Here’s how to do that:
1. Across your portal
2. For a single branch
A. How to set a default group across your portal
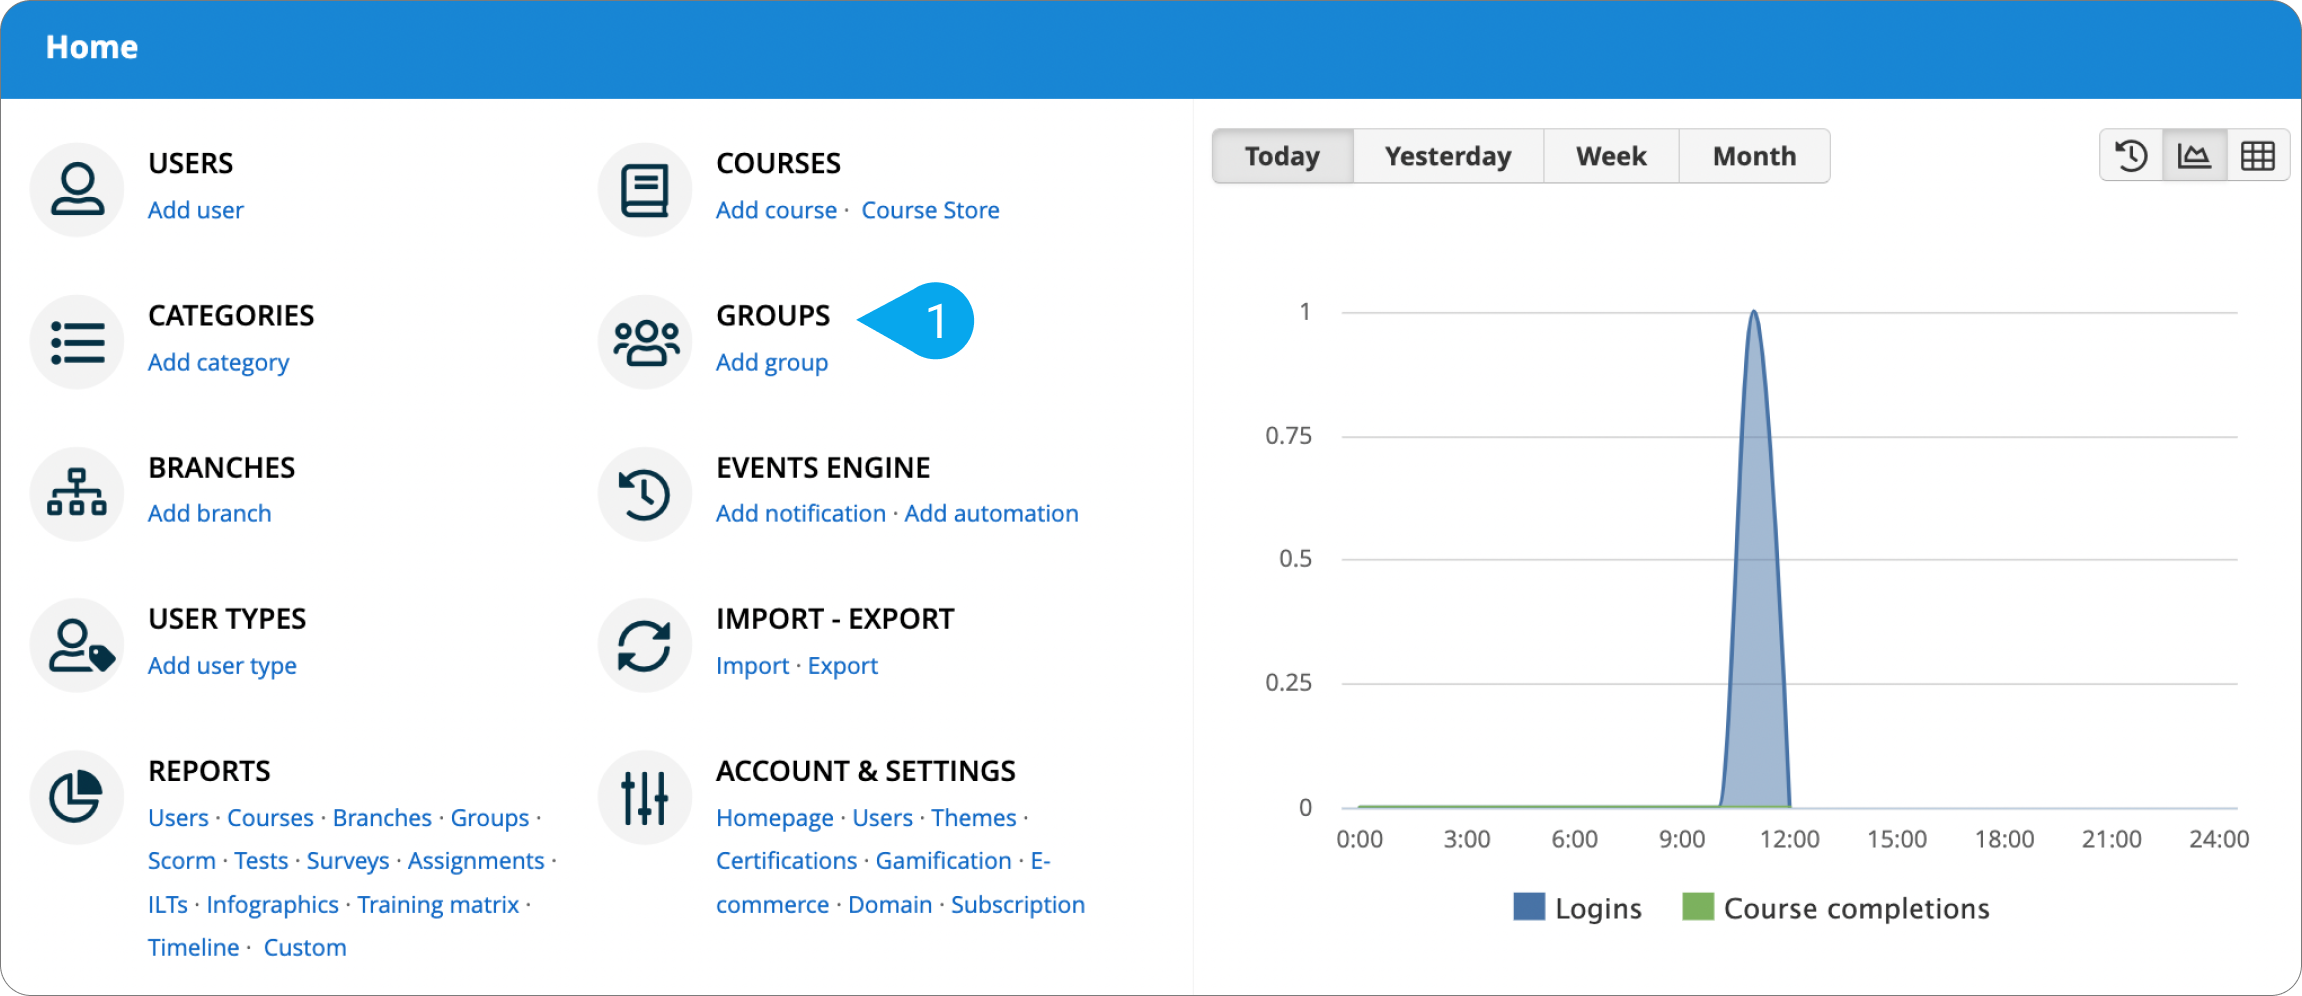
1. Sign in to your pcl.LMS account as Administrator and go to Home > Groups.
2. Click Add group (1).
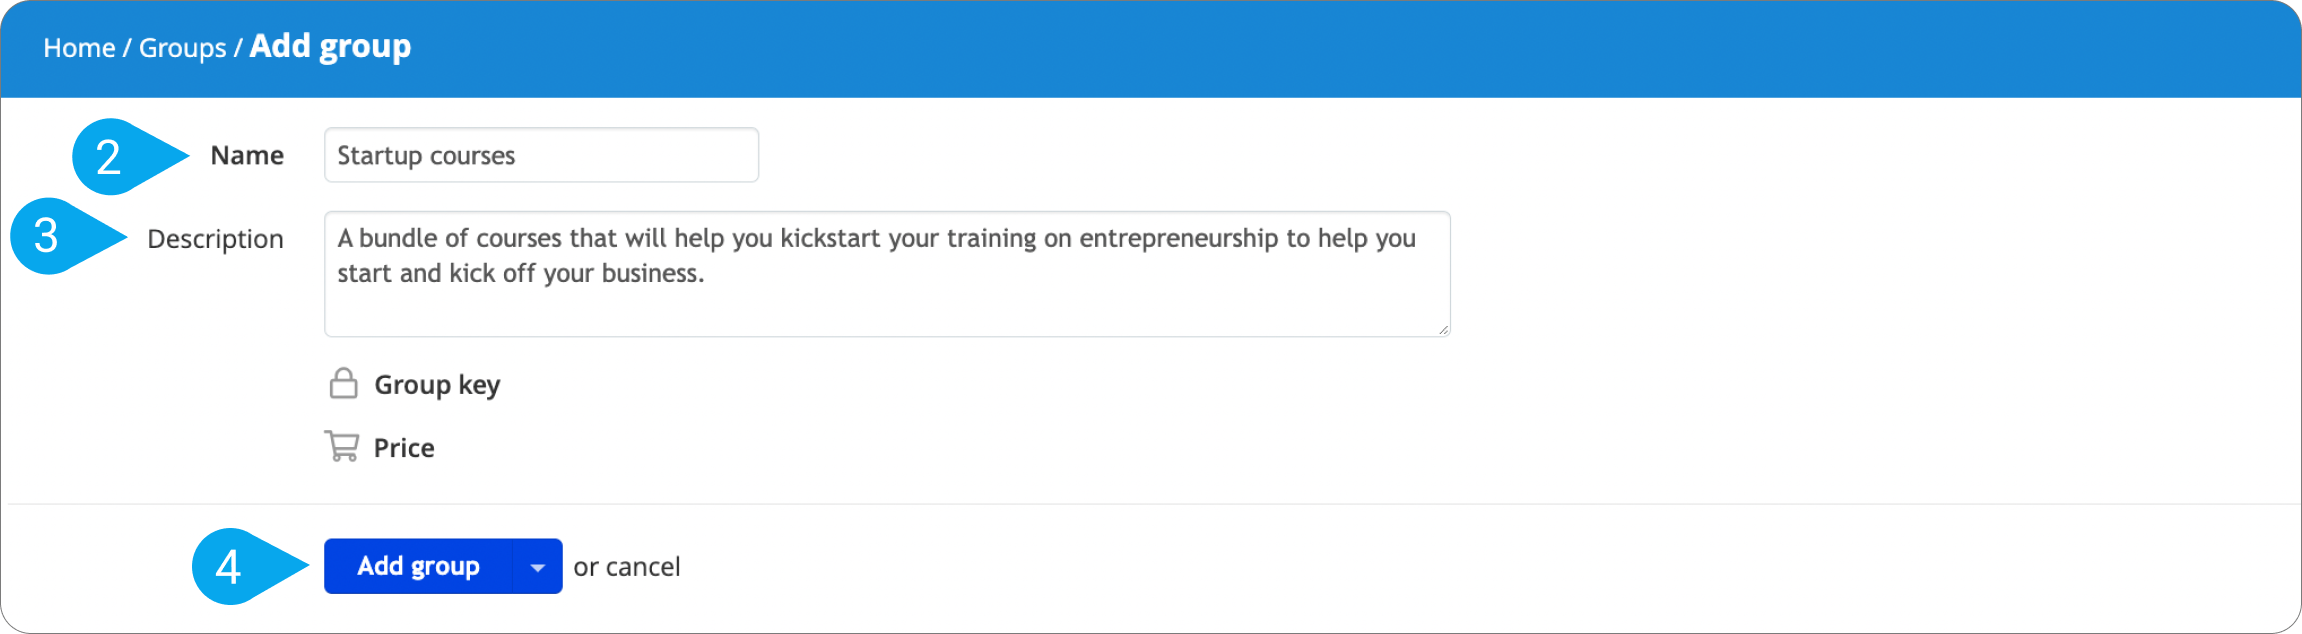
3. Type a Name (e.g., Startup courses) (2) and a Description for your group (3) in the respective fields.
4 Click Add group to save your changes (4).
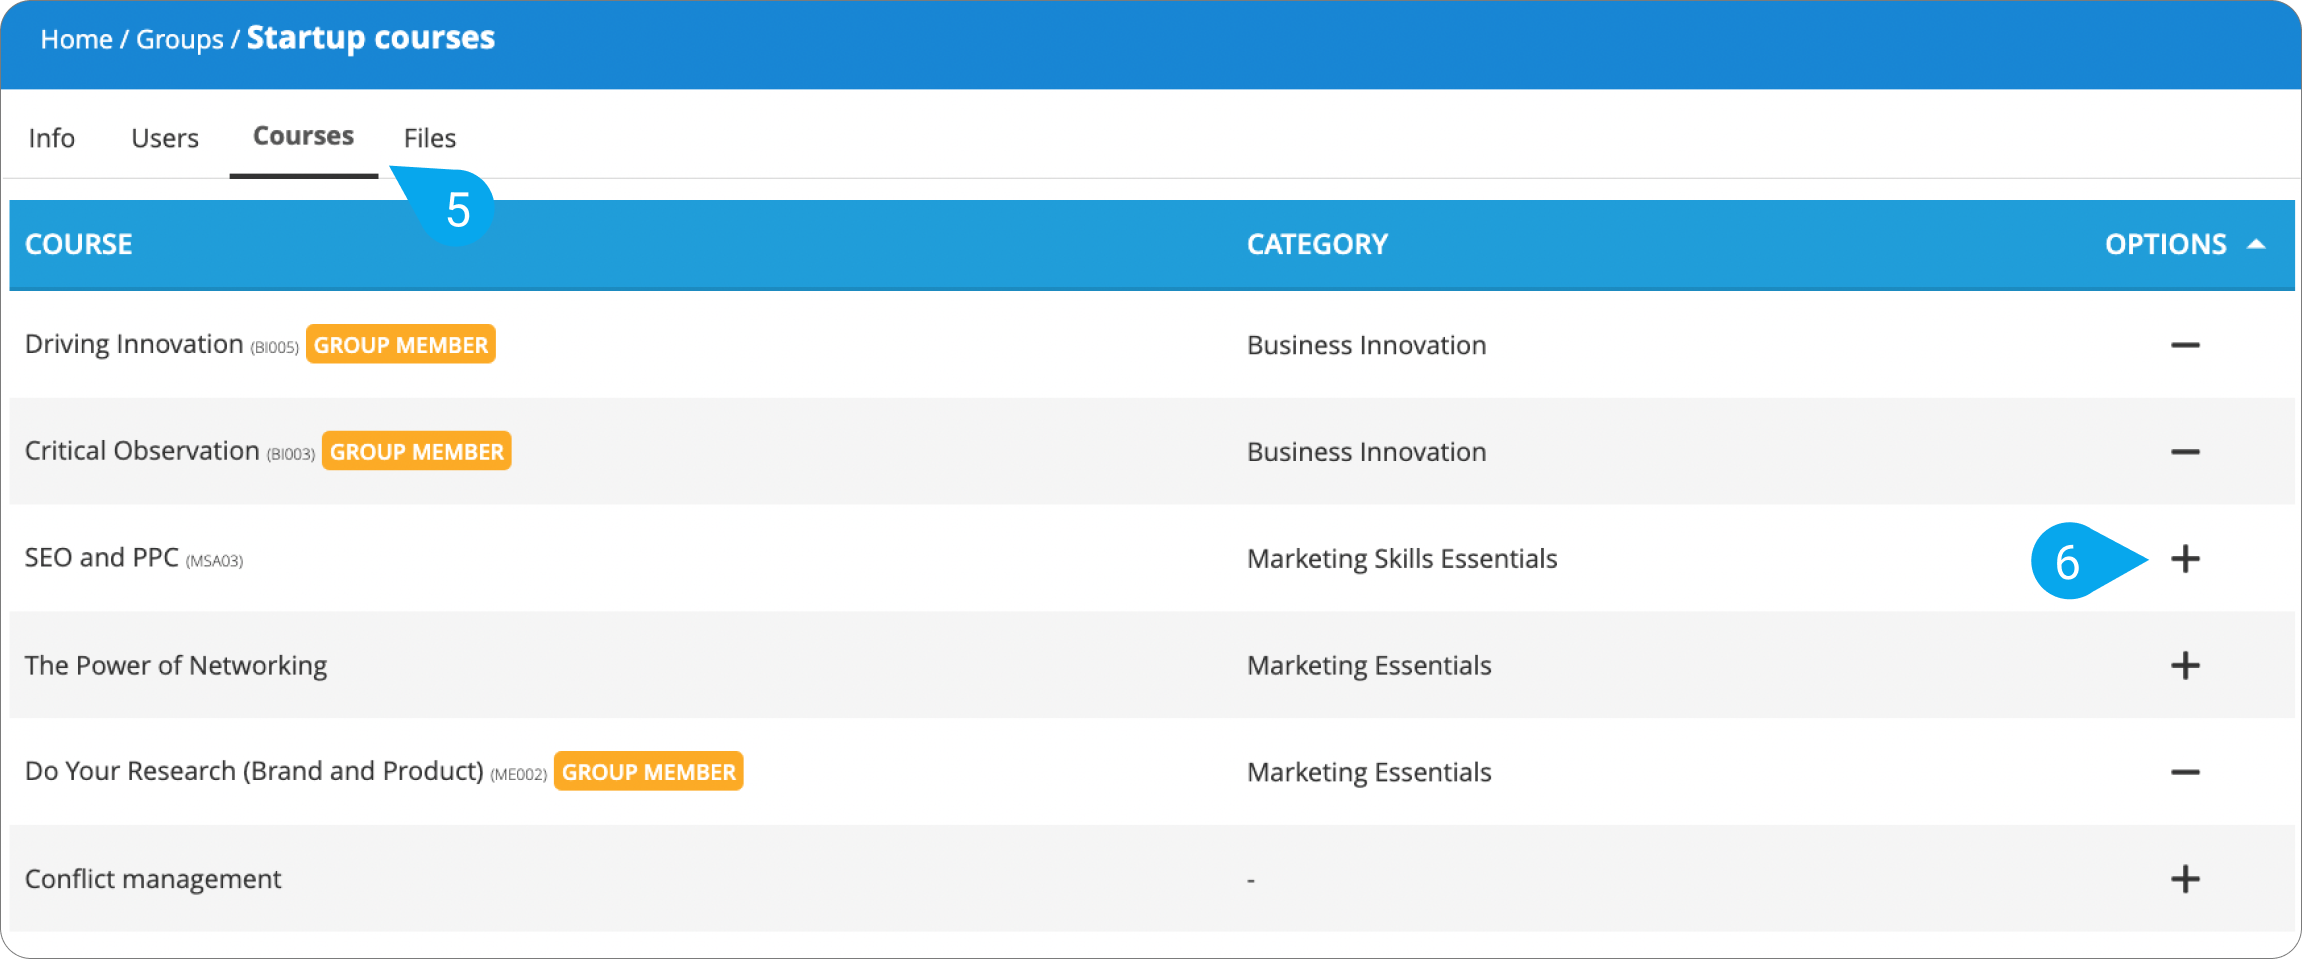
5. Go to the Courses tab (5).
6. Add courses to your group by clicking the respective plus symbol for each course (6).
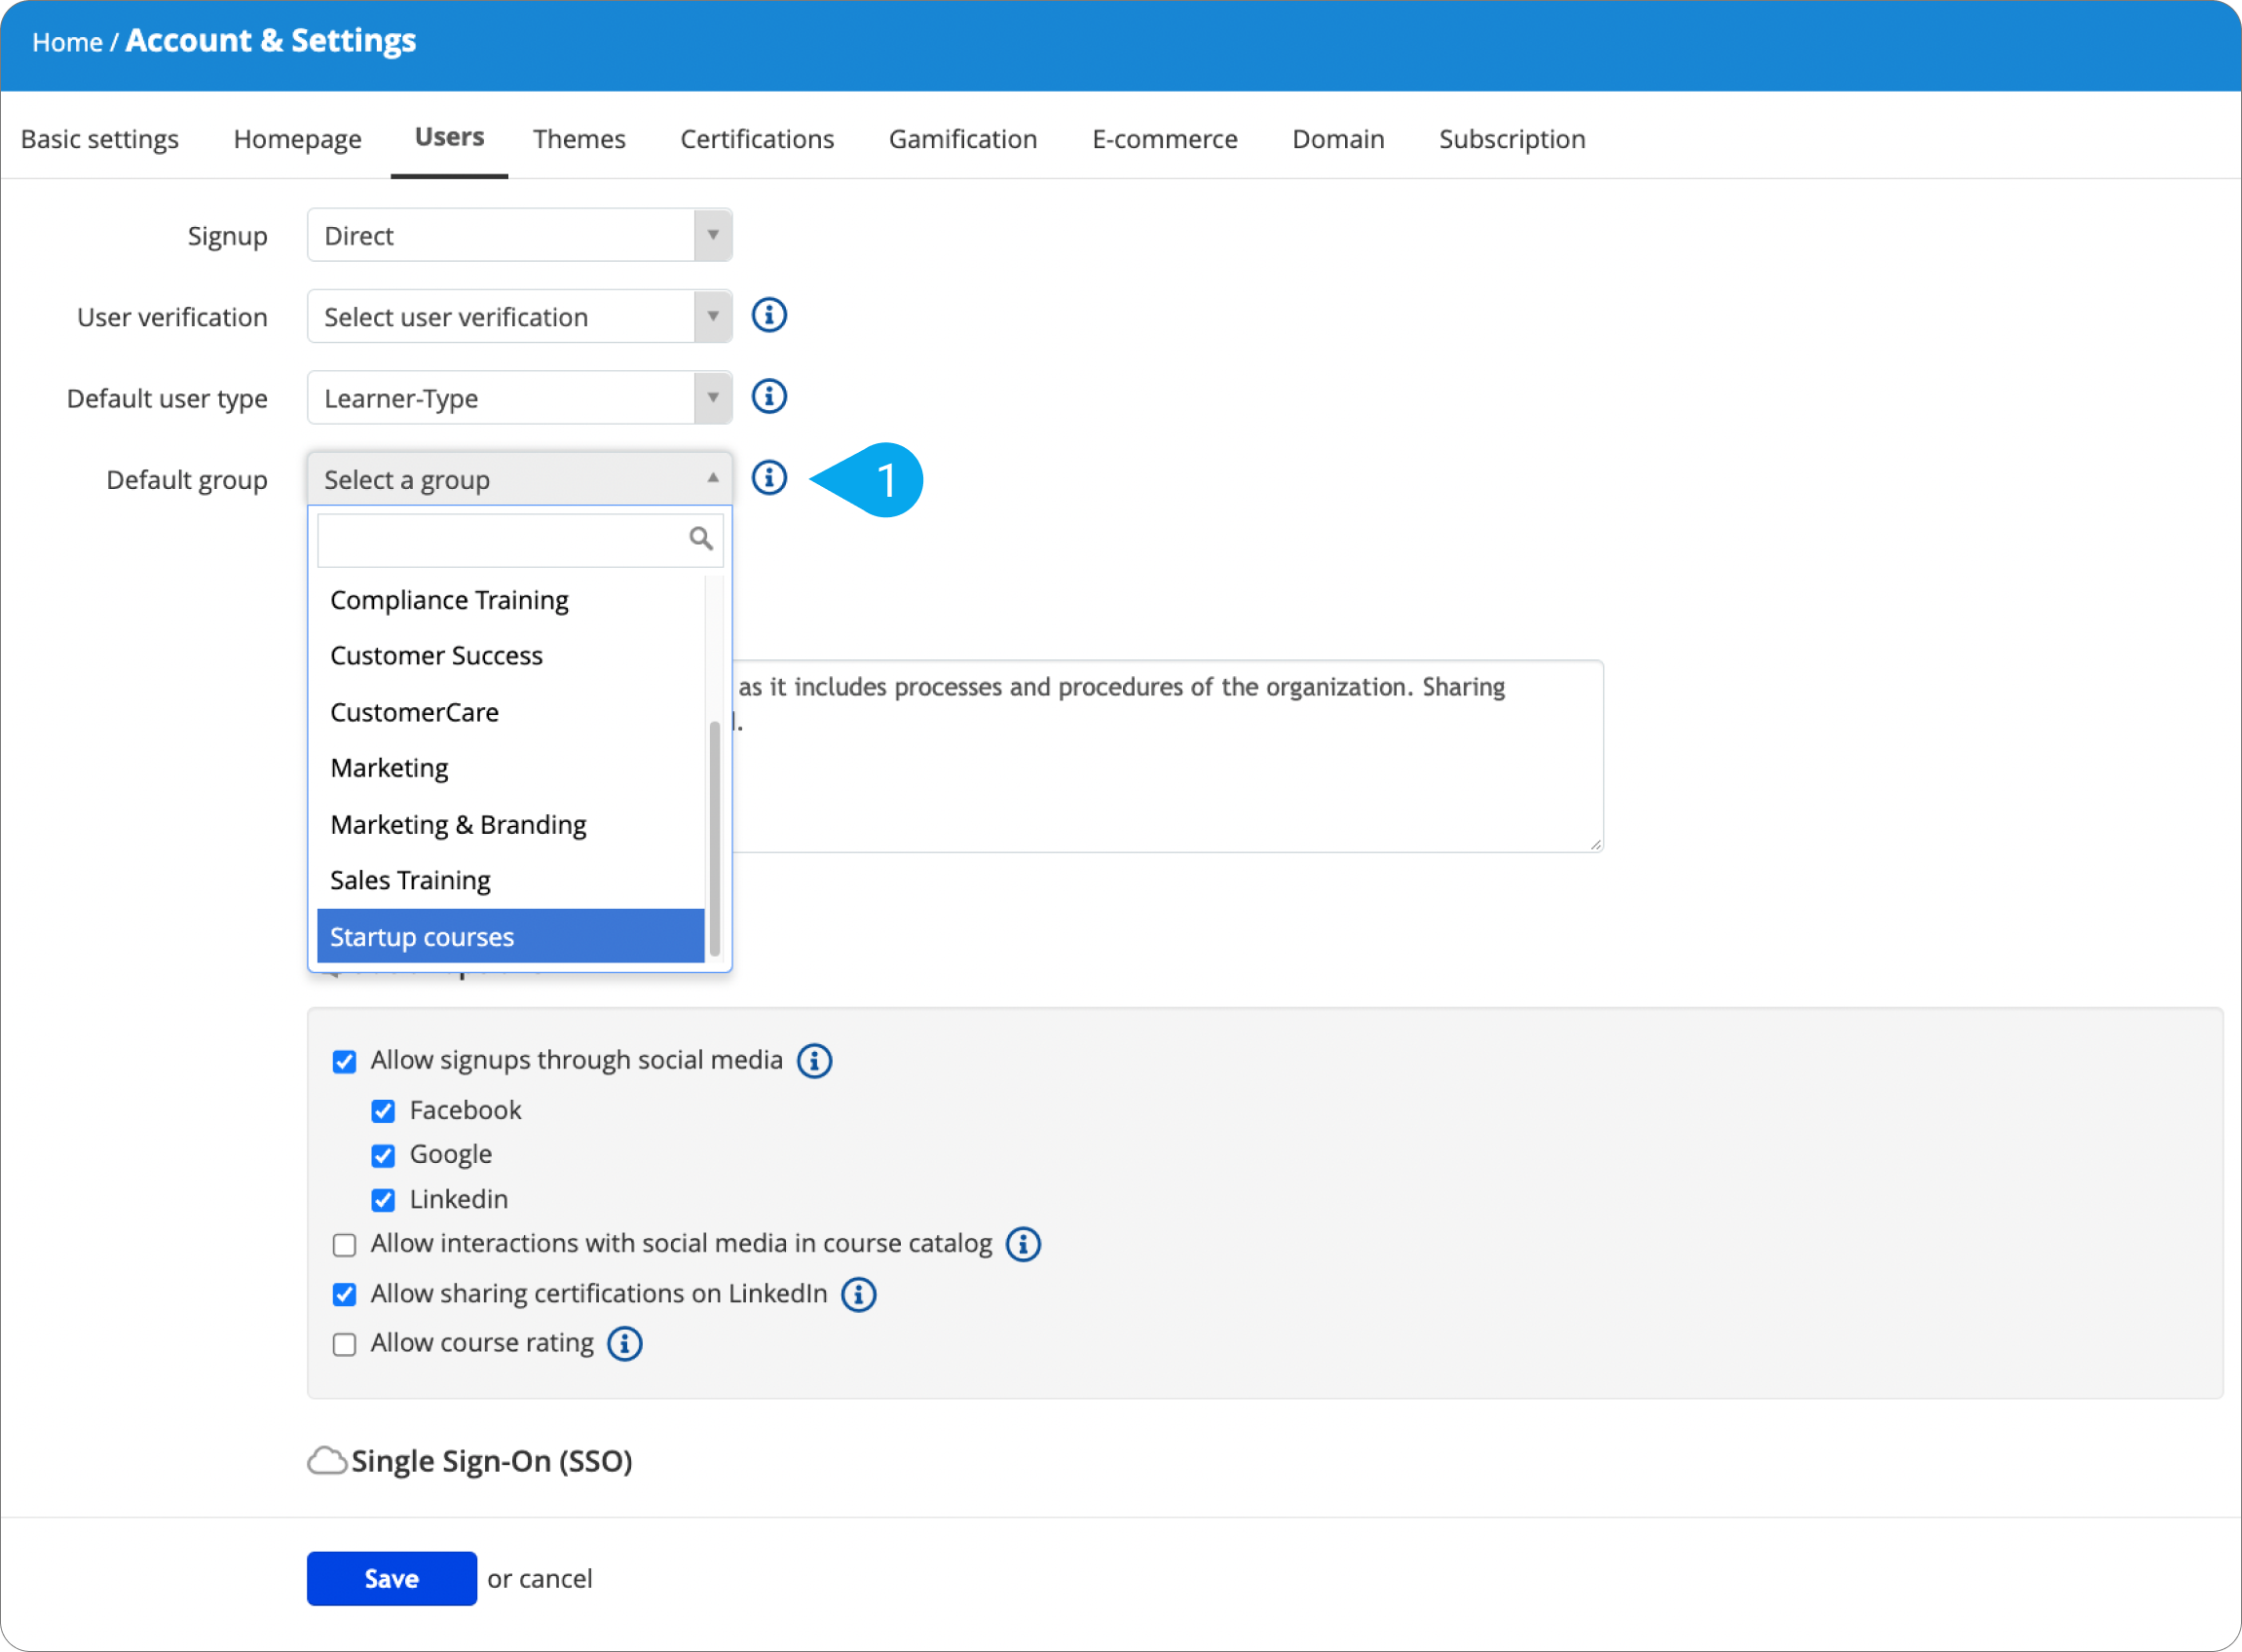
7. Go to Home > Account & Settings > Users.
8. From the Default group (1) drop-down list, choose which group you want your new users to be assigned to upon registration (i.e., Startup courses).
9. Click Save to update your settings.
B. How to set a branch-specific default group
Branches can have their own set of courses. When some of these courses are required for new branch members, they can also be grouped together and assigned to users upon registration.
Here’s how:
1. Sign in to your pcl.LMS account as Administrator and go to Home > Groups.
2. Click Add group (1).
3. Type a Name (e.g., Learning team) (2) and a Description for your group (3) in the respective fields.
4. Click Add group to save your changes (4).
5. Go to the Courses(5) tab and add your preferred courses to the new group by clicking the respective plus symbol (6).
| Note: Make sure that the courses you assign to your new group (i.e., Learning team) belong to the branch for which you want to set it as default (e.g., Sales). |
6. Go to Home > Branches and click the branch you want to update (i.e., Sales).
7. In the Users section, choose a Default group for your branch (1).
8. Click Update branch to save your changes (2).