Here’s how to import multiple users in a few steps:
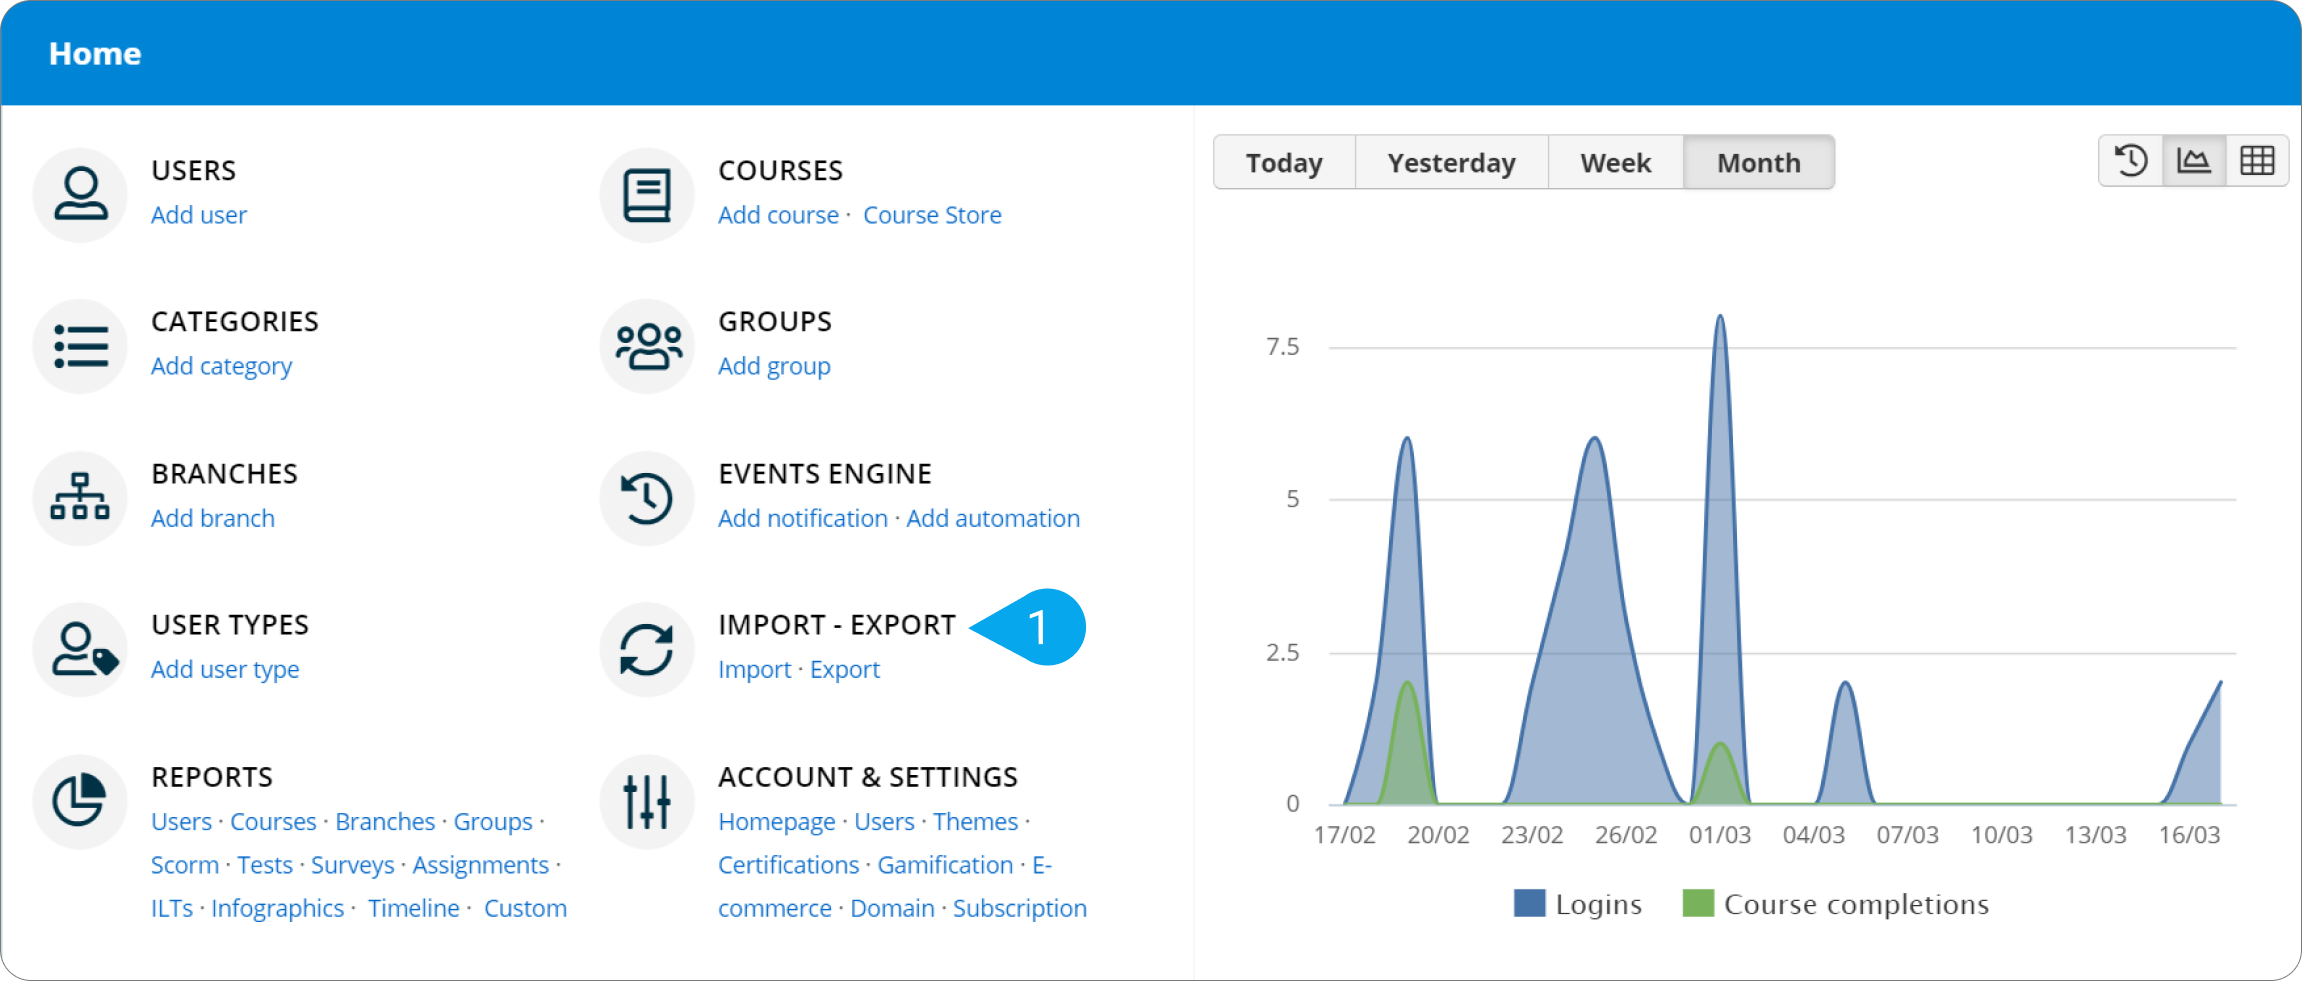
1. Sign in to your pcl.LMS account as Administrator. Go to Home > Import - Export (1).
| Note: When, along with your grouped users, you add a user that’s already registered in your system, no duplicate account is created. The system simply updates the existing user’s account information. |
2. To add new users, choose one of the three available methods:
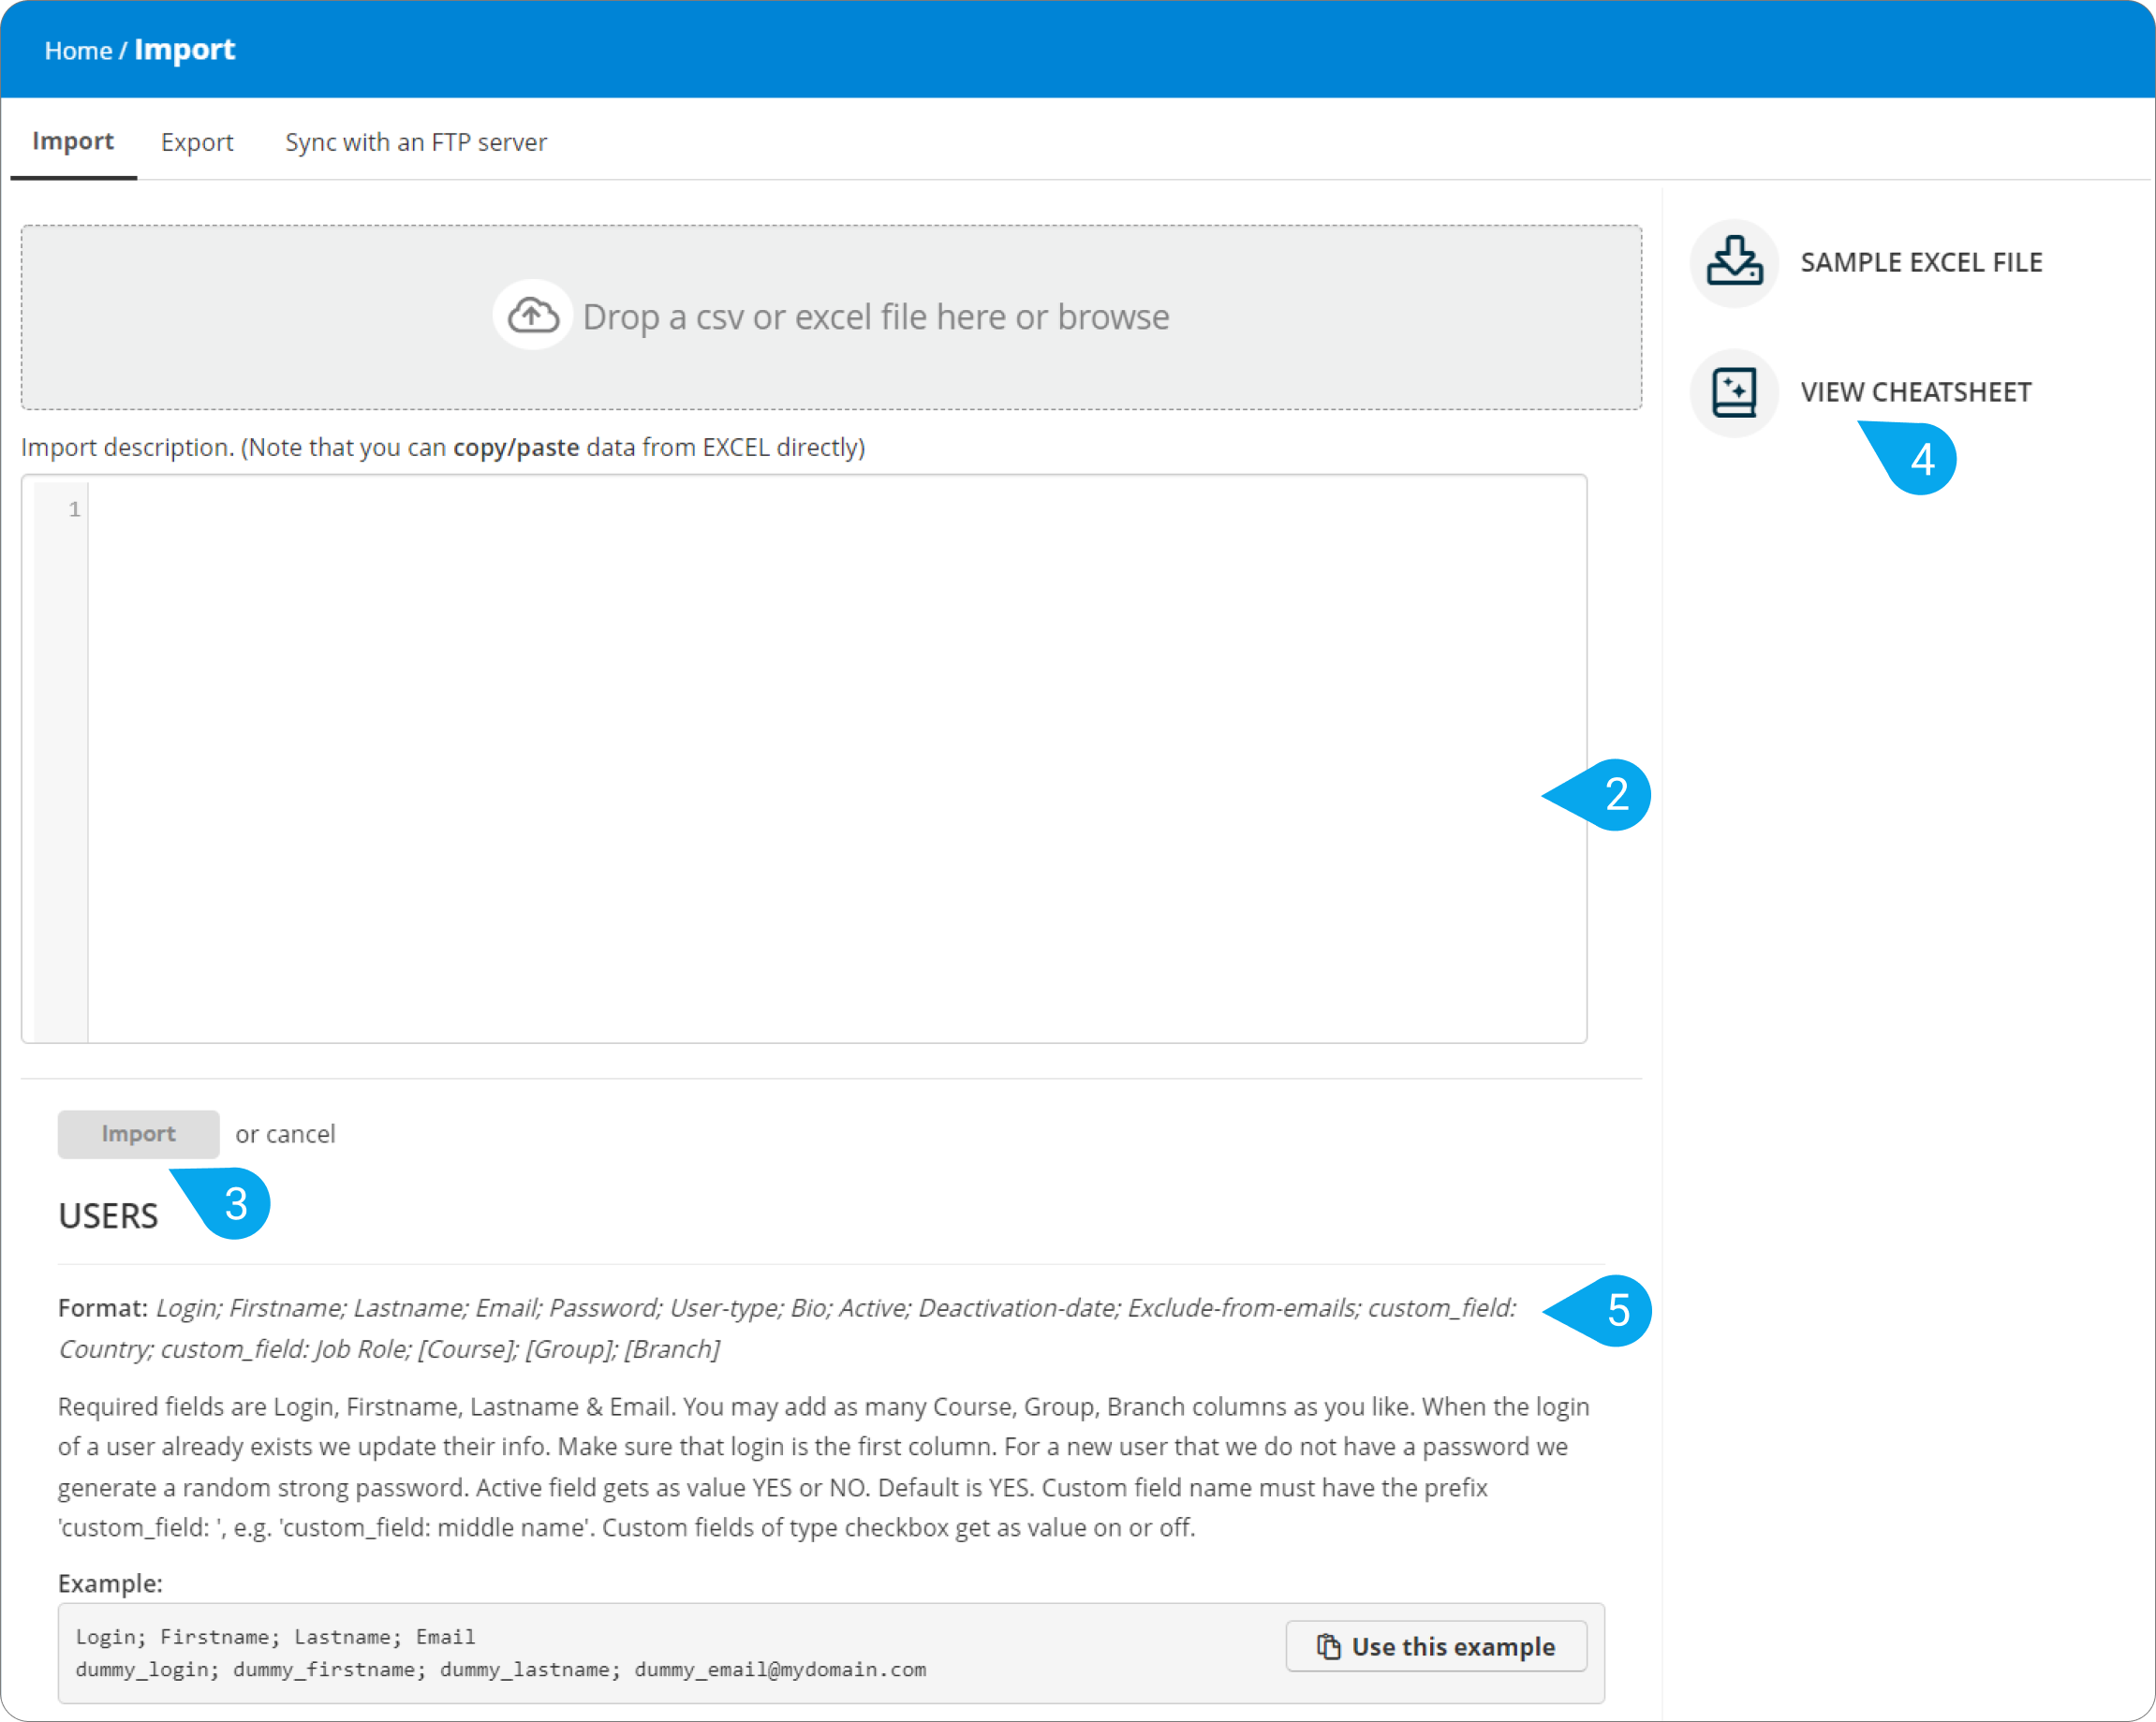
- In the Import description text area (2), type the required attributes on the first line (i.e., Login, Firstname, Lastname, and Email). Then, type whichever you need from the optional attributes (i.e., Password, User-type, Bio, etc.). Press Enter to change line and type the corresponding values for the first user you want to add (e.g., username;first name;last name;email address;password;user type;bio,etc.). Press Enter to change line and do the same for the next user. To view the provided guidelines and the available optional attributes, click View cheatsheet (4).
| Notes: Login should always be your first column. When you don’t type a password for a new user, the system generates a random, strong password automatically. The value of the Active attribute is either YES (default) or NO. Custom field values always have the prefix “custom_field:” (e.g., custom_field: middle name). Custom fields with a checkbox are set as either ON or OFF. |
| Note: When you import a user, you can add multiple courses, branches or groups. This is indicated in the cheat sheet with [Course]; [Branch]; [Group]. When you want to add multiple courses, you should add the Course header into the import line as many times as the number of courses you plan to add. For example, if you wanted to add 2 courses, you would add Course; Course; into the import headers, and then the respective course names in the import line for the user. The example below can be used for reference. Login; Firstname; Lastname; Email; User-type; Bio; Active; Deactivation-date; Exclude-from-emails; custom_field: DOB; Course; Course; Course; john.d; John; Doe; john.d@example.com; Learner-type; John is an example user; YES; 23/12/2022; NO; 17/11/1983; Course A (A1); Course B (B1); Course C (C1); |
- If you have your user data in an Excel document, then copy and paste them in the Import description text area.
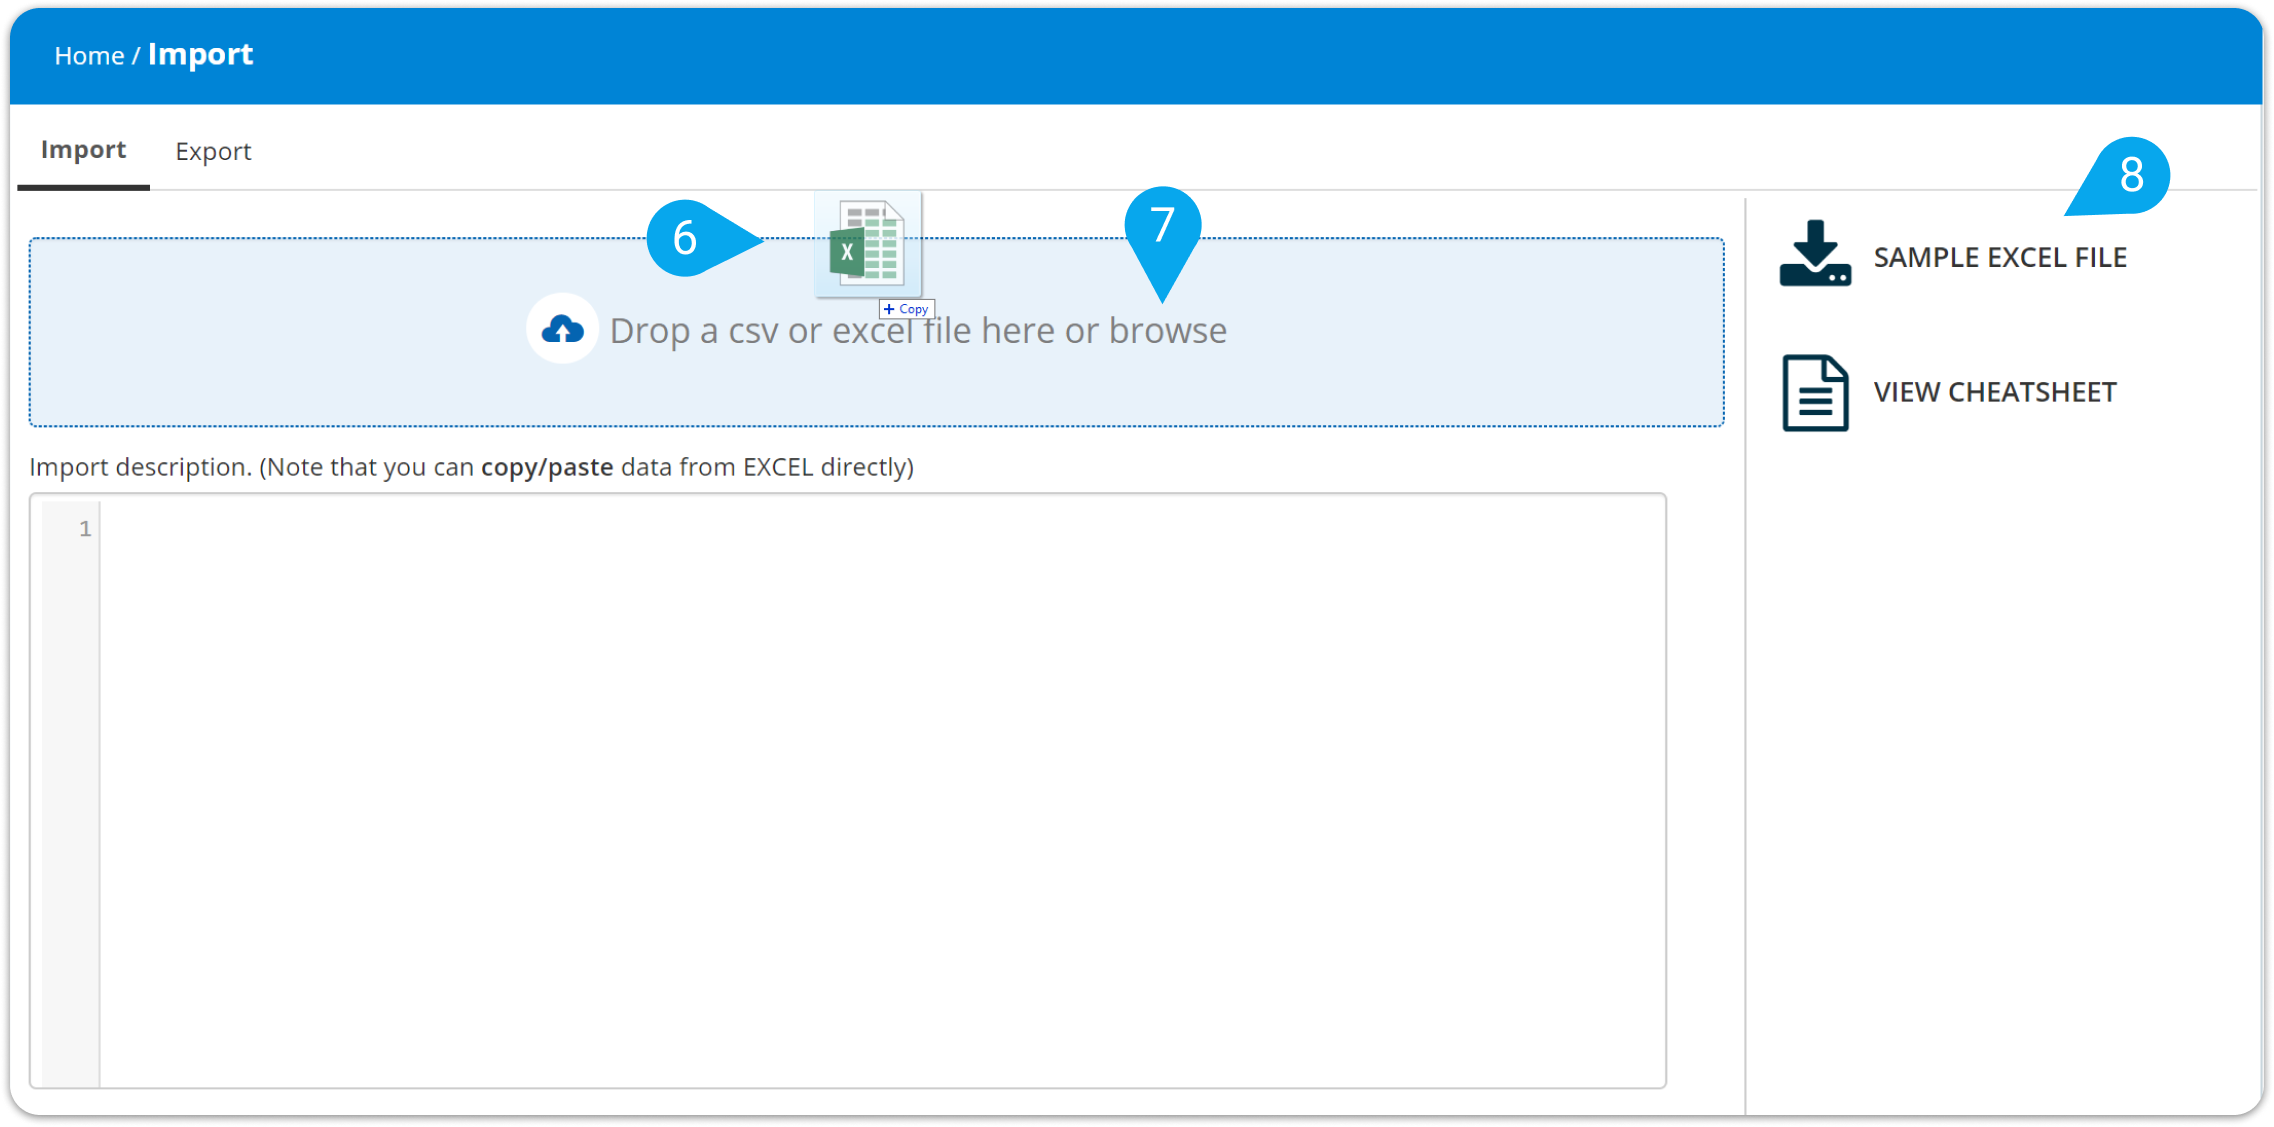
- Alternatively, upload an Excel or CSV file containing your user data in the Drop a csv or excel file here or browse area (either drag and drop it (6) or click to upload from your local disk (7)).
| Note: The column names in your Excel document should match the included attributes (i.e., Login, Firstname, Lastname, Email, etc.). To do it correctly, first, take a look at our sample Excel document (click Sample excel file (8) to download). |
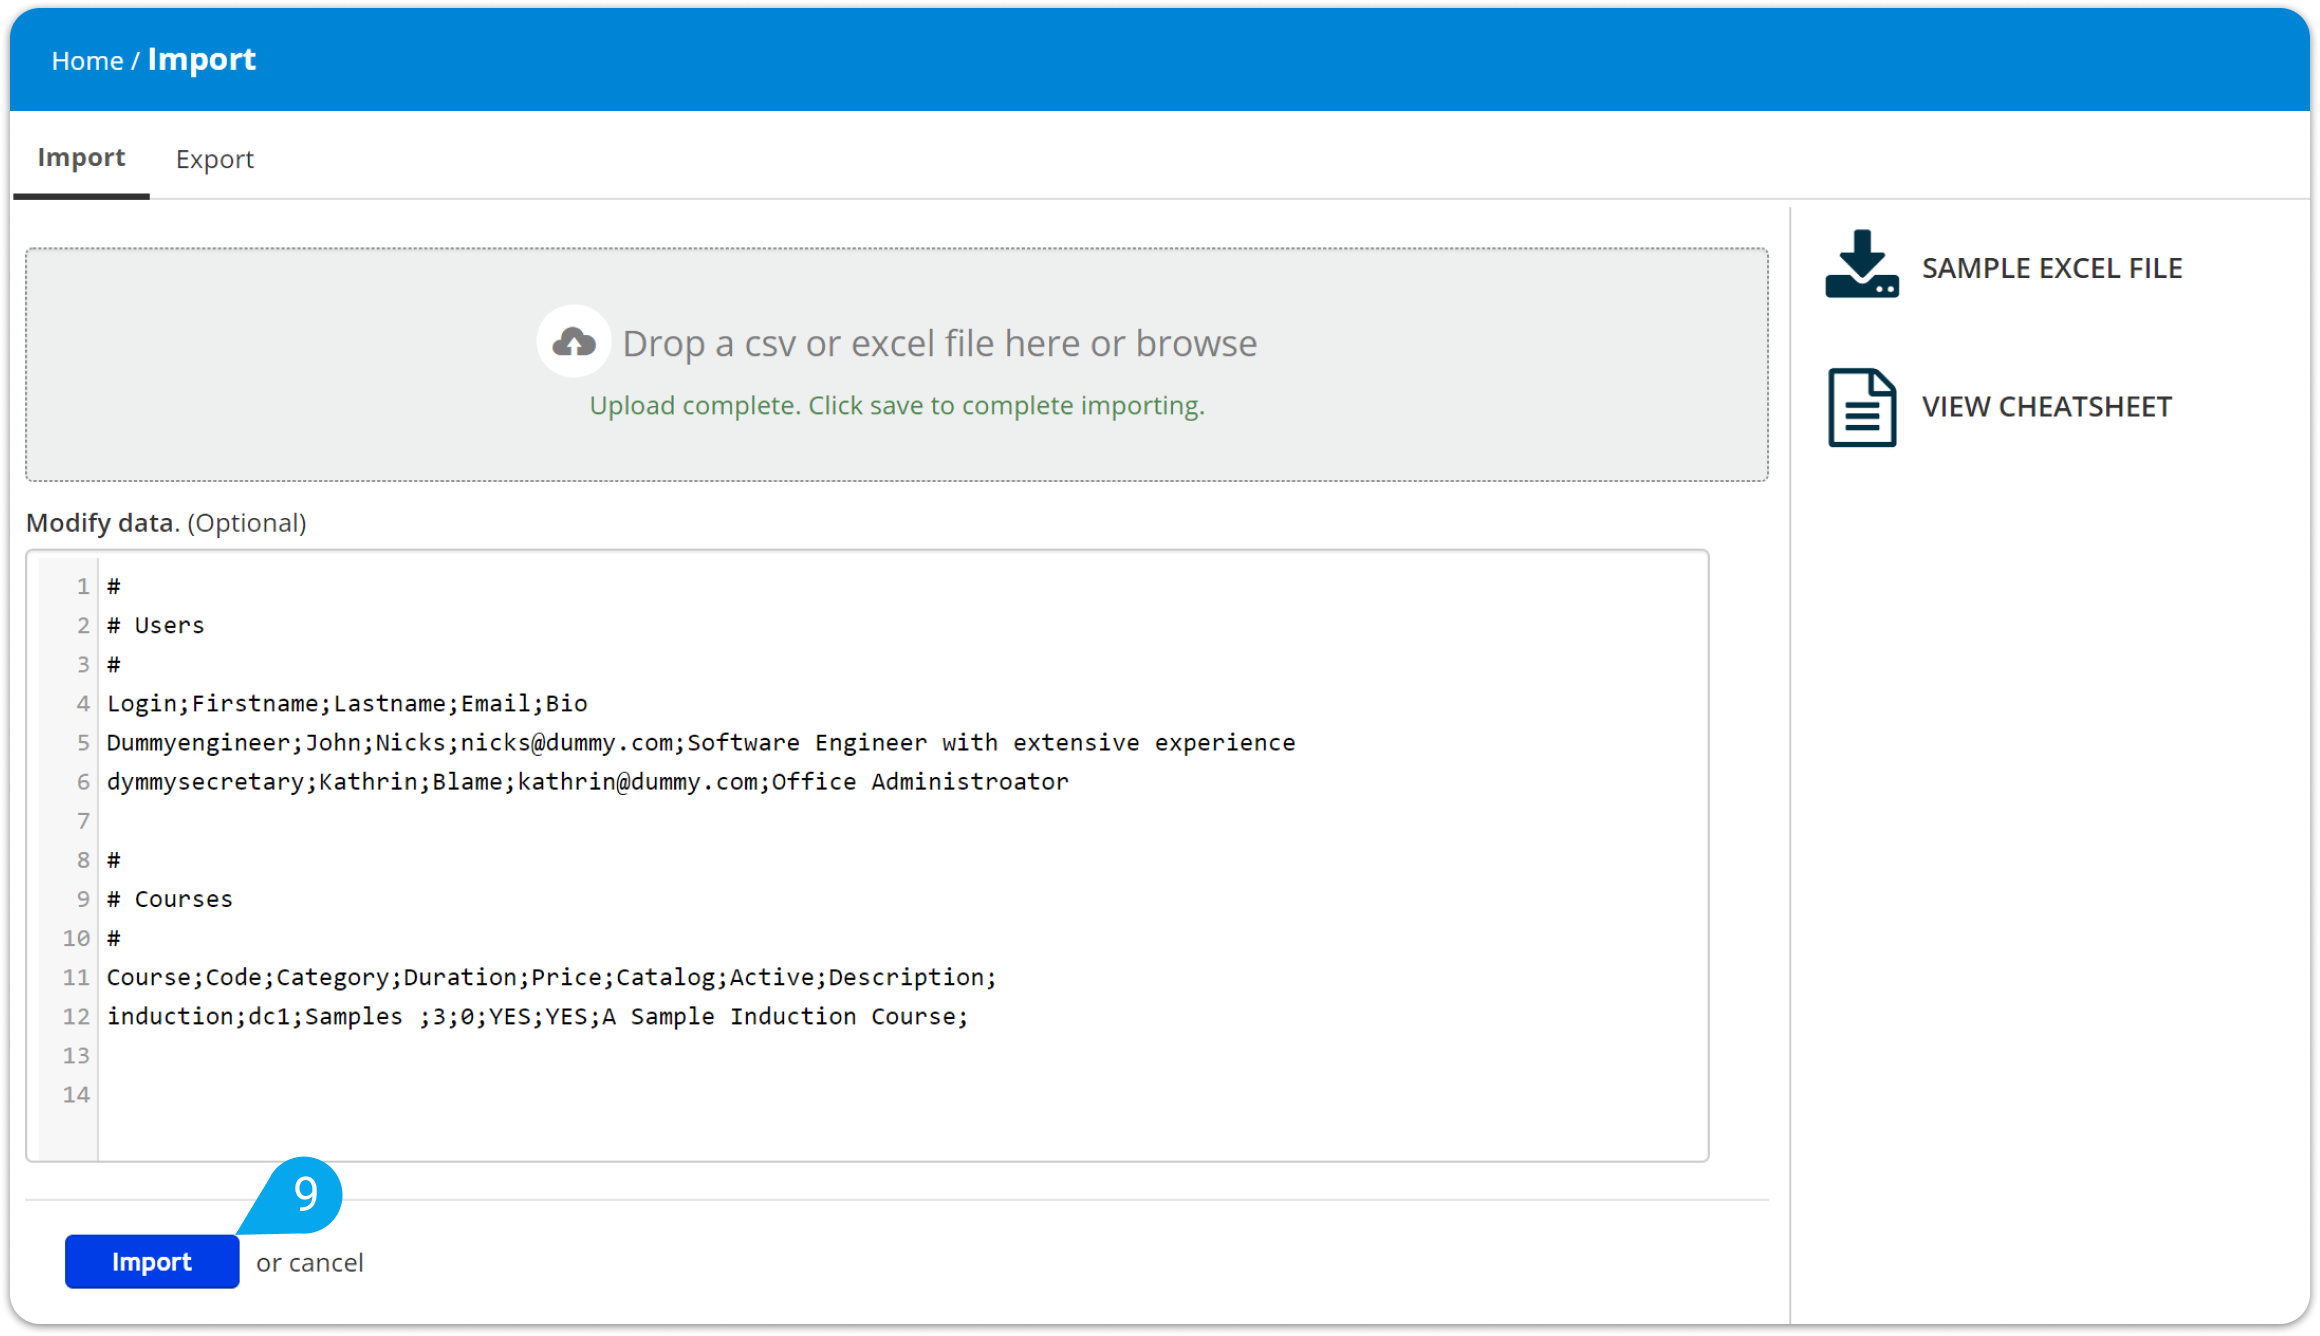
 3. Click Import (9) to complete the process.