Some of the options are:
- Deactivating users one by one.
- Deactivating many users via mass actions.
- Scheduling the deactivation of a single user on a specific date.
- Scheduling the deactivation of multiple on a specific date.
- Mass deactivating users via Custom Reports (available in Plus and Premium plans).
- Deactivating many users via Automations (available in Premium plans).
Deactivating a single user:
- Sign in to your pcl.LMS account as Administrator and go to Home > Users.
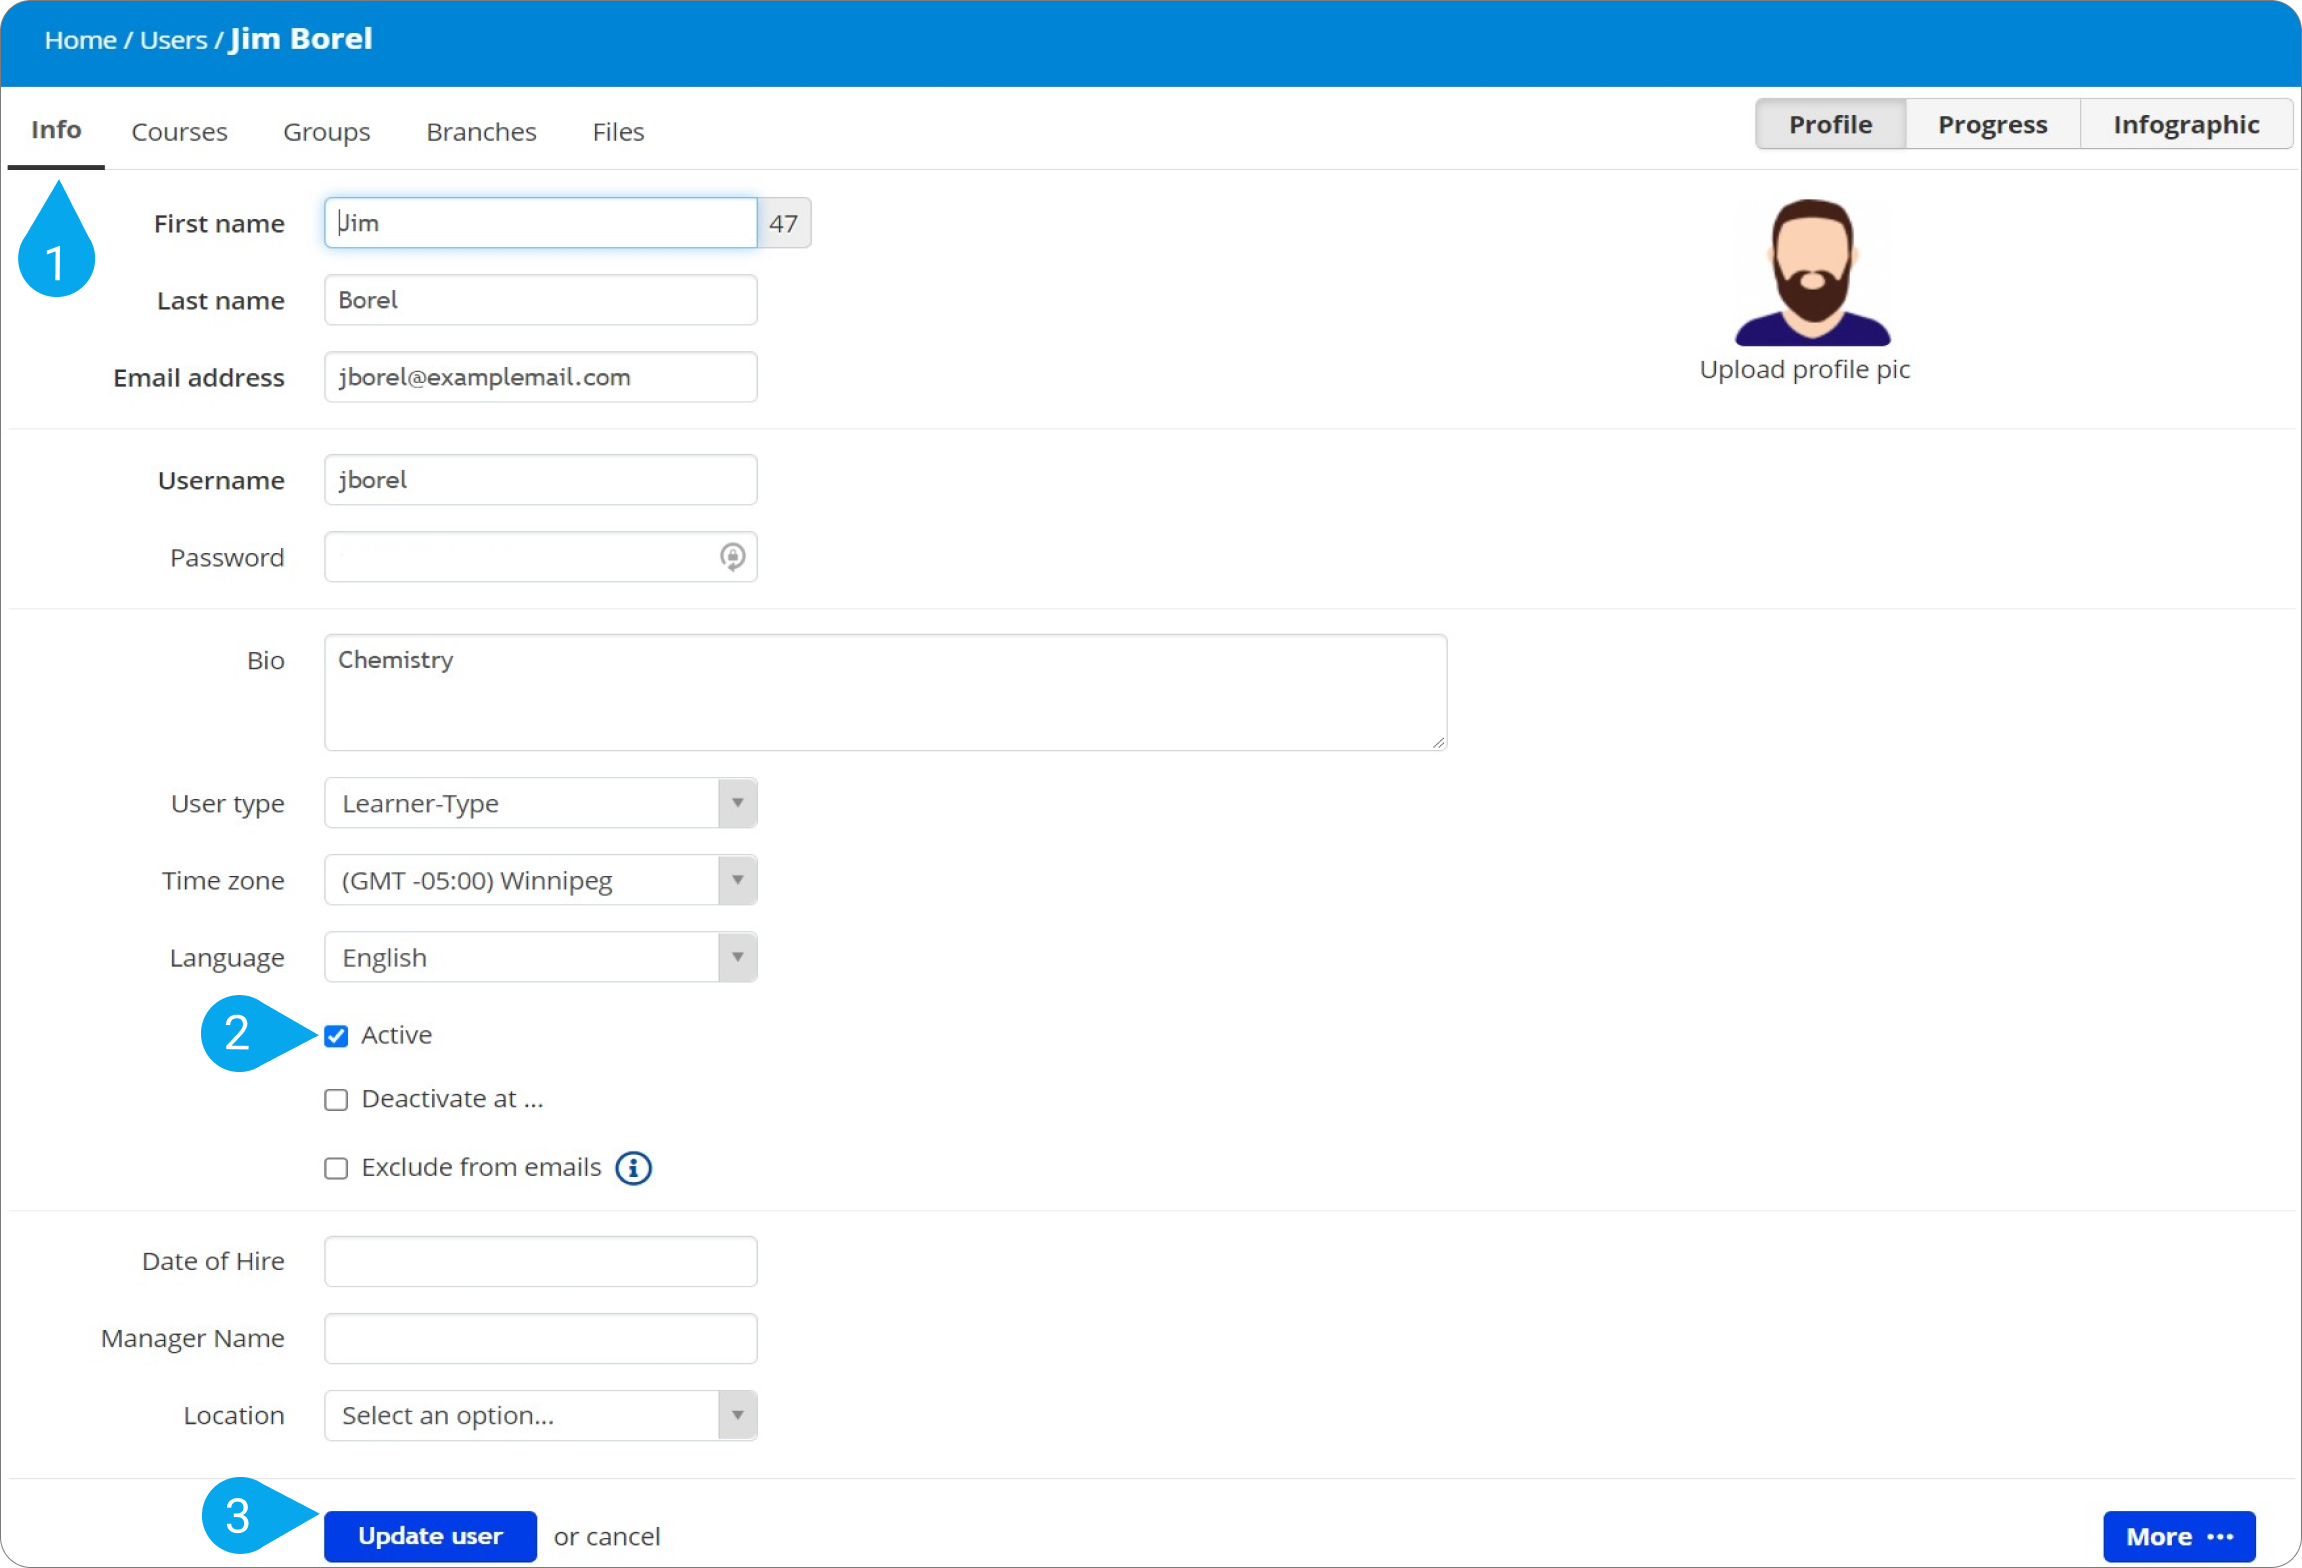
- Go to the page of the active user you want to deactivate and select the Info(1) tab.
- Uncheck the box marked Active (2).
- Click on Update user(3) to save your settings.
Here’s how to deactivate many users via mass actions:
- Sign in to your pcl.LMS account as Administrator and go to Home > Users.
- Point to a user and click the checkbox next to their name (1). Repeat for each user until you have selected all the users you want to update.
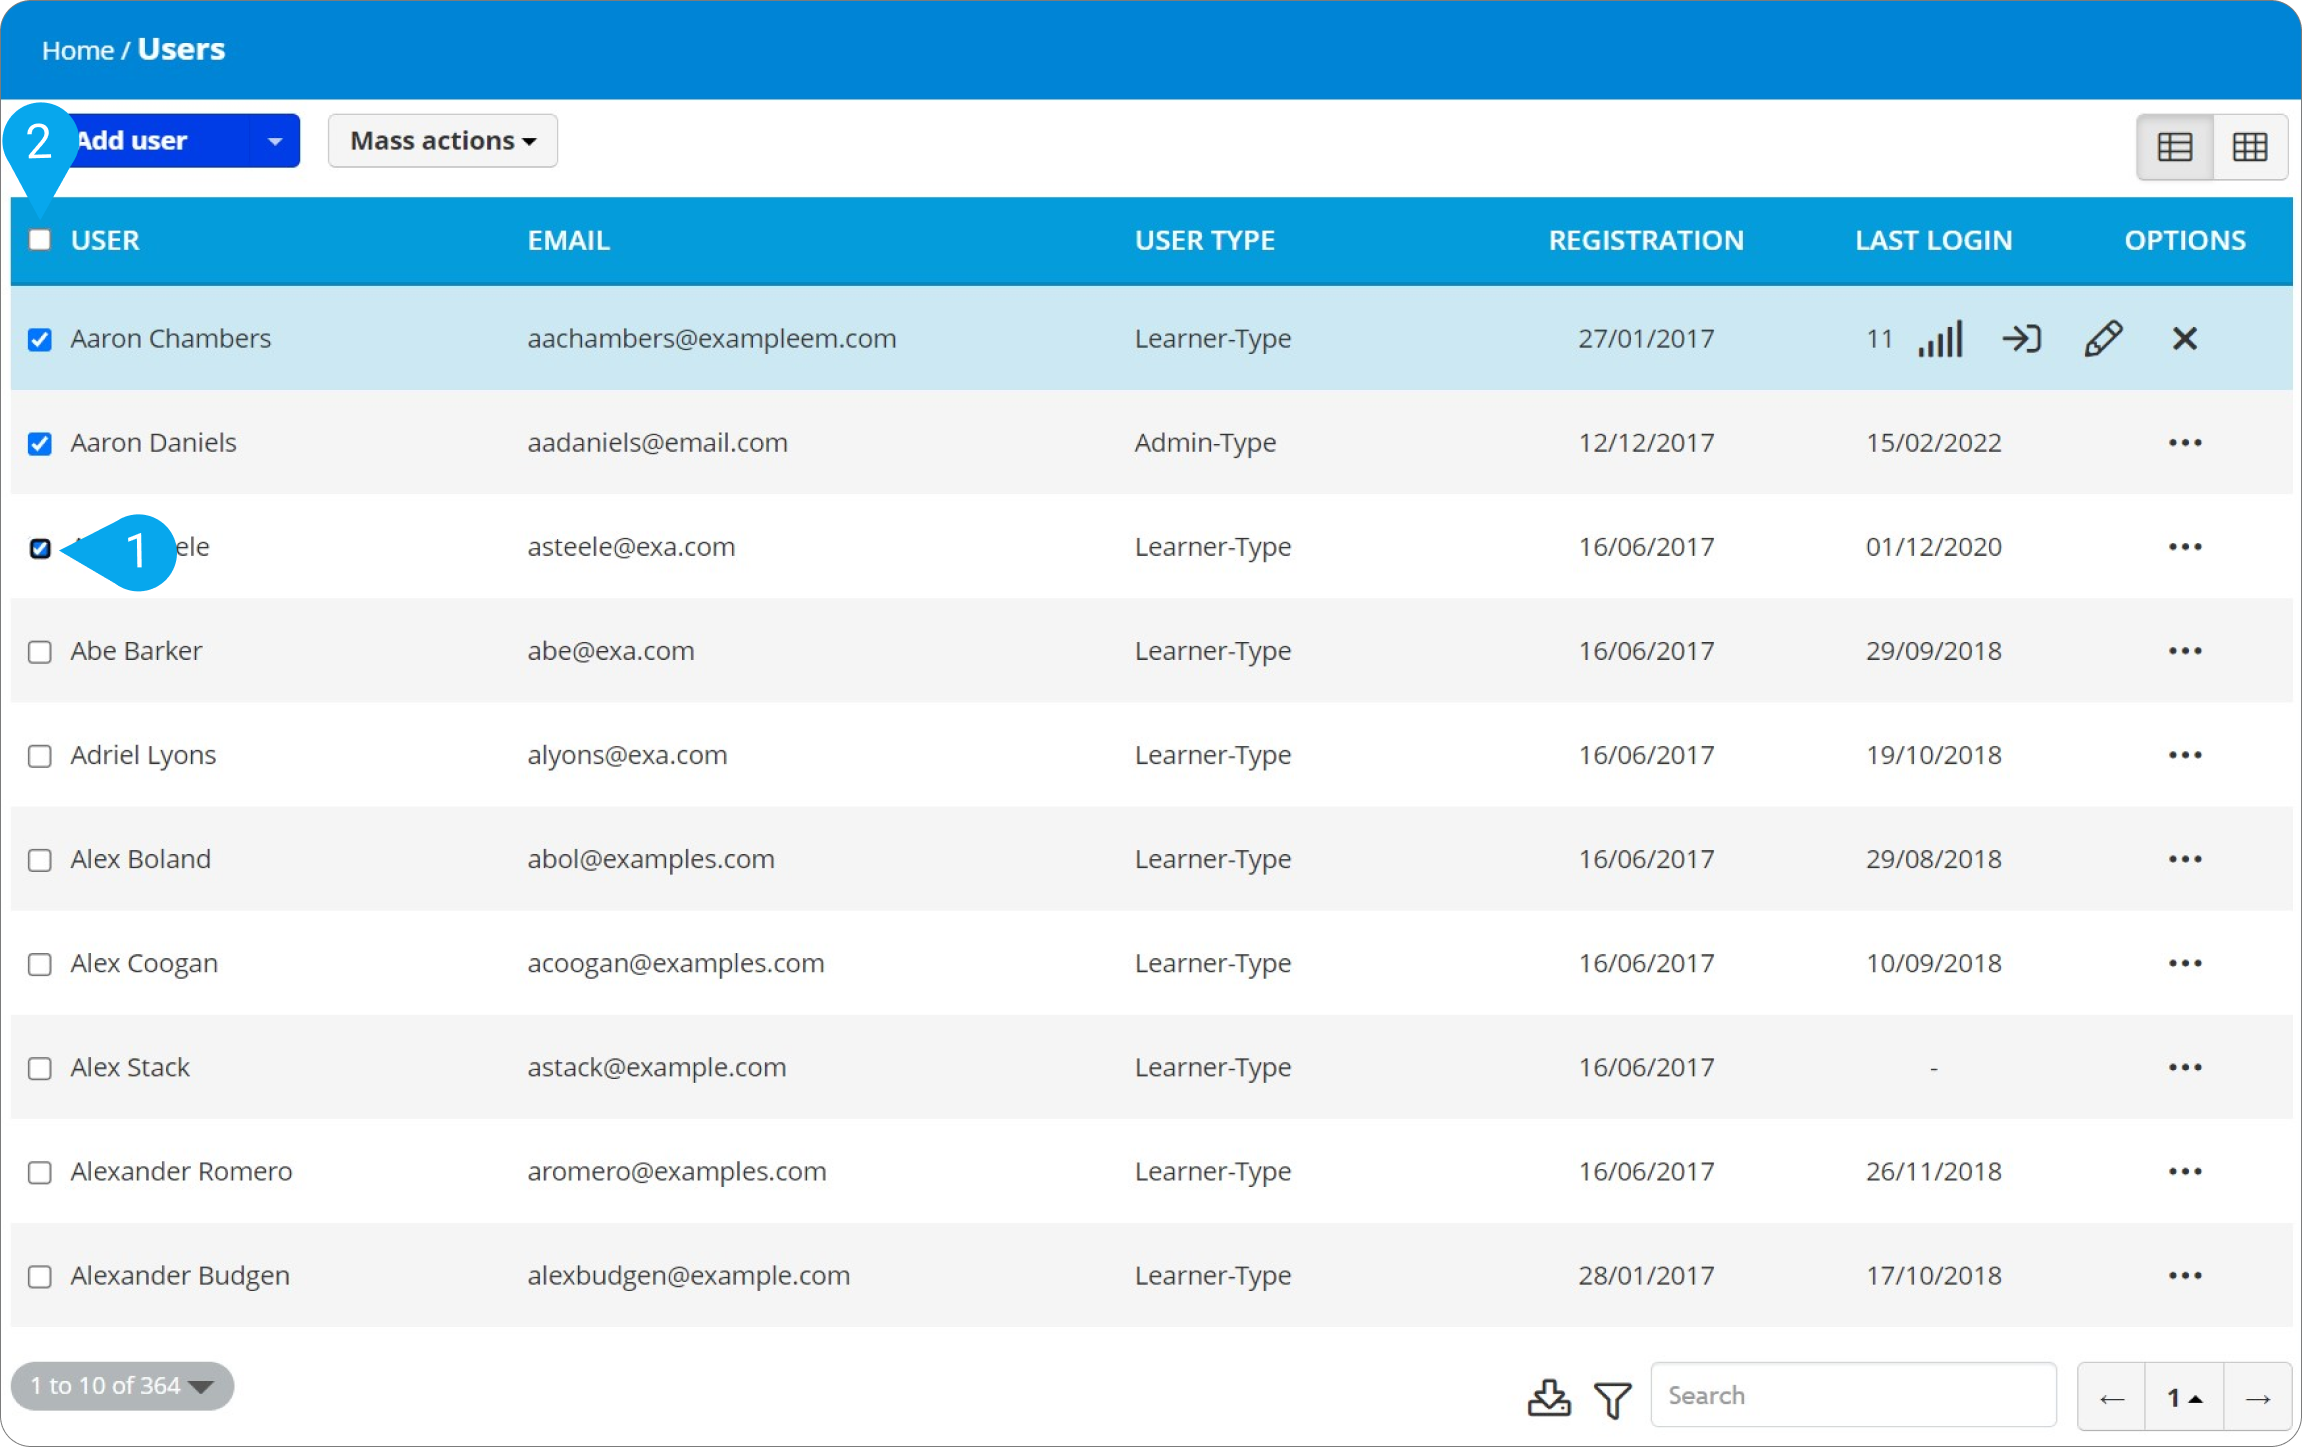
Note: To select all users at once, point to the columns bar and click the checkbox next to the User (2) column. Currently, the limit of users that can be selected to perform mass actions to, using the checkboxes, is 80. |
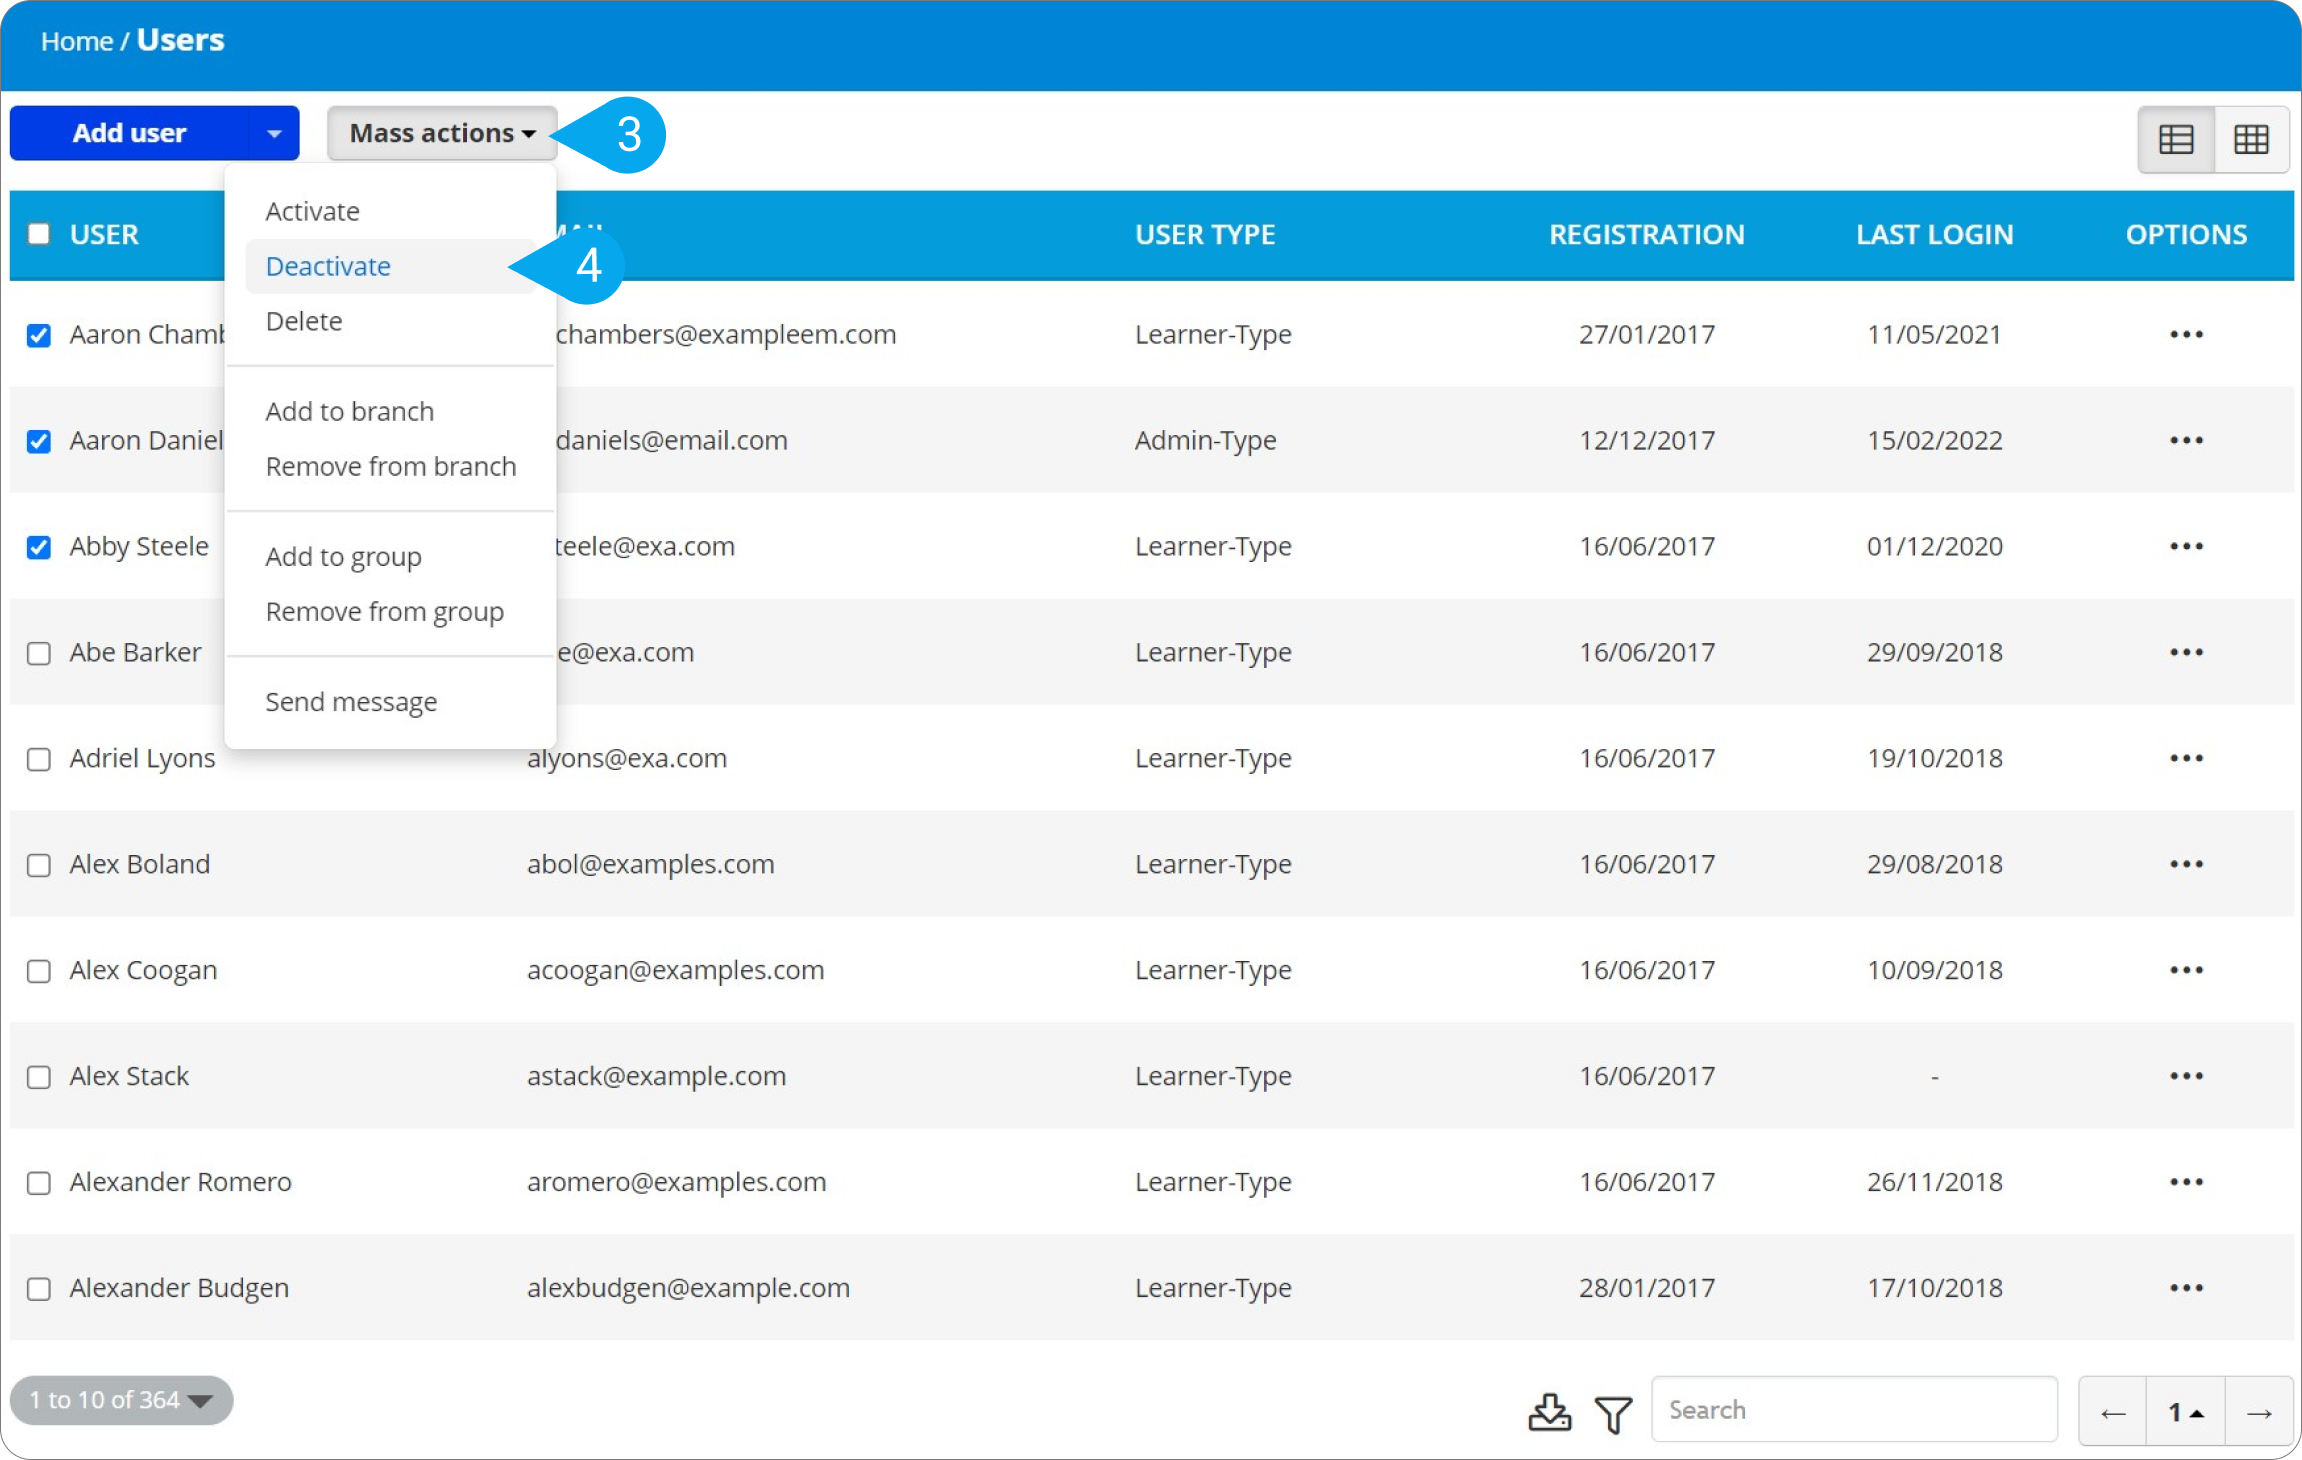
3. Click on Mass Actions (3) and select Deactivate (4).
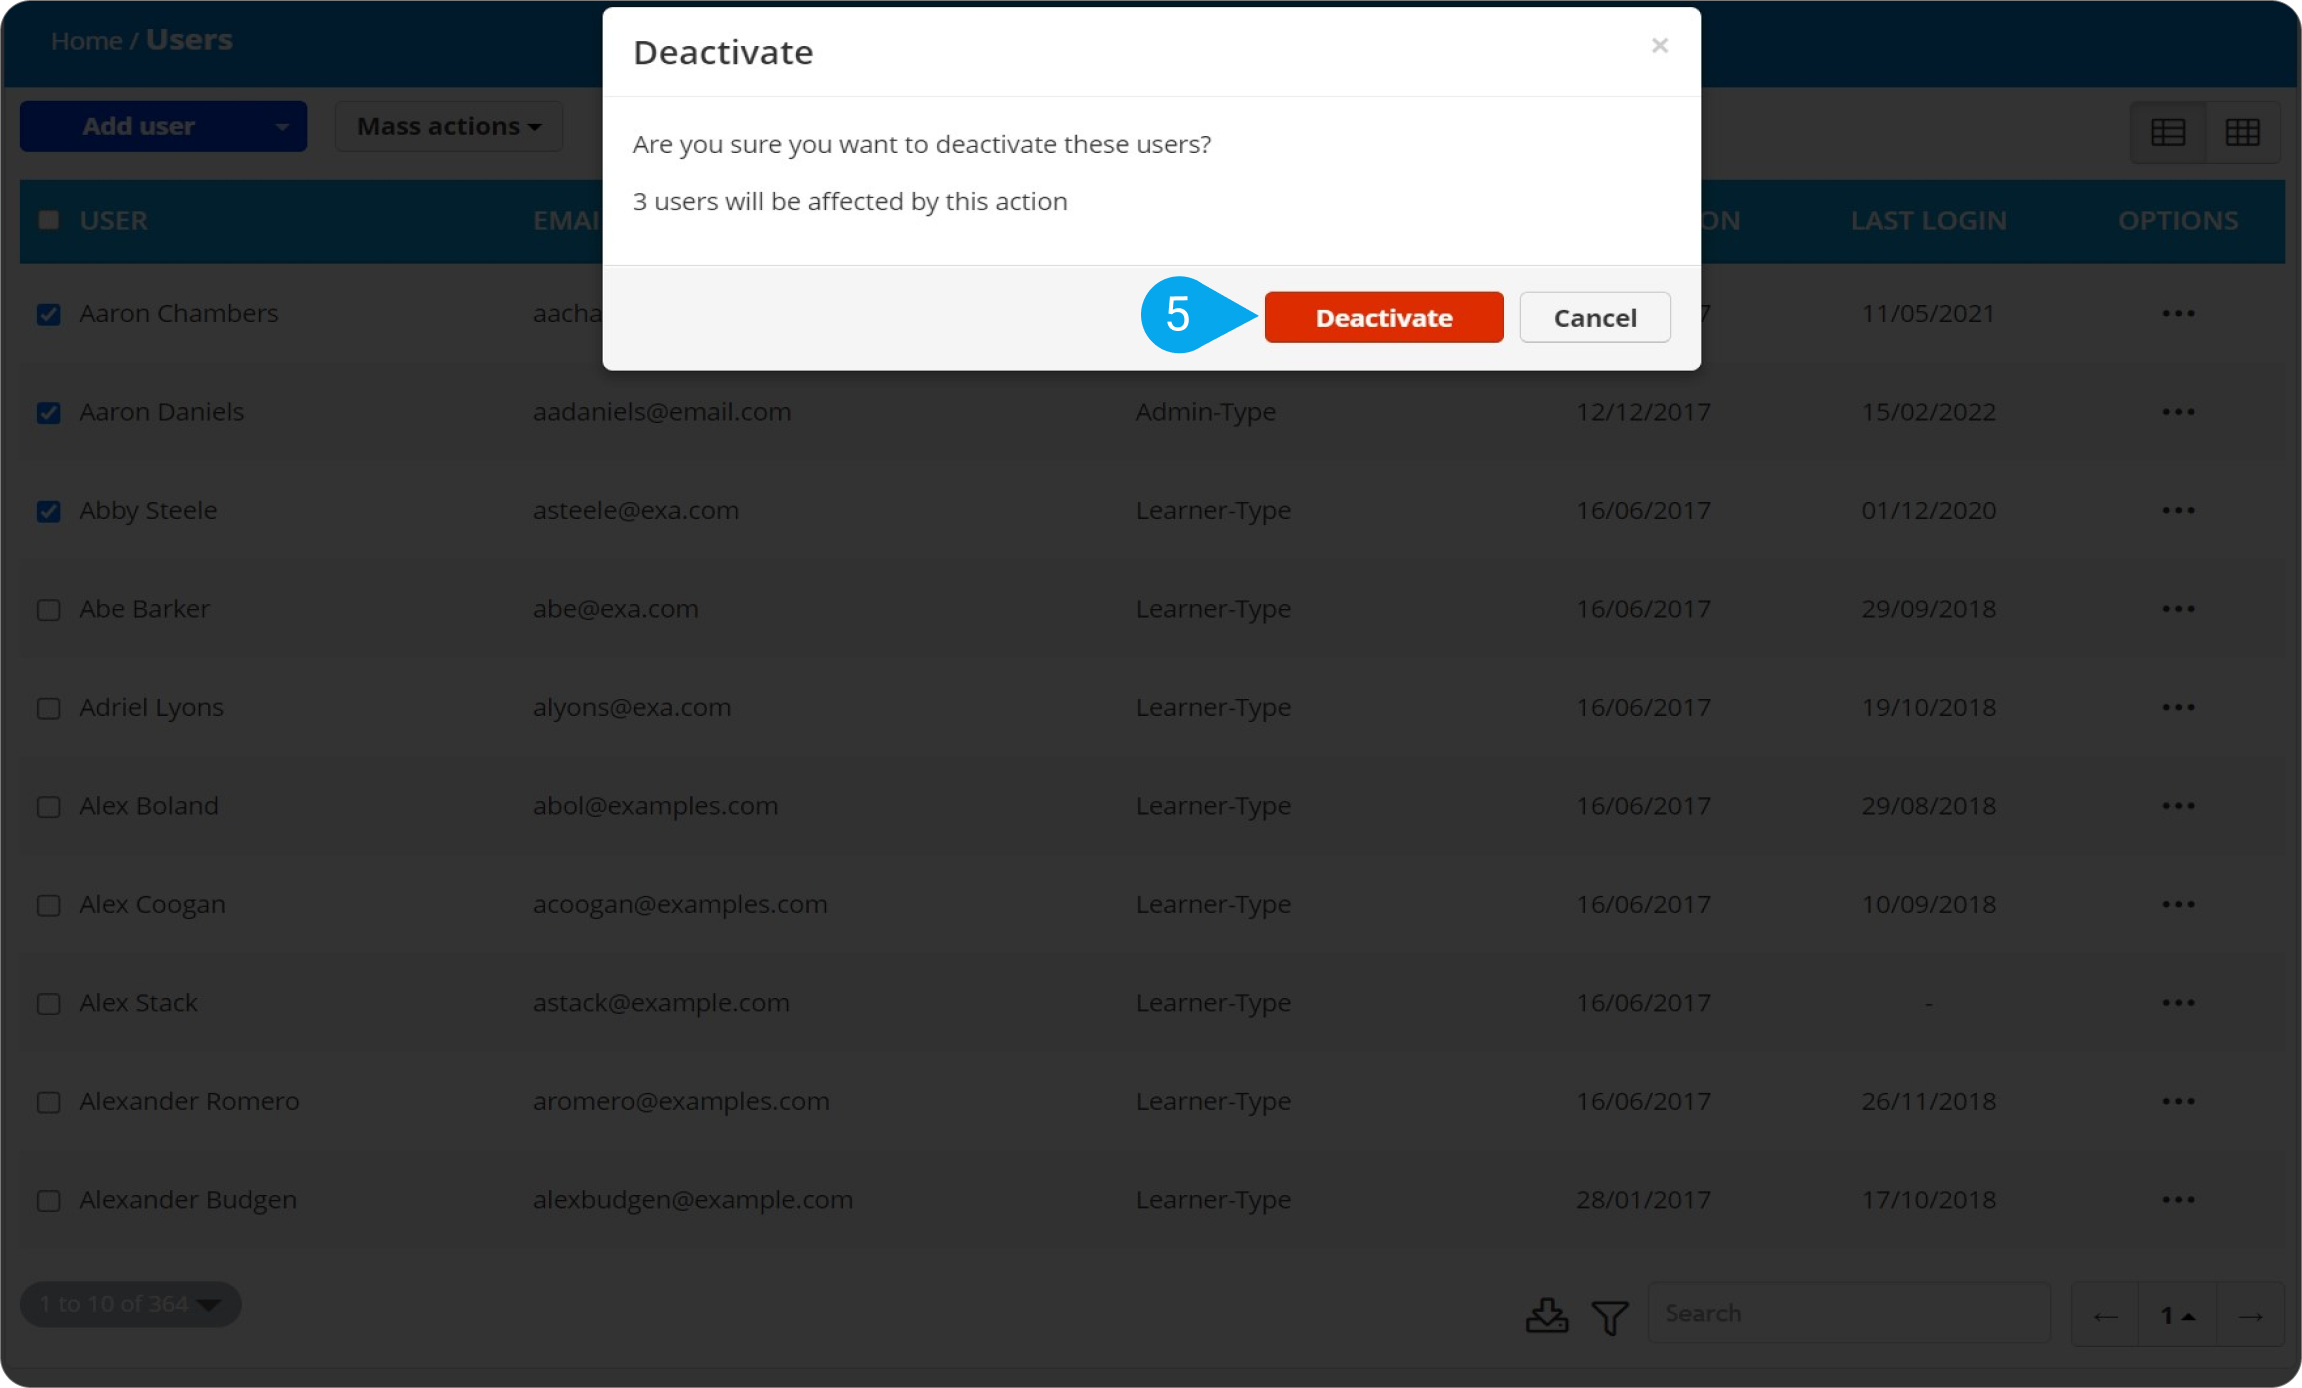
4. On the pop-up that appears click on Deactivate (5).
Here’s how to deactivate a single user on a specific date:
For more info on deactivating a single user on a specific date, see this article.
Here’s how to deactivate multiple users on a specific date:
For more info on scheduling the deactivation of multiple users at once see this article.
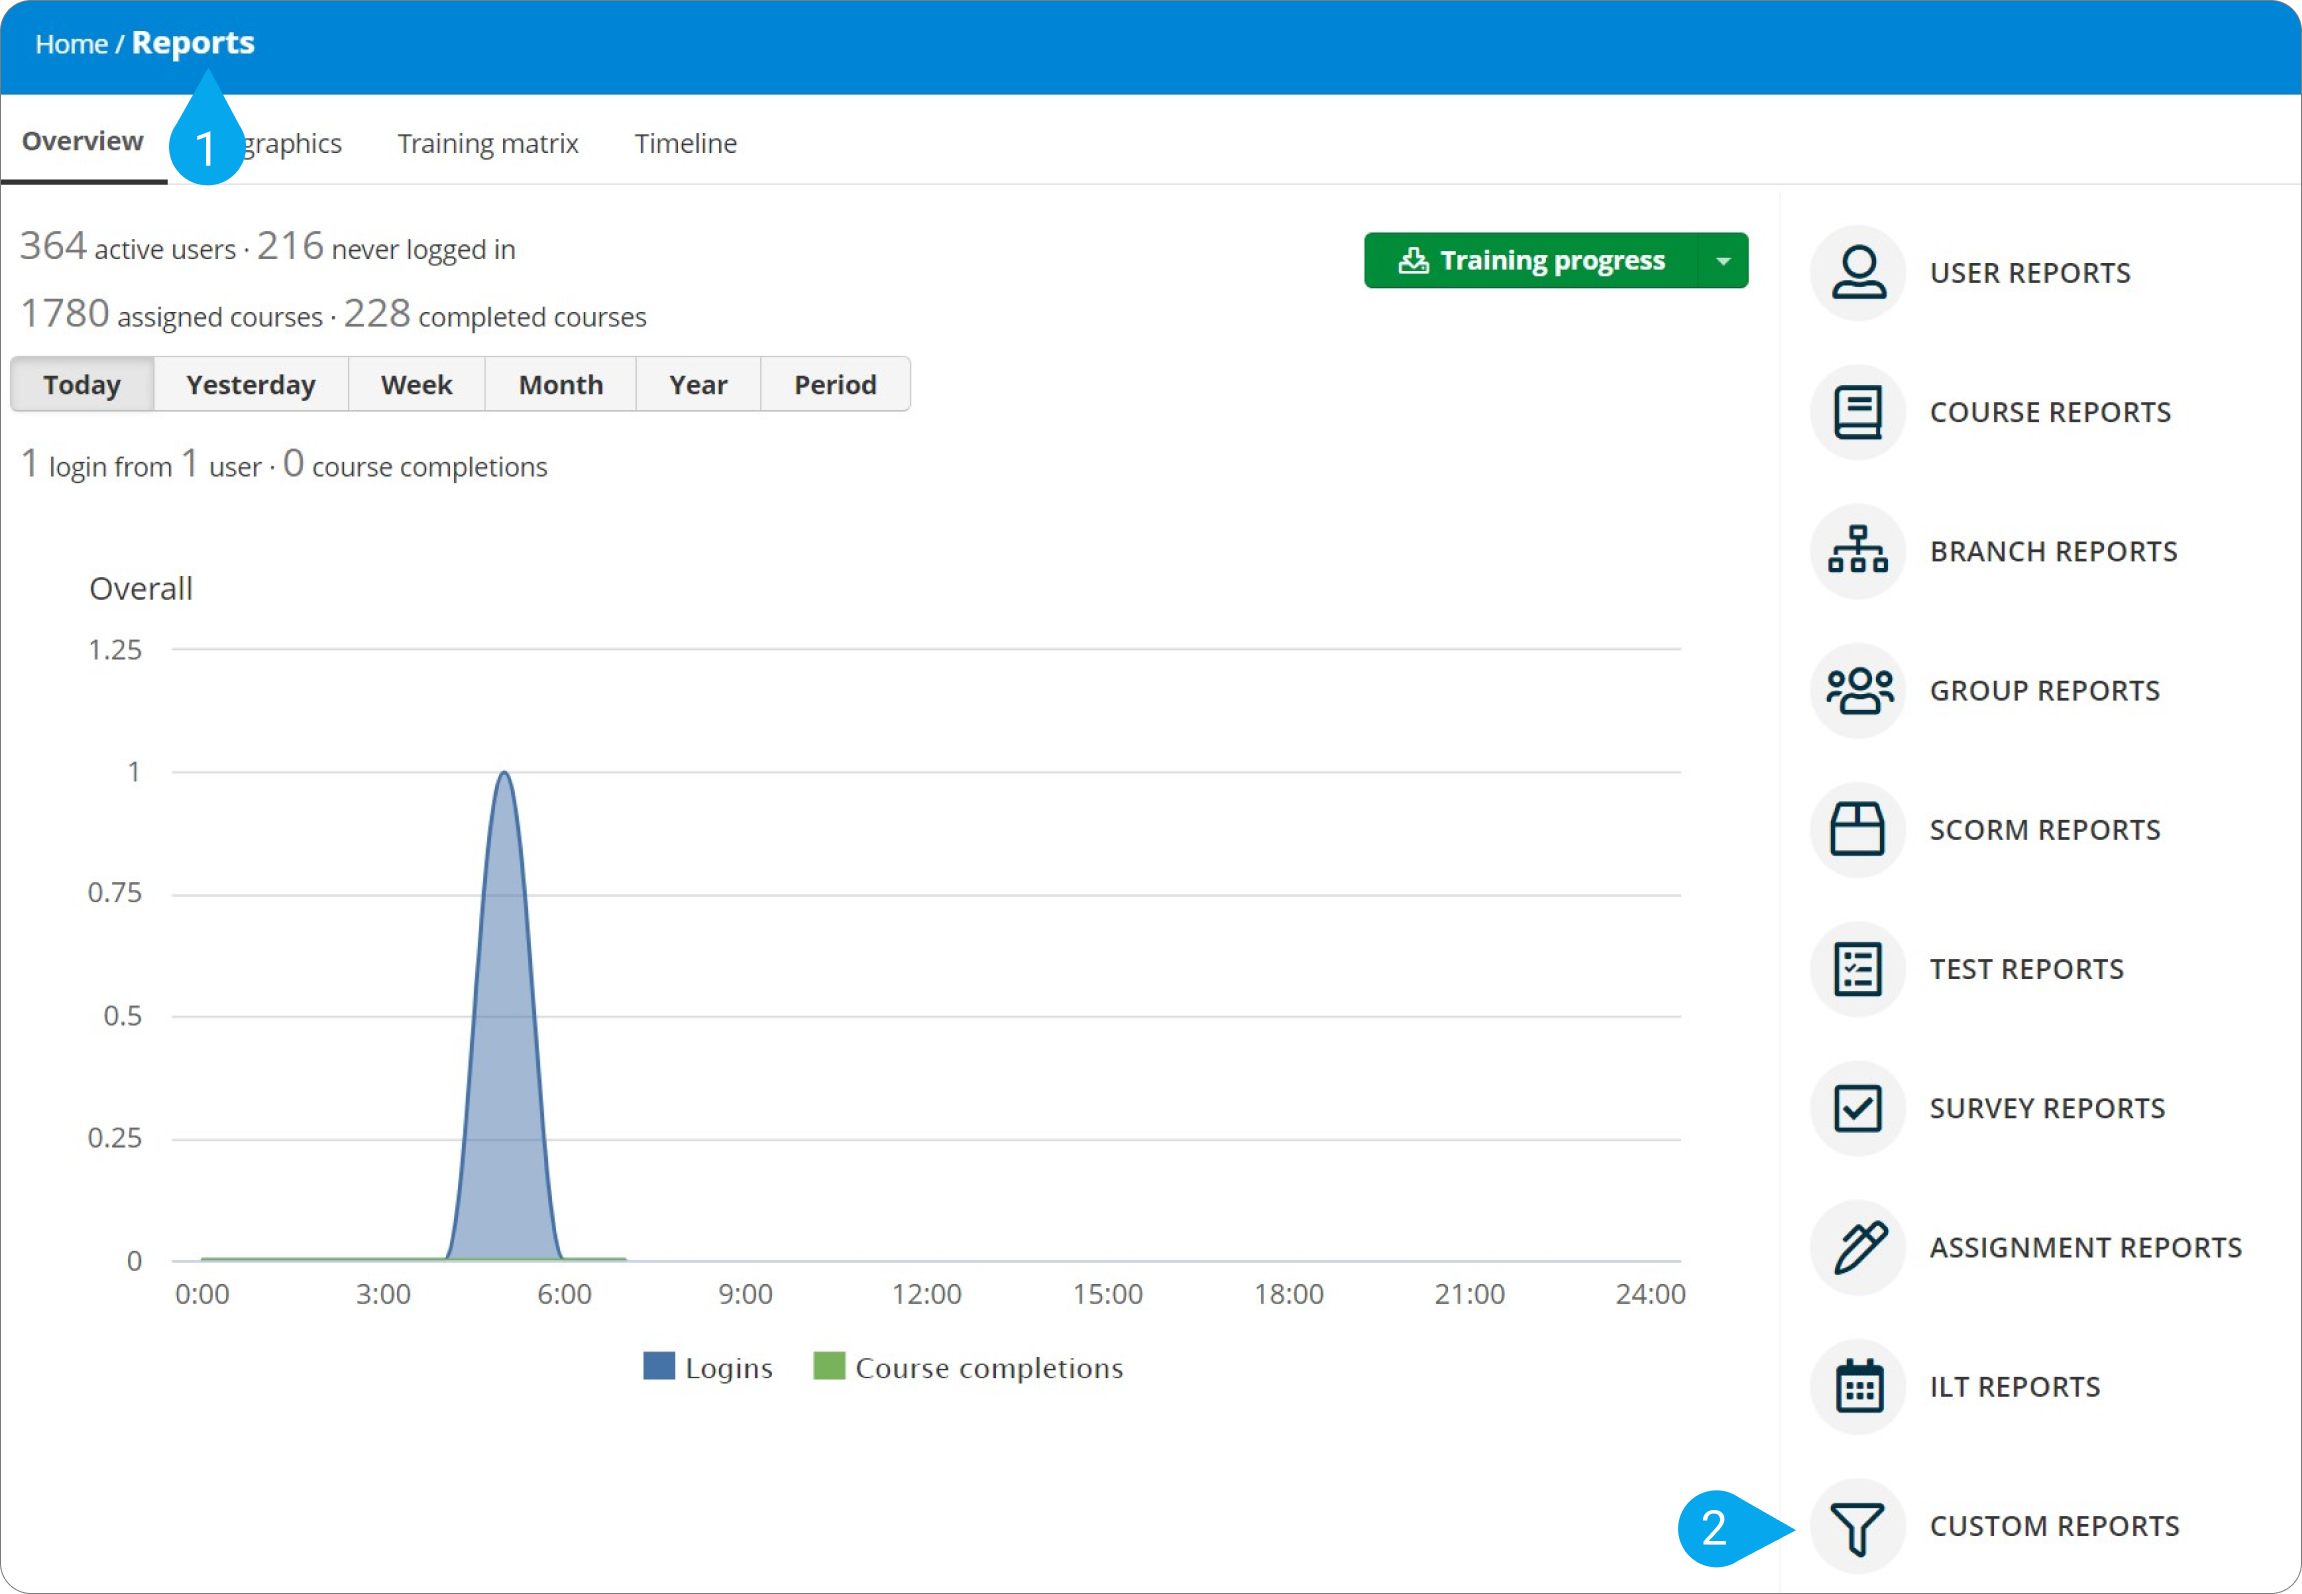
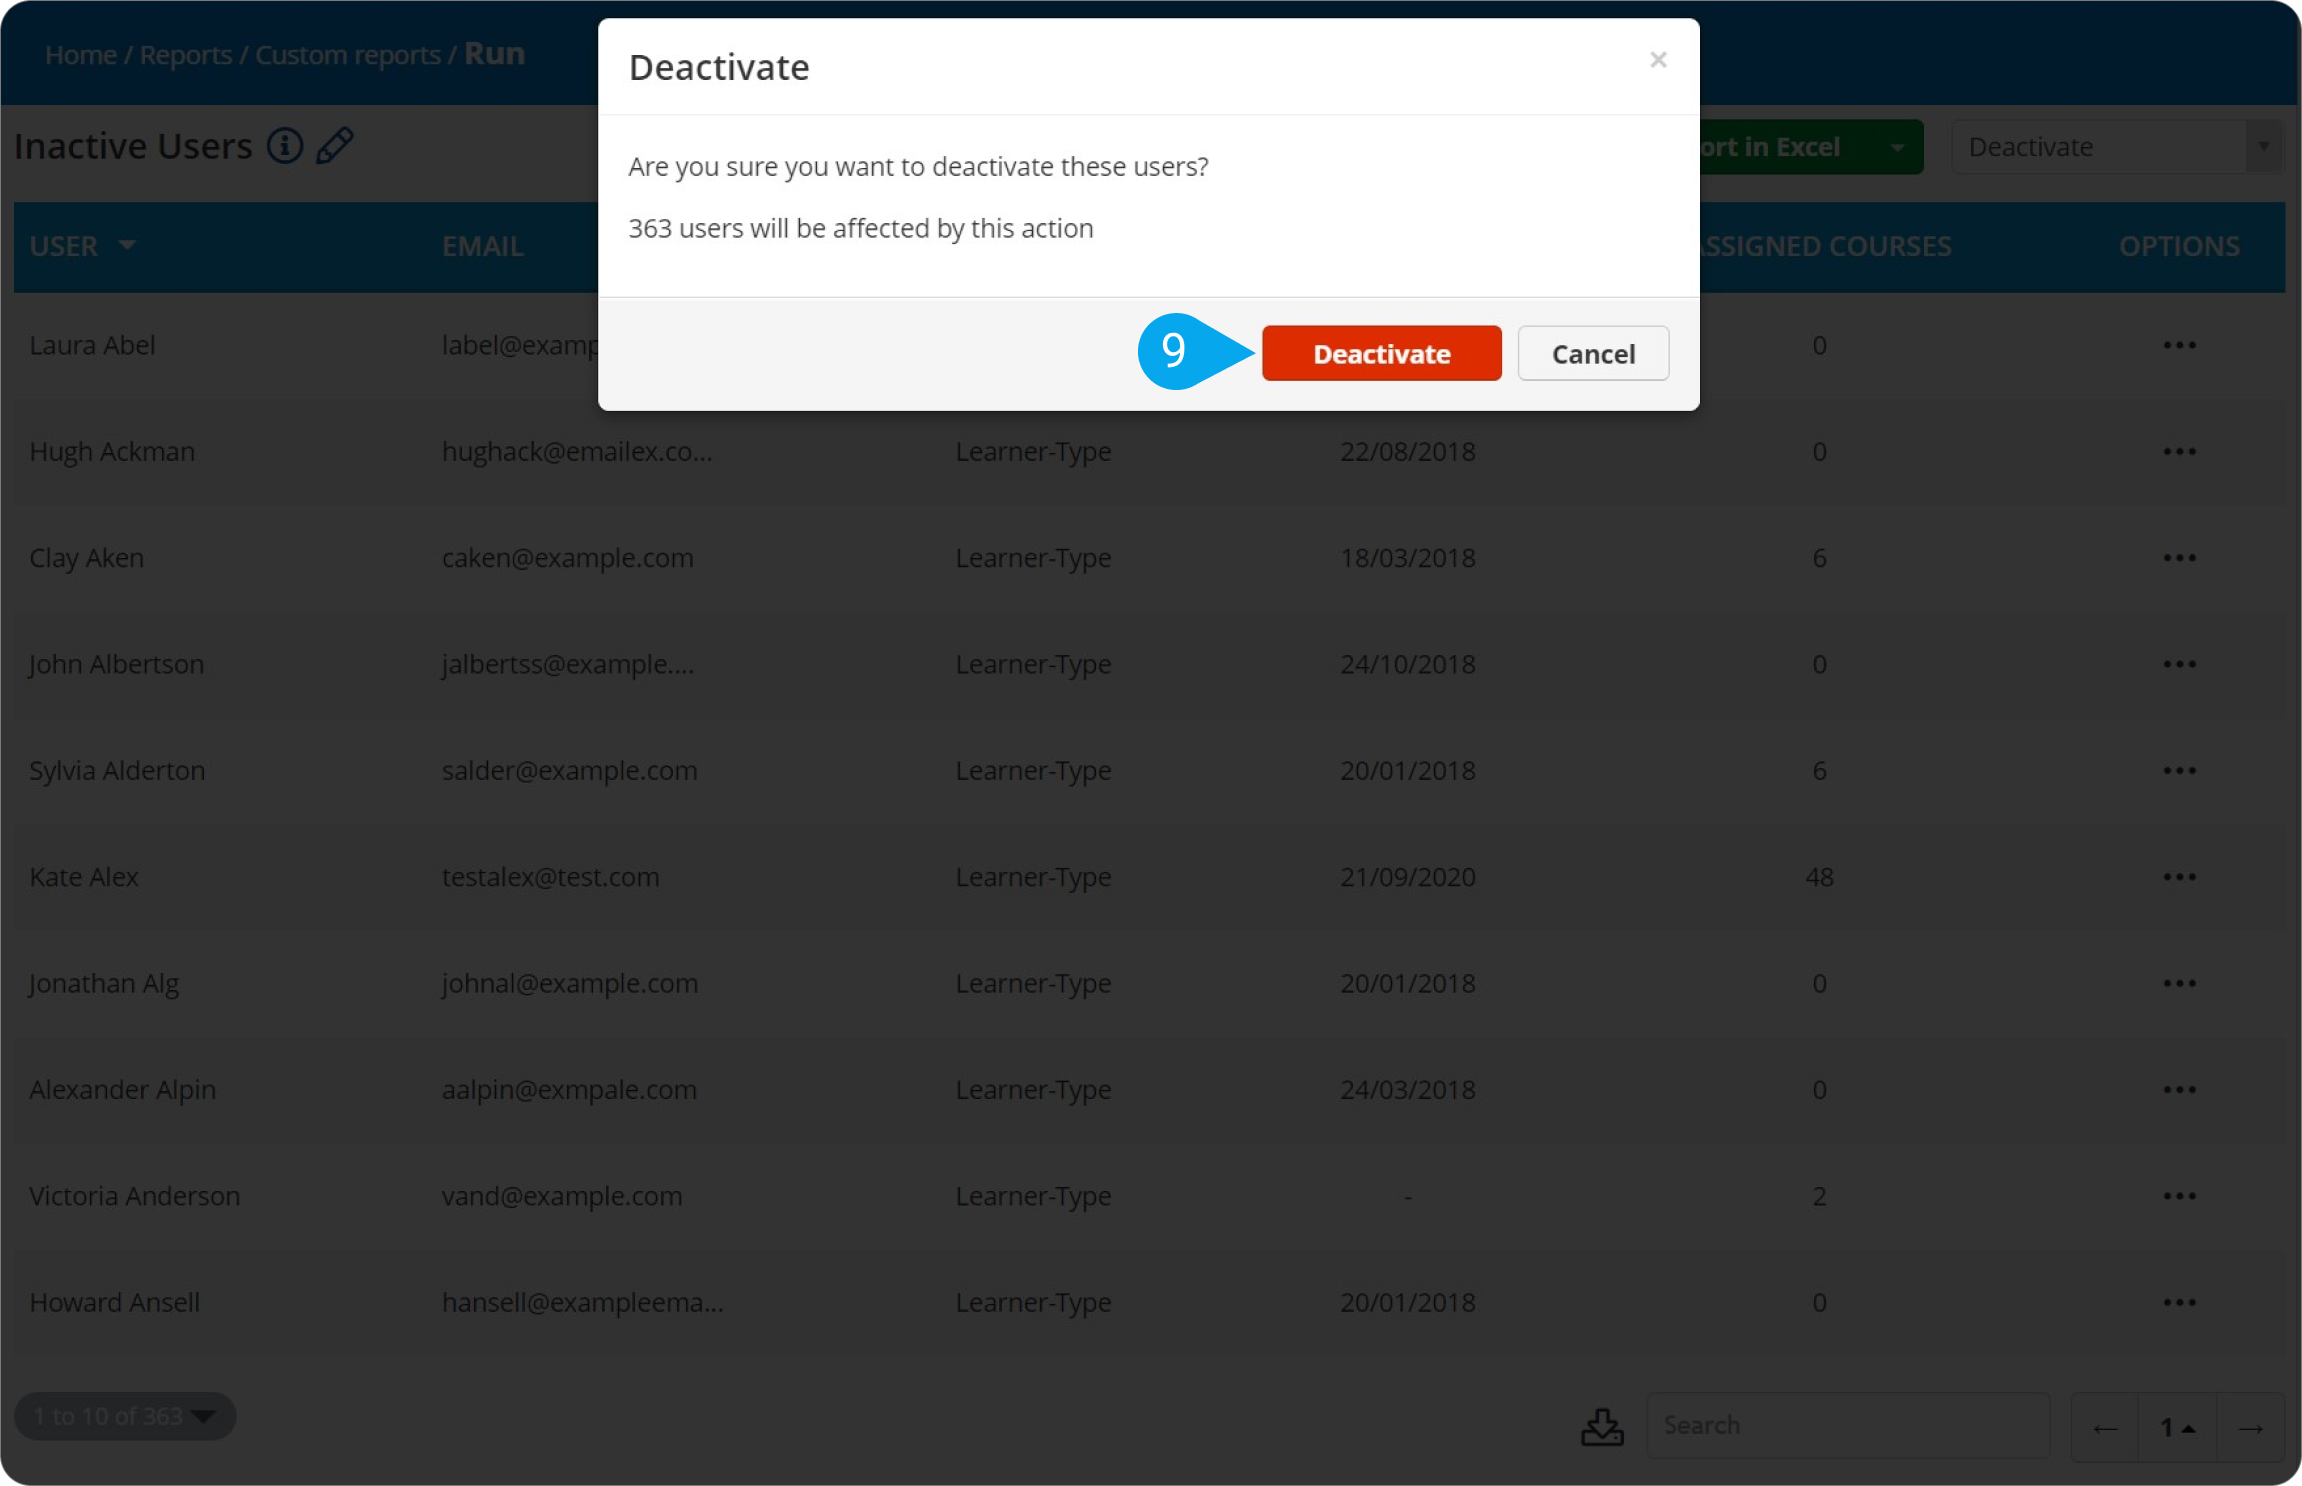
Here’s how to deactivate many users via custom reports(available in Plus and Premium plans):
- Sign in to your pcl.LMS account as Administrator, go to Home > Reports (1), and click Custom reports (2).
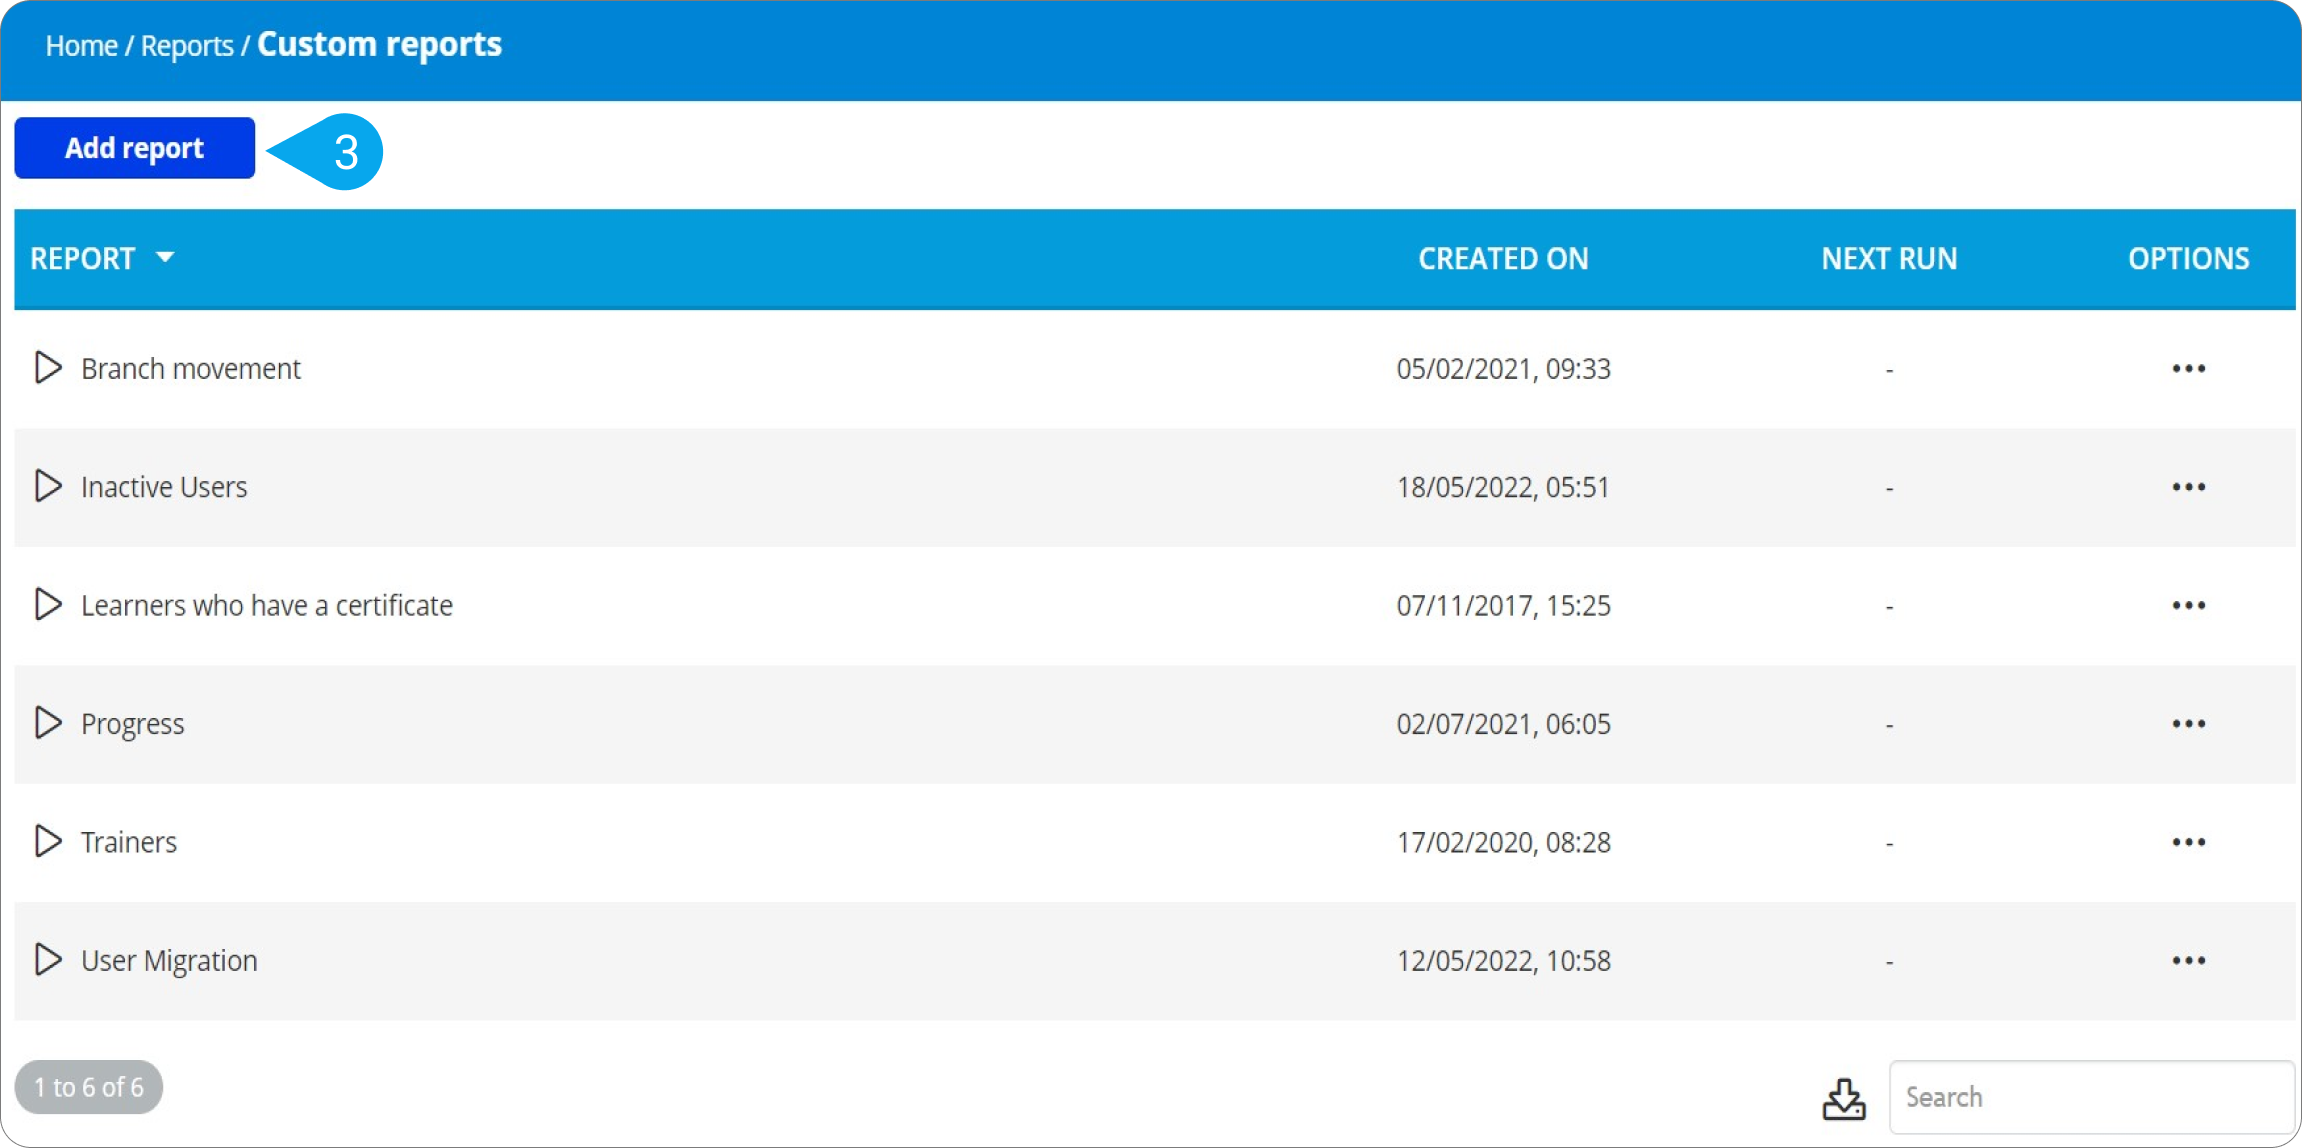
2. Click on Add report or open an existing one (3).
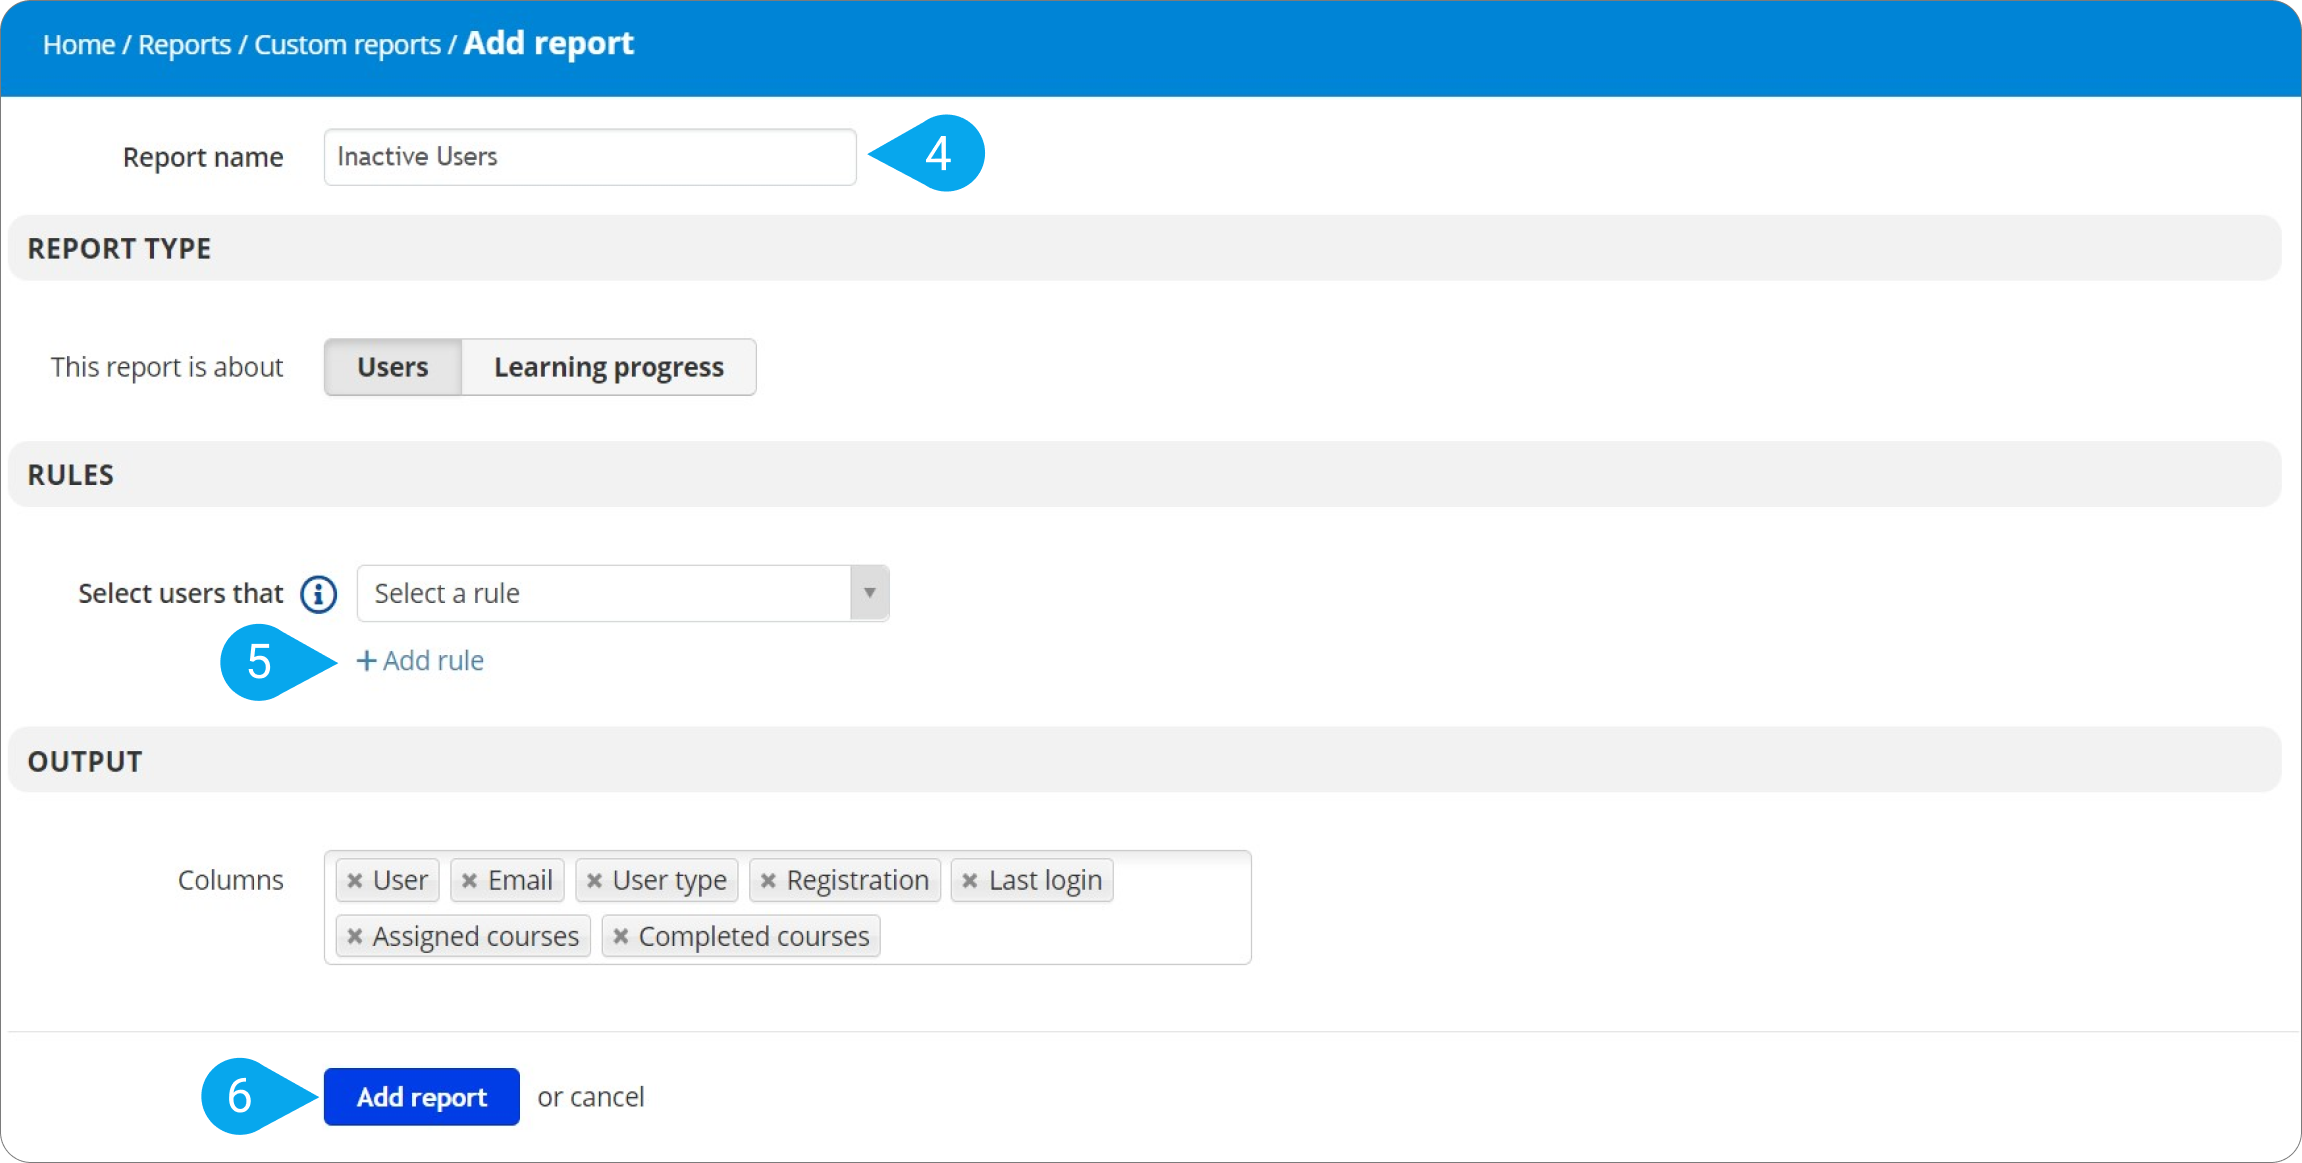
3. Click on the Report name (4) field and name your report.
4. In the Rules section, click on Add Rule (5) and then select the condition that works for you from the dropdown menu.
5. Click on Add report (6).
6. On the new screen, click on Mass Actions (7) and from the dropdown menu select Deactivate (8).
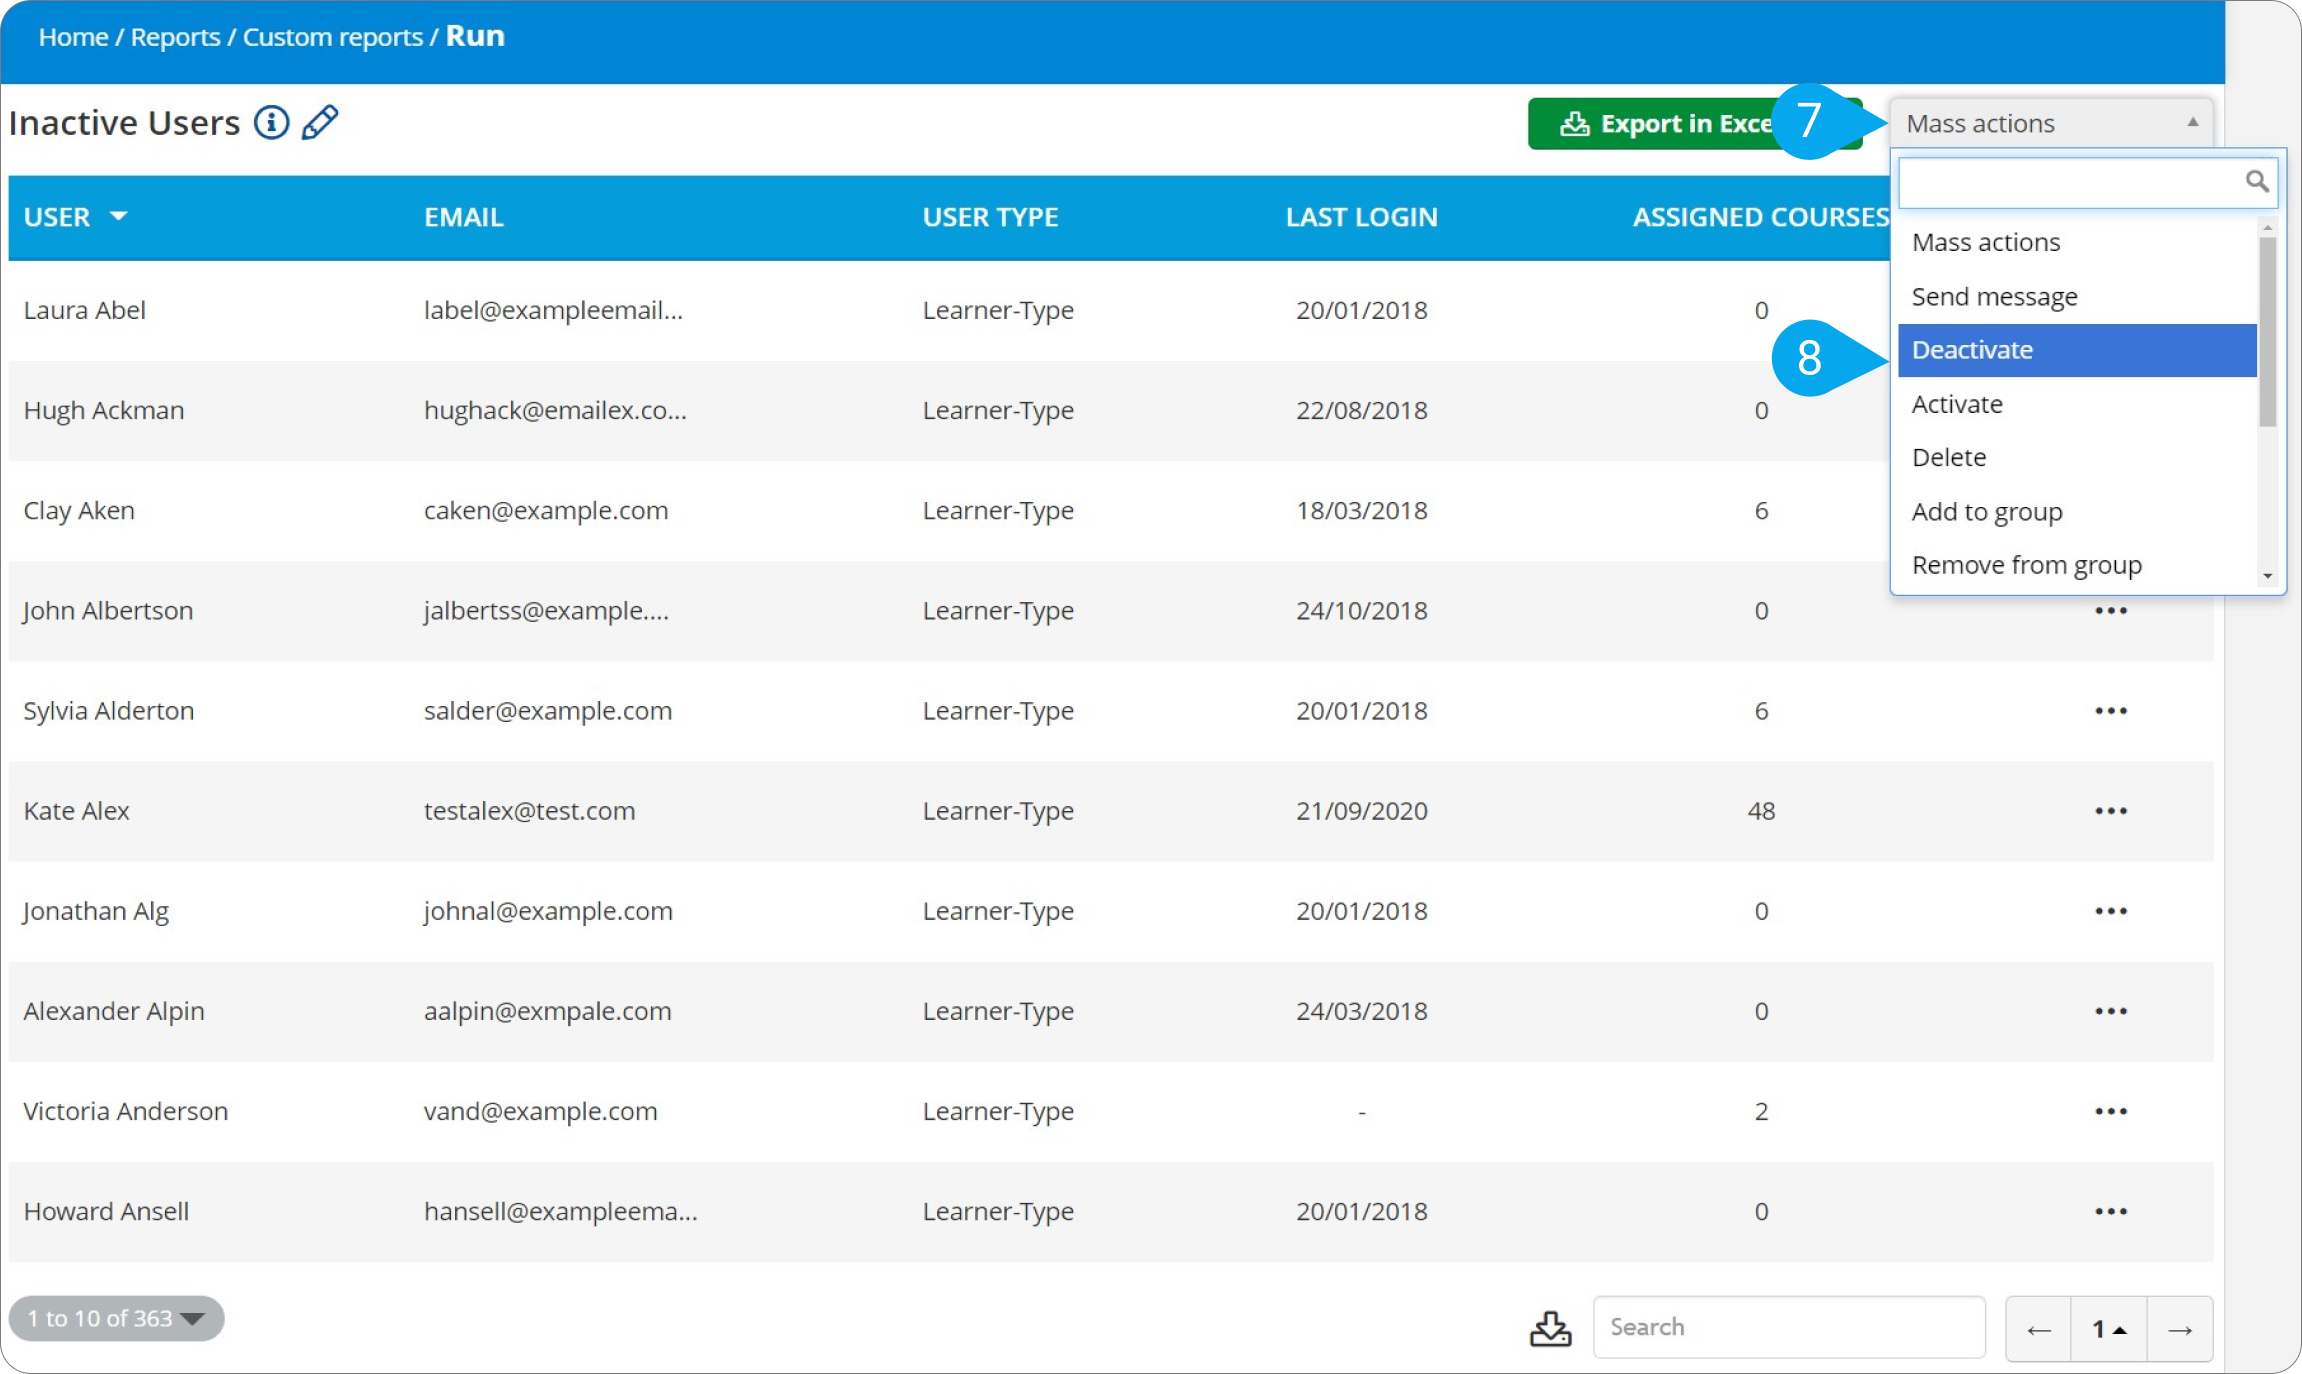
7. On the pop-up that appears click on Deactivate (9).
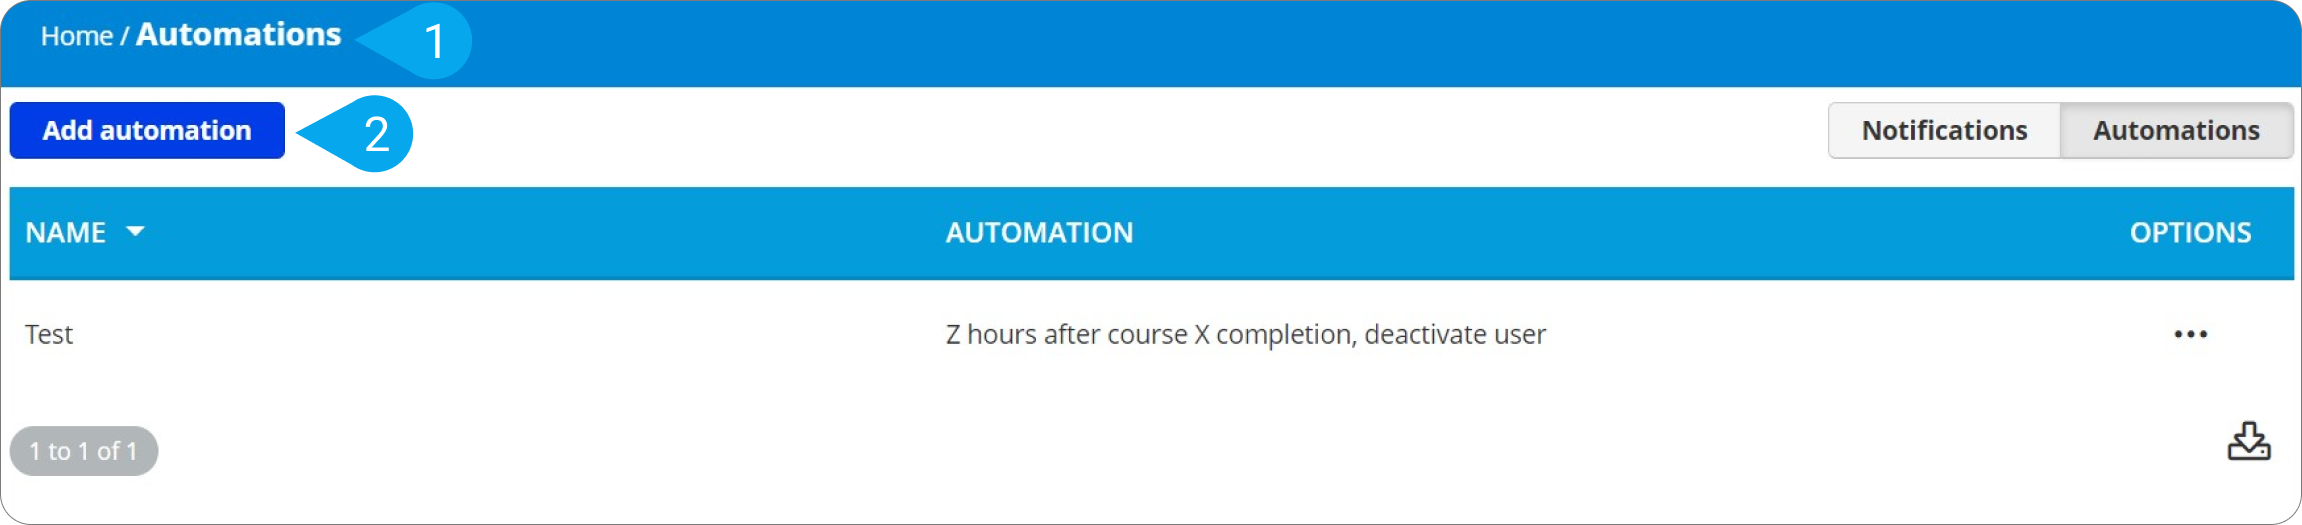
Here’s how to deactivate users via Automations (applicable to Premium plans):
- Sign in to your pcl.LMS account as Administrator and go to Home > Events engine.
- On the Notifications/Automations switch, click Automations (1).
- Click Add automation (2).
4. Click on the Name (3) tab and name your automation.
5. Click on the dropdown menu to expand it and on the search bar type deactivate (4).
6. You can select one of the three conditions based on your needs (5):
- Z hours after course X completion, deactivate user
- Z hours after last login, deactivate or delete user
- Z hours after signup and the user has not made a purchase, deactivate user
Depending on the automation you've selected, add a value for the required X, Y, and Z parameters (e.g., Z hours, course X, and course Y).
7. Click Add automation (6) to save your changes.