| Note: Custom Reports are available with all the Plus and Premium plans. |
To create your first custom report, follow these simple steps:
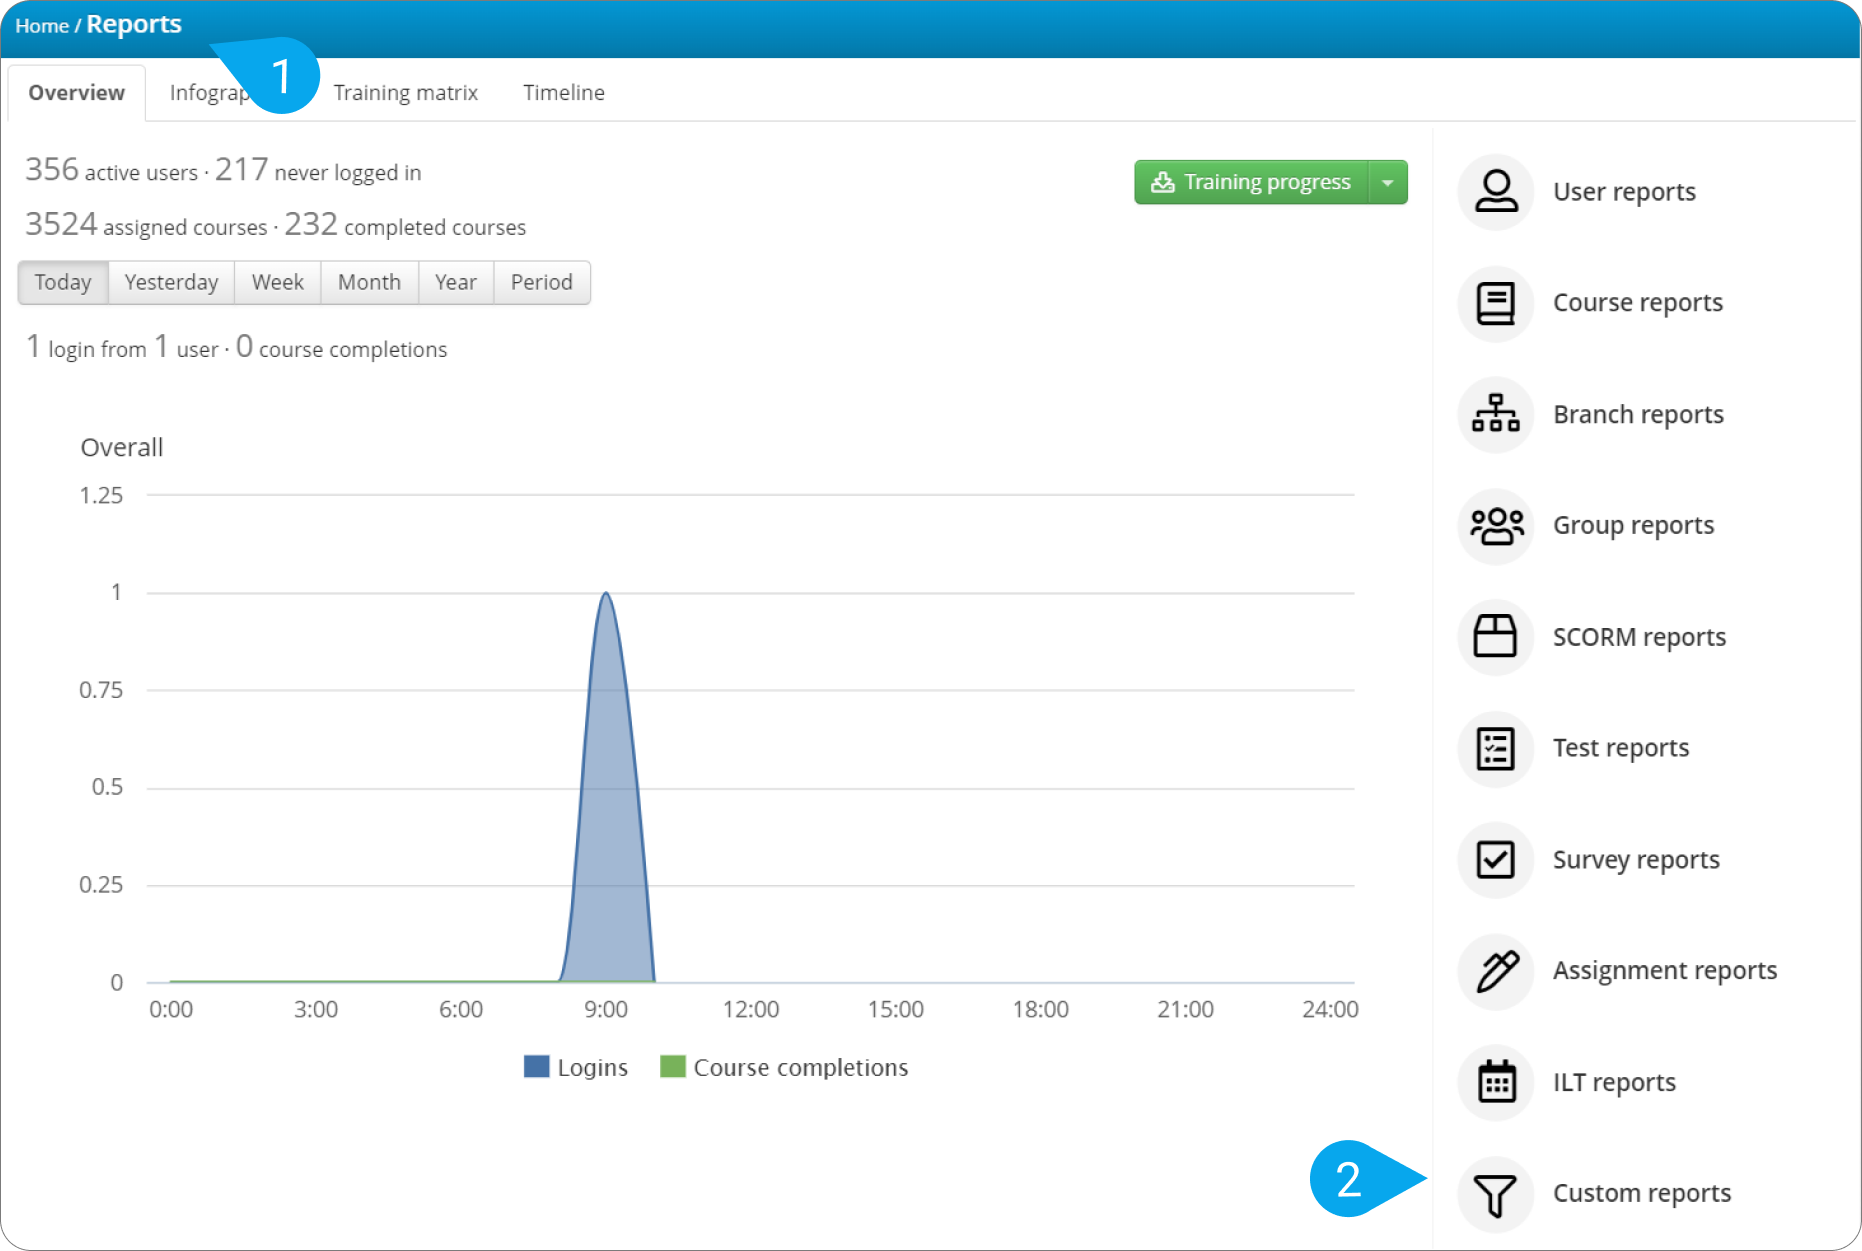
1. Sign in to your pcl.LMS account as Administrator, go to Home > Reports (1) and click Custom reports (2).
| Note: Custom Reports can be set up only through the main domain. |
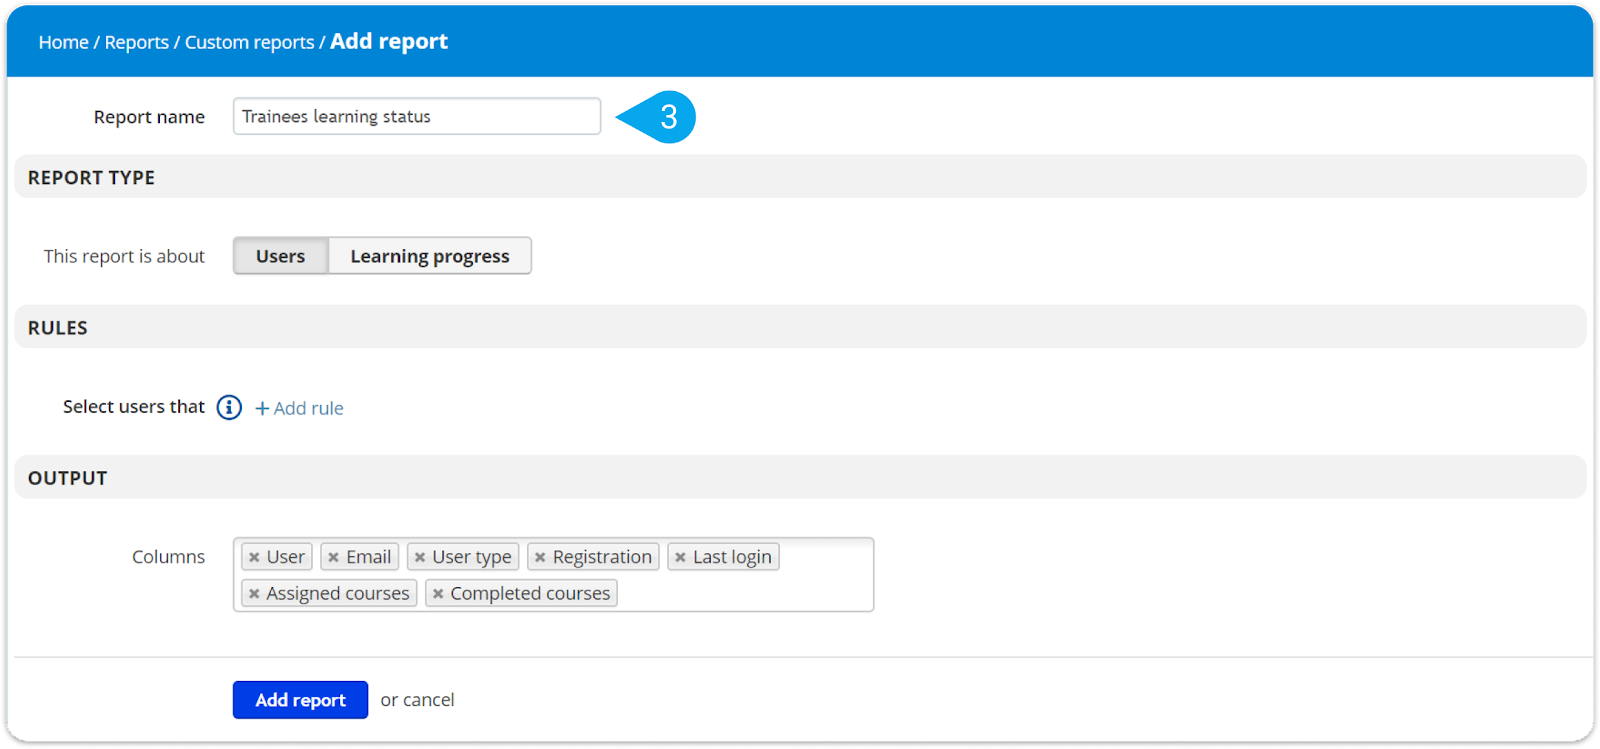
2. Click Add report. Type a distinct Name (3) for your report (i.e., make the name indicative of the results you want your report to return).
| Note: The next step is a critical one. Be careful to set the optimal rules for user selection. These are the rules by which the system selects the users whose activity is to be reported. |
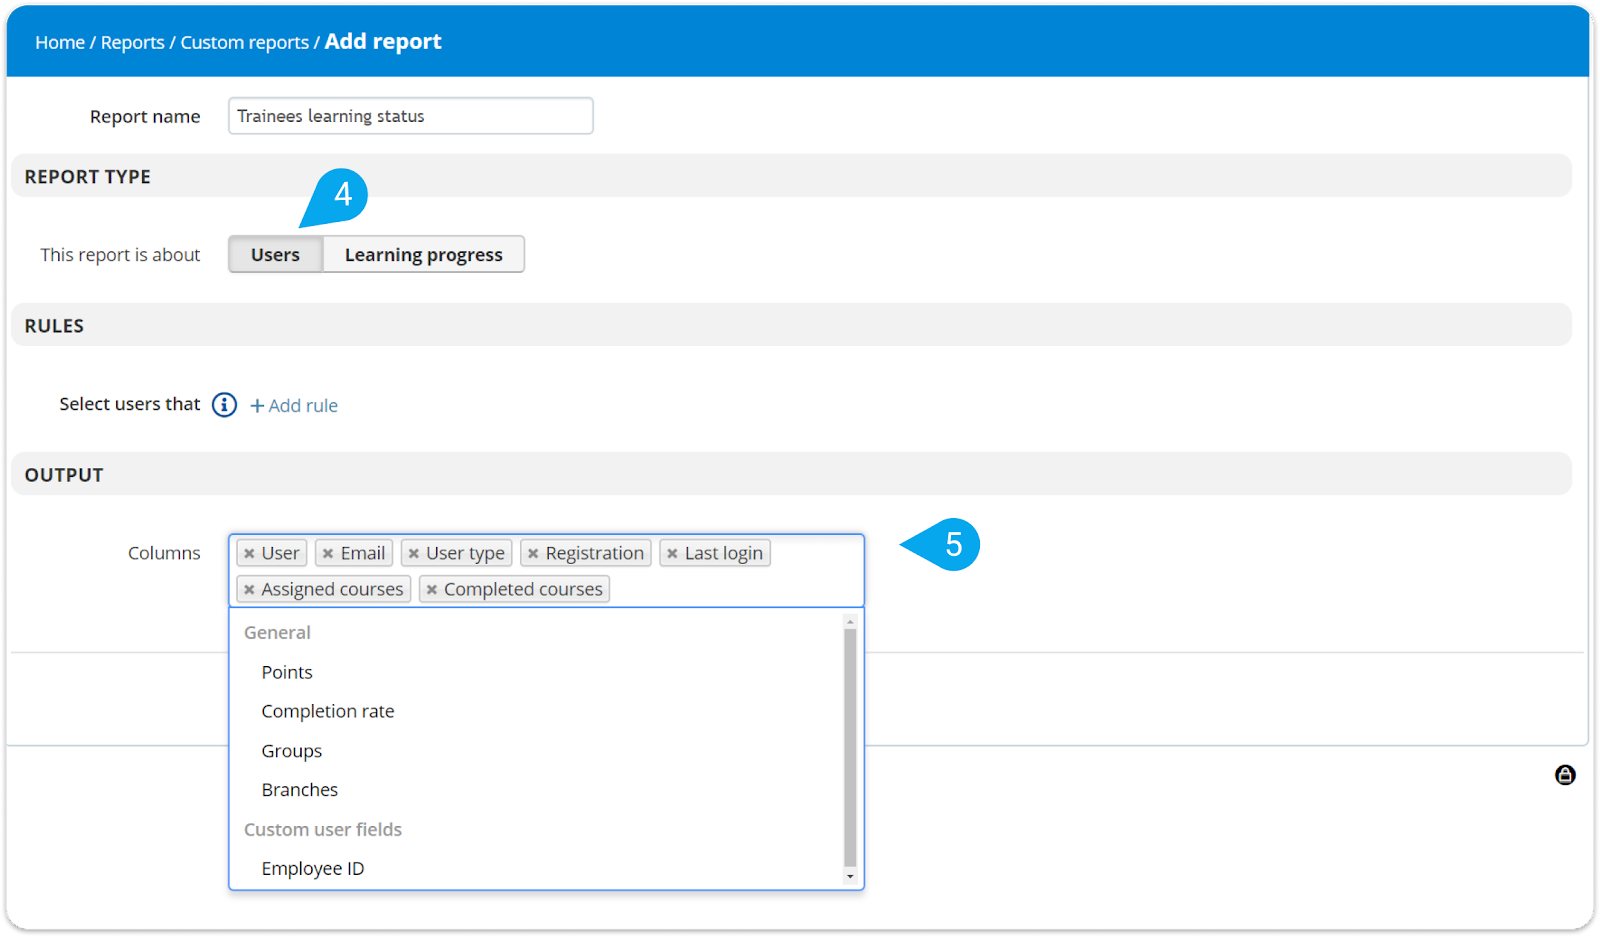
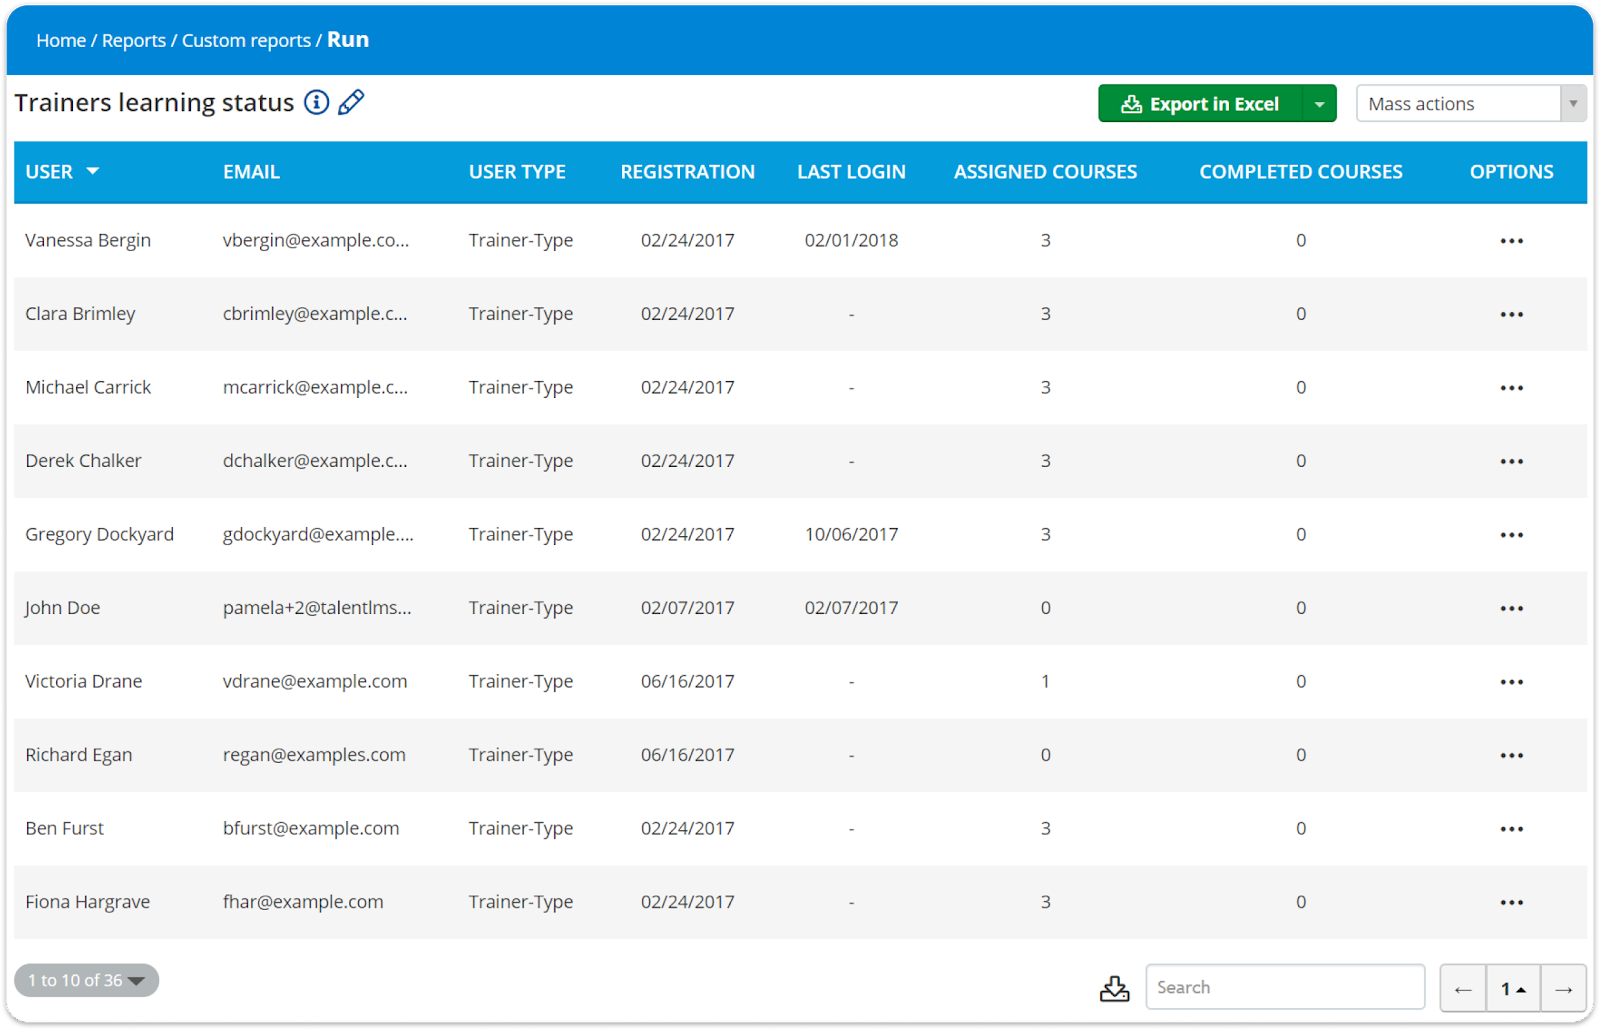
- Click Users (4) to view your selected users’ account-related and general activity data (i.e., User Type, Last login, Assigned courses, etc.). To specify what data you want your report to include, click the Columns (5) field and choose from the respective drop-down list.
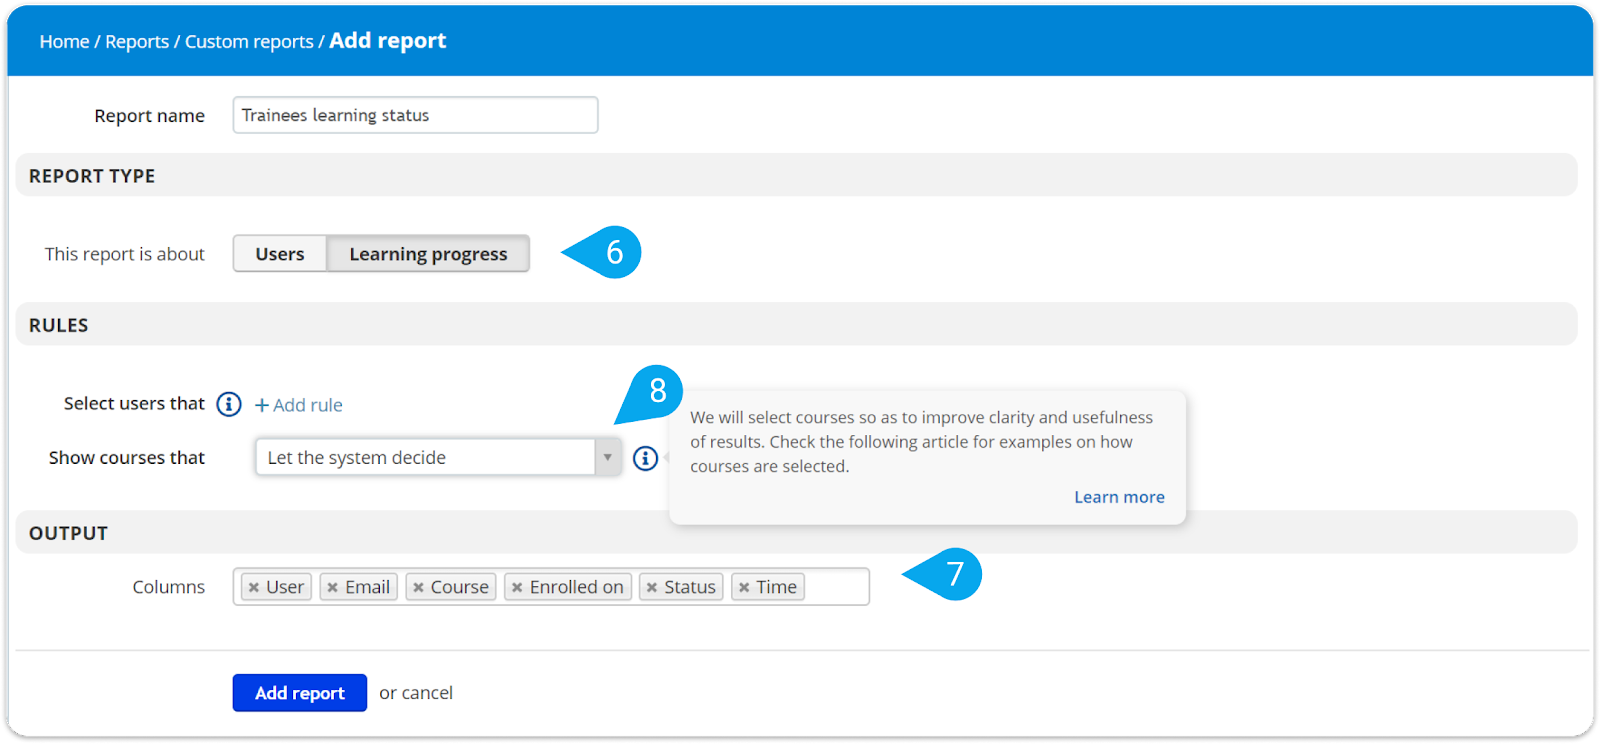
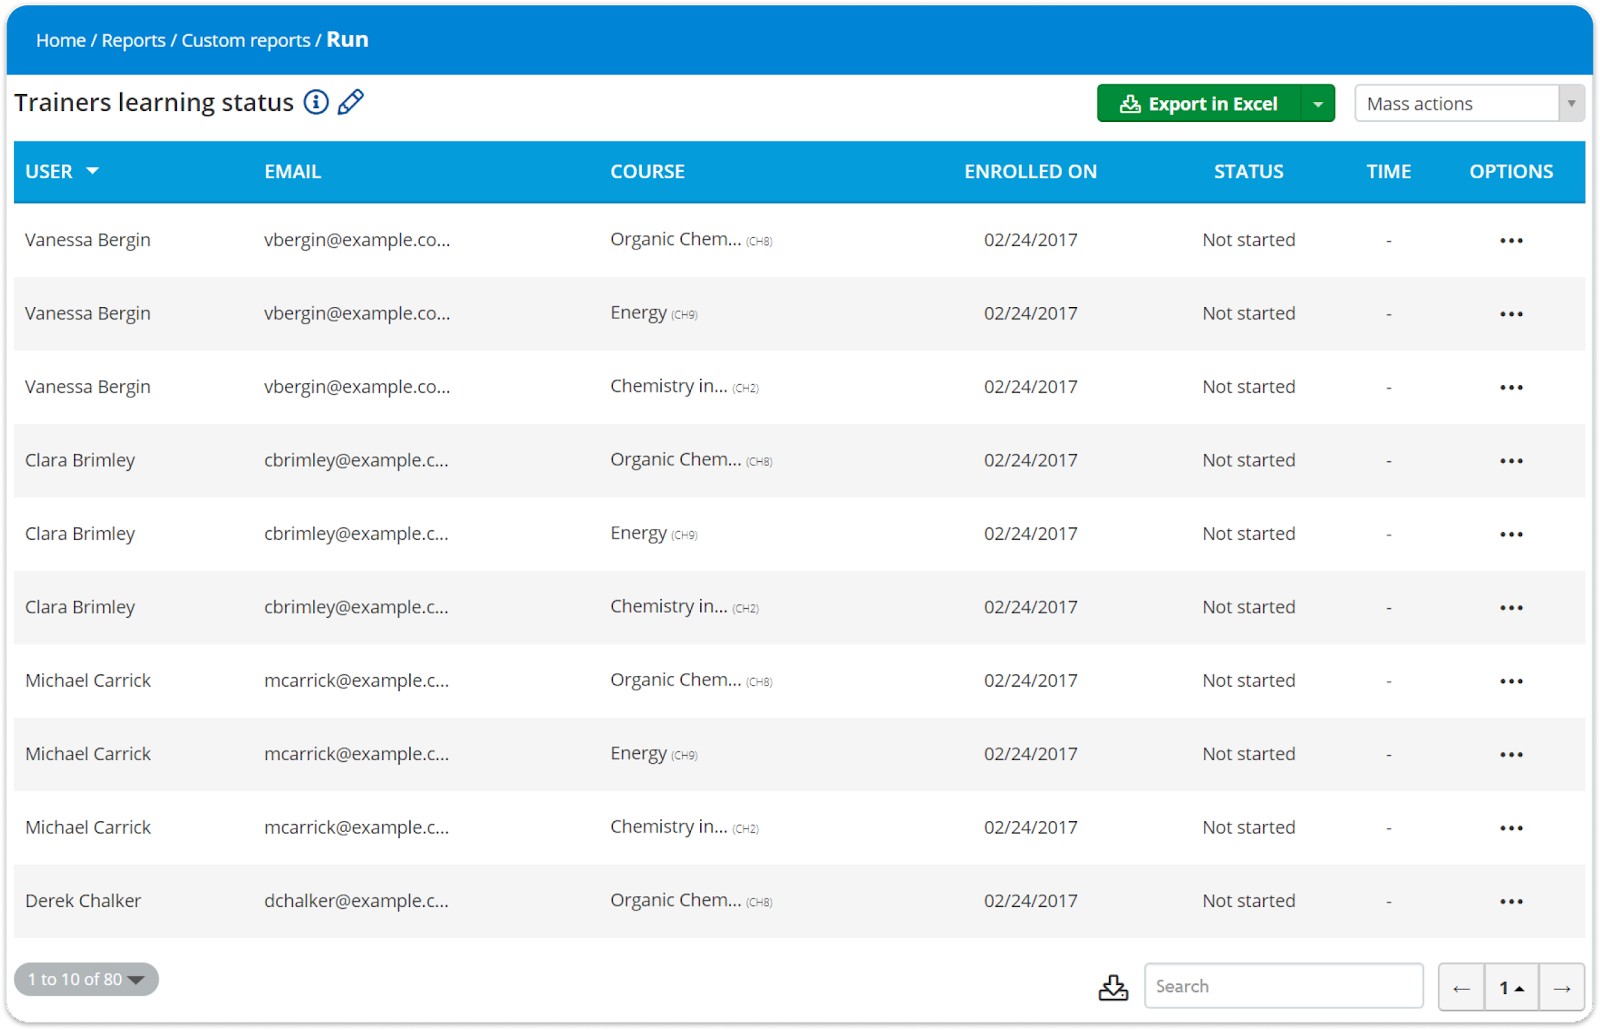
- Click Learning progress (6) to view your selected users’ course-related data (i.e., Course, Status, Average score, etc.). To specify what data you want your report to include, click the Columns (7) field and choose from the respective drop-down list.
| Note: If you have added any custom fields to user profiles, those become automatically available in the Columns drop-down list. |
- You can extend Learning progress reports to offer more control on the exact set of users/courses we show. Use the course selection box (8). From the drop-down list use one the following options:
A. Let the system decide: it’s the default option. In this article you can find important scenarios on how this option works.
B. Belong to list: the administrator can select specific courses.
C. Belong to groups: the administrator can select specific groups.
D. Belong to branches: the administrator can select specific branches.
| Note: You can select only one option but you can use different items. E.g. Select users that “Belong to groups” and select multiple groups. Different items use a logical OR operation. |
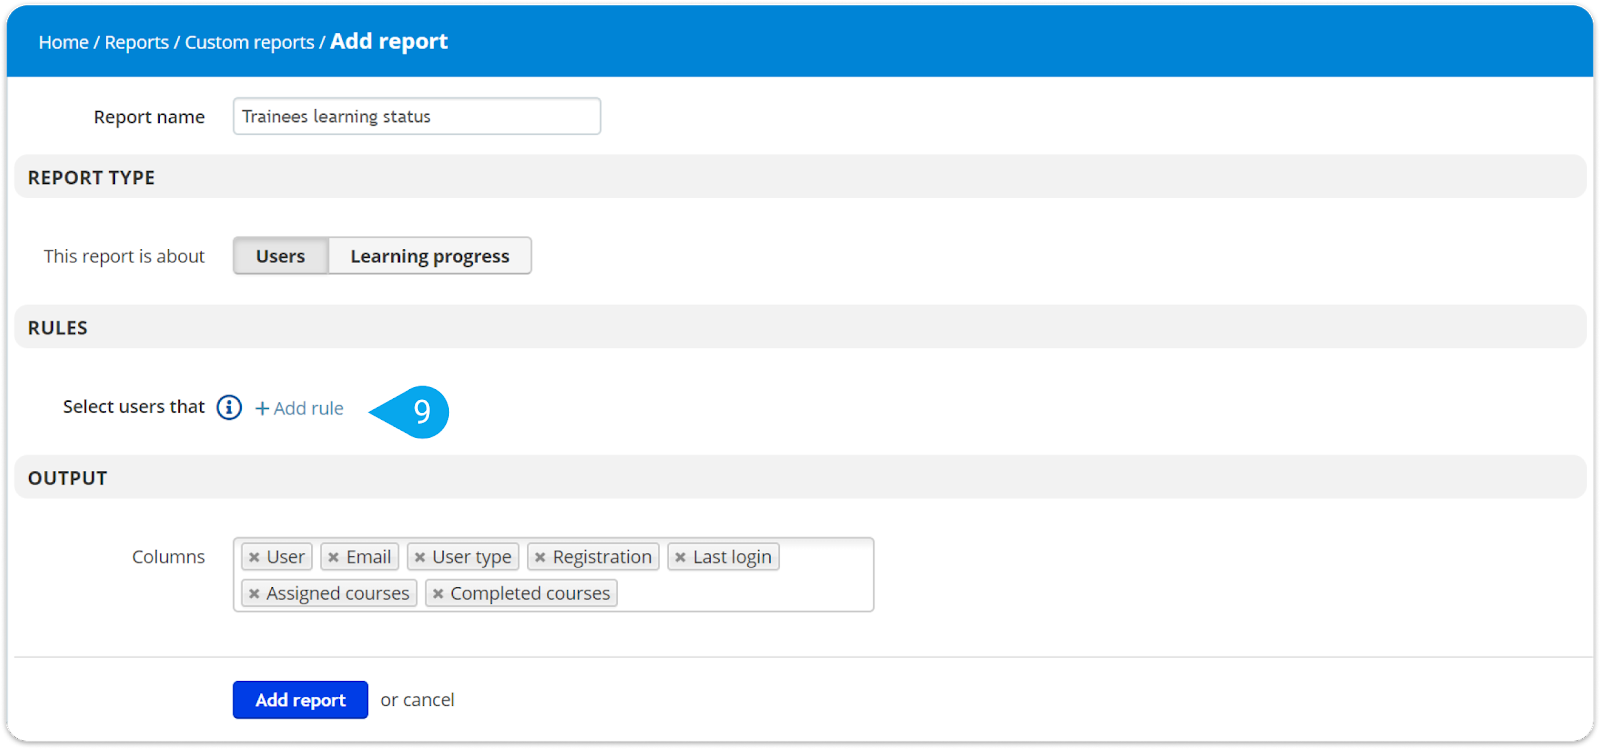
5. Choose one of the available rules from the “Select users that” drop-down list (10):
- Belong to branch
- Do not belong to branch
- Belong to group
- Do not belong to group
- Have the course
- Do not have the course
- Have been assigned to a course within a period of time
- Have completed the course
- Have not completed the course
- Have completed a course within a period of time
- Have not completed a course within a period of time
- Have not completed a course expiring within a period of time
- Have started but not completed a course
- The course has expired
- Have a certification for course
- Have an expired certification for course
- Have a certification expiring within a period of time
- Got a certification within a period of time
- Have logged in within a period of time
- Have not logged within a period of time
- Have signed up within a period of time
- Have the user type
- Have a specific value on a custom field
- Are active
- Are inactive
- Have at least X points
- Have reached level X or higher
- Have accepted terms of service
- Have not accepted terms of service
- Their email includes
6. From the second drop-down list, choose a specific course, branch, group, etc. (10) for the rule to be applied to.
To add another rule, just follow the same steps. To delete a rule, point to the rule and click the delete symbol (11).
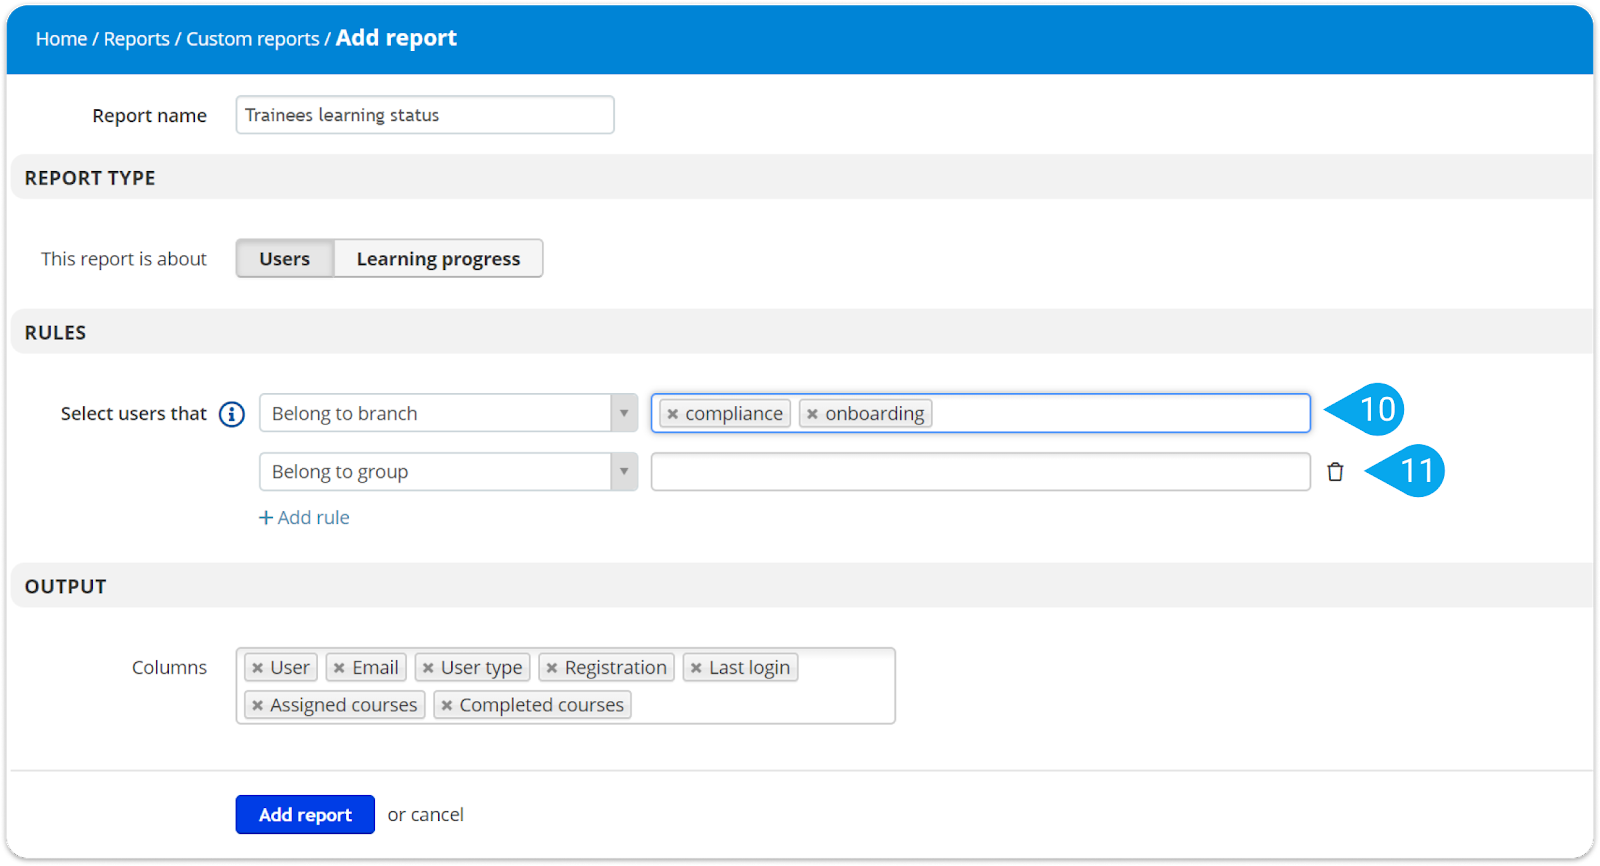
| Note: You can set up to 5 rules for each report. The rules are combined by a logical AND operation (i.e., they all have to be true at the same time). The different values within a rule are combined by a logical OR operation (i.e., one of them has to be true at any moment). To save you time and effort, TalentLMS lets you clone and reuse your custom reports. |
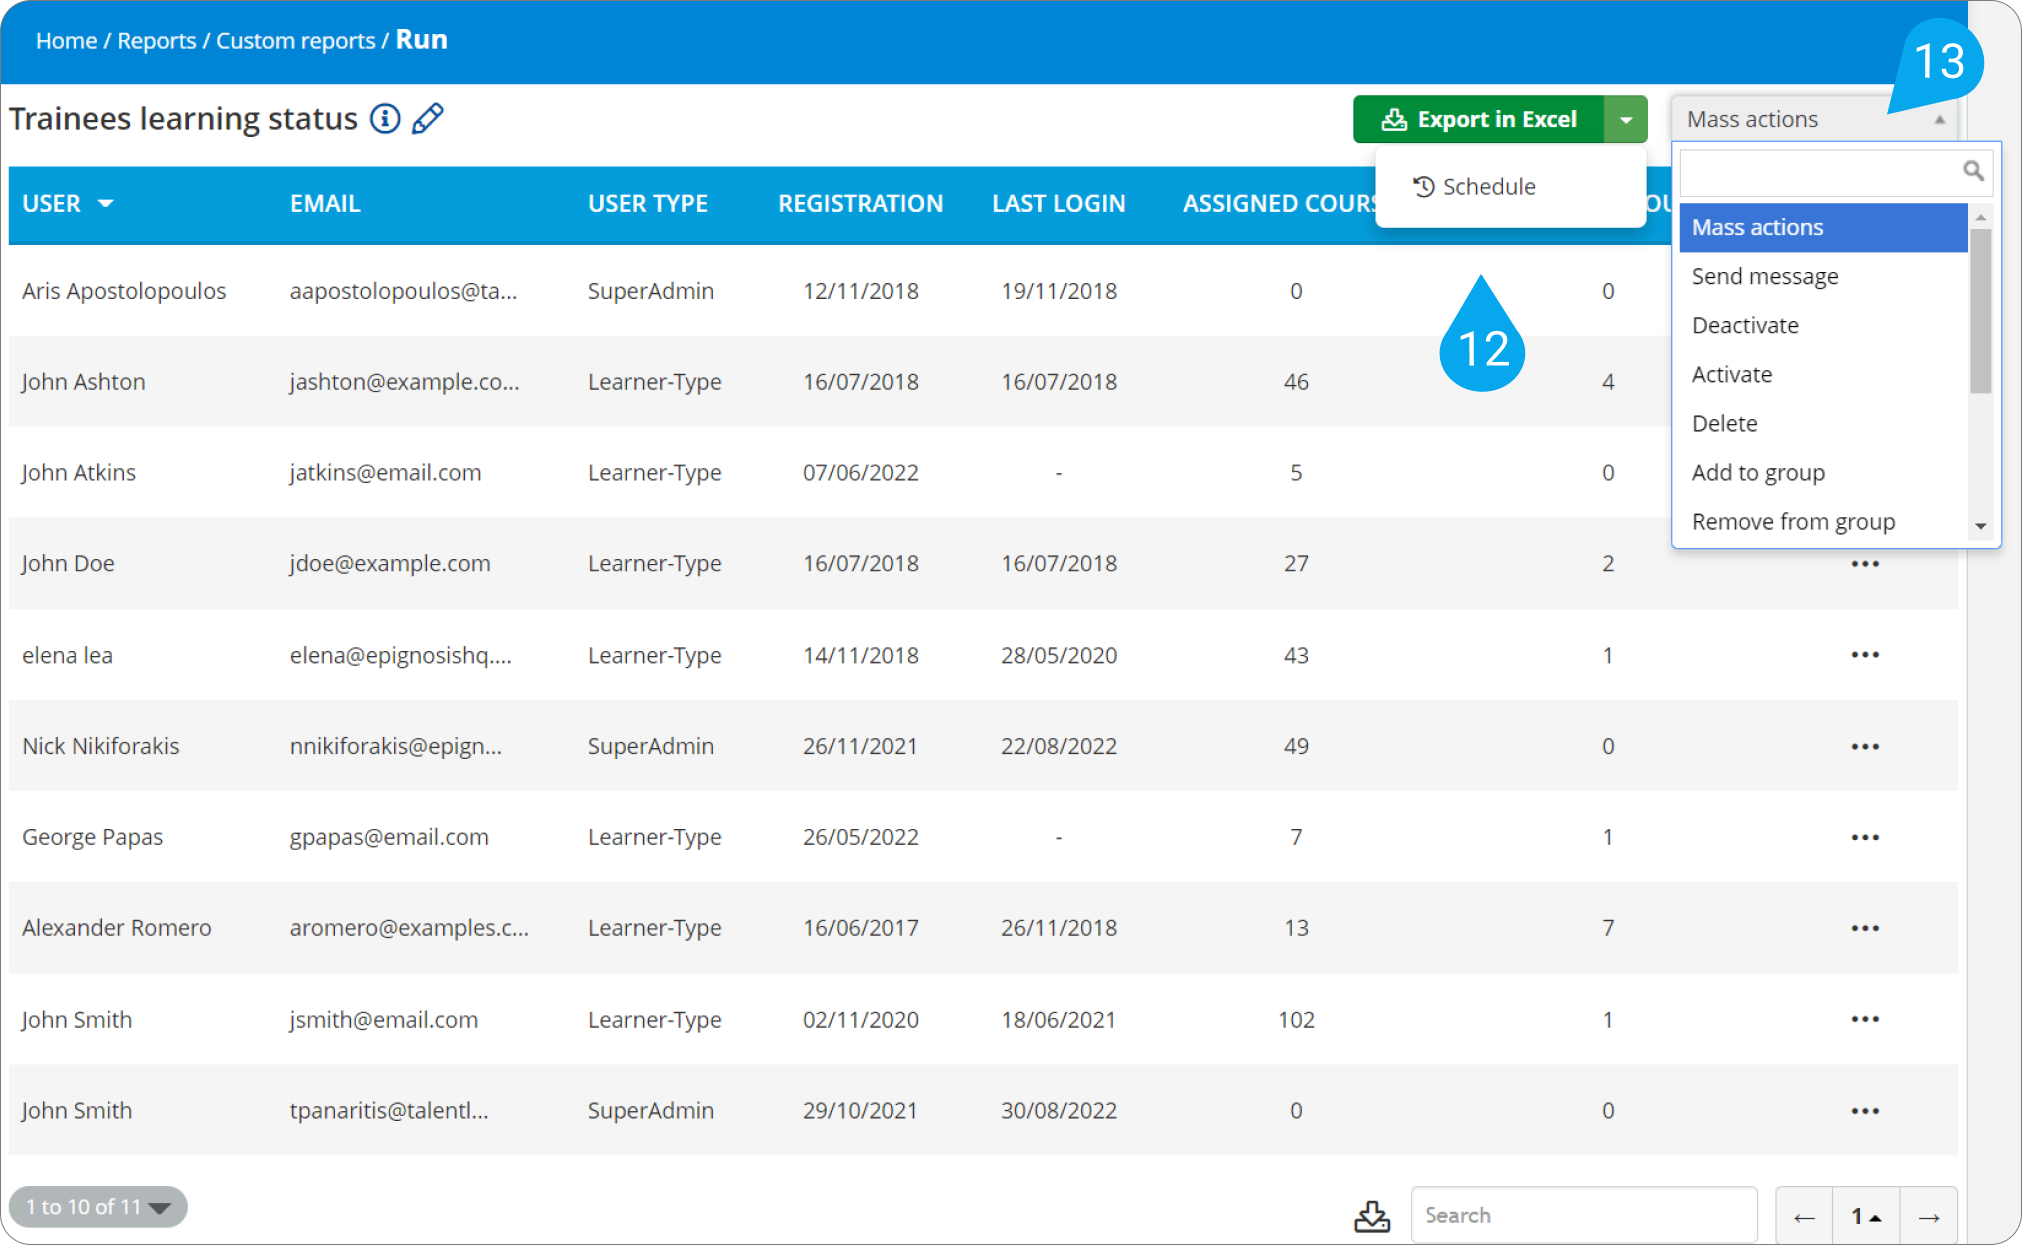
Now, you can:
- Click Export in Excel (12) to export your report to an Excel file.
- Click Schedule to schedule your custom report (12) like you can do with all reports.
- Click Mass actions (13) to perform an action on all the users included in the report with one click (i.e., send a message, add to a group, deactivate, etc.).
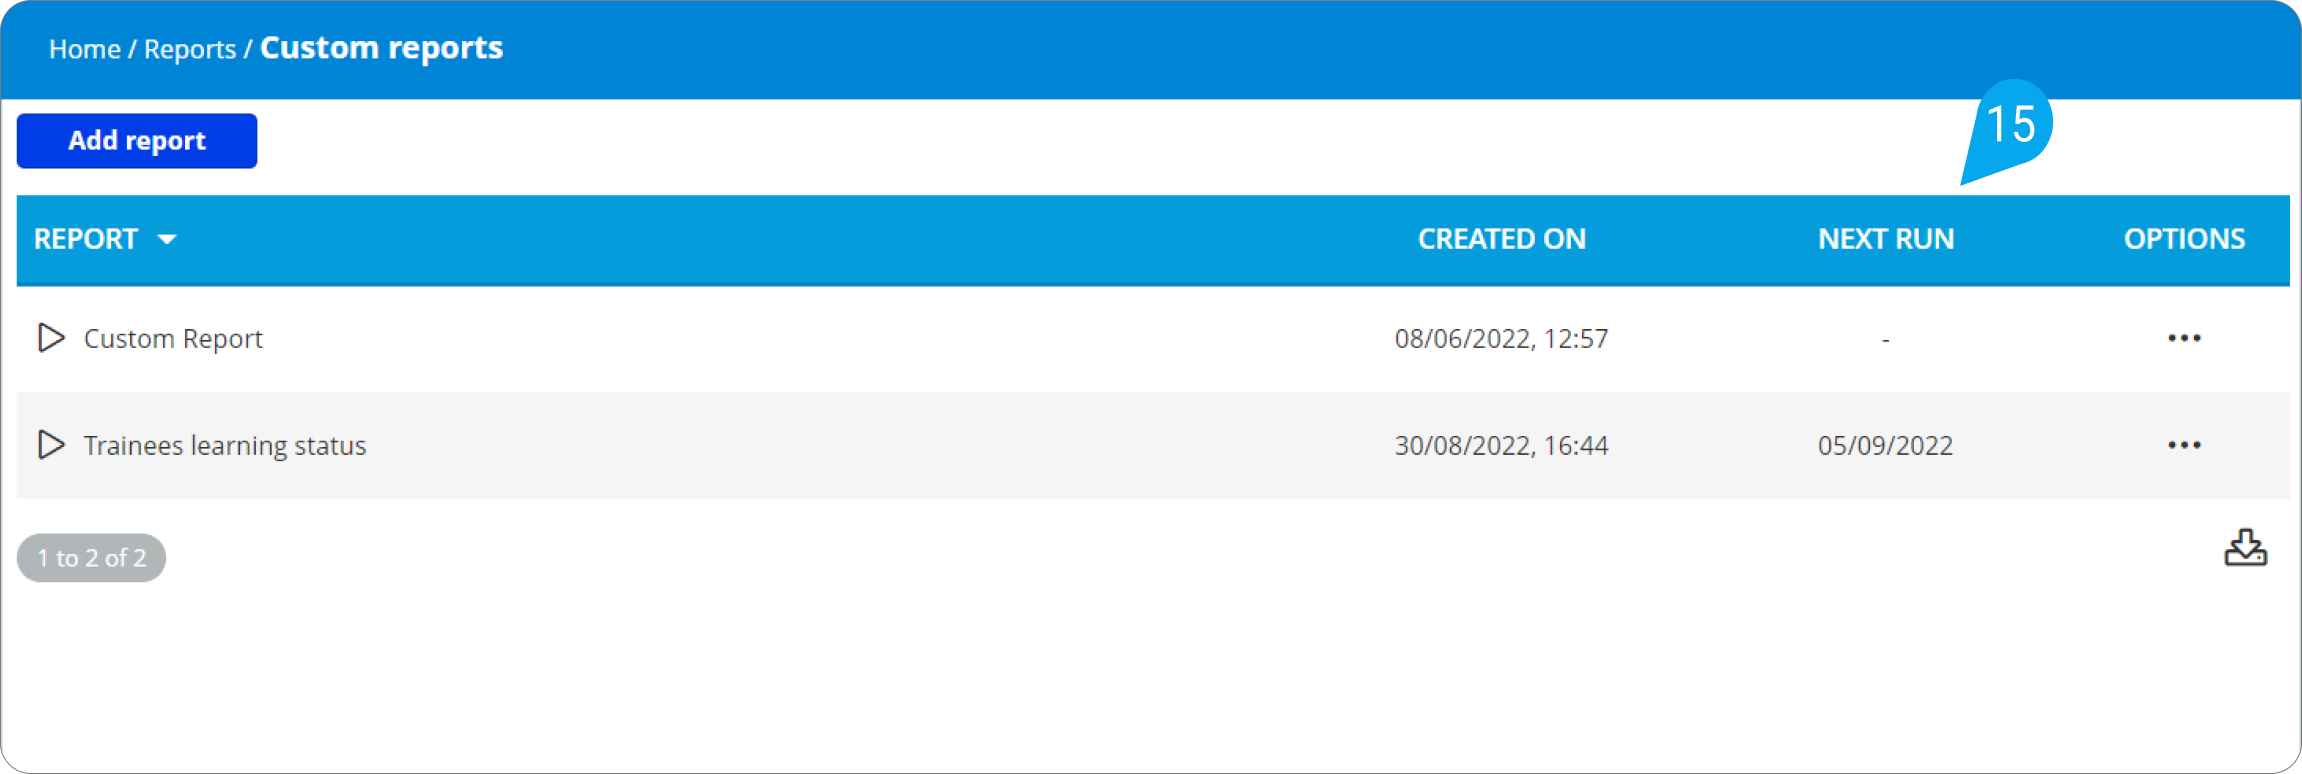
All custom reports will be available on a list, with their name, date of creation, and when they are scheduled to be sent (15).