To set up your first scheduled report:
1. Sign in to your pcl.LMS account as Administrator and go to Home > Reports.
2. On the right-hand panel, click the type of report you want to schedule (i.e., User reports, Course reports, etc.).
3. Go to the page of the report you want to schedule.
4. Click the arrow on the green Export in Excel button and, from the drop-down list, choose Schedule (1).

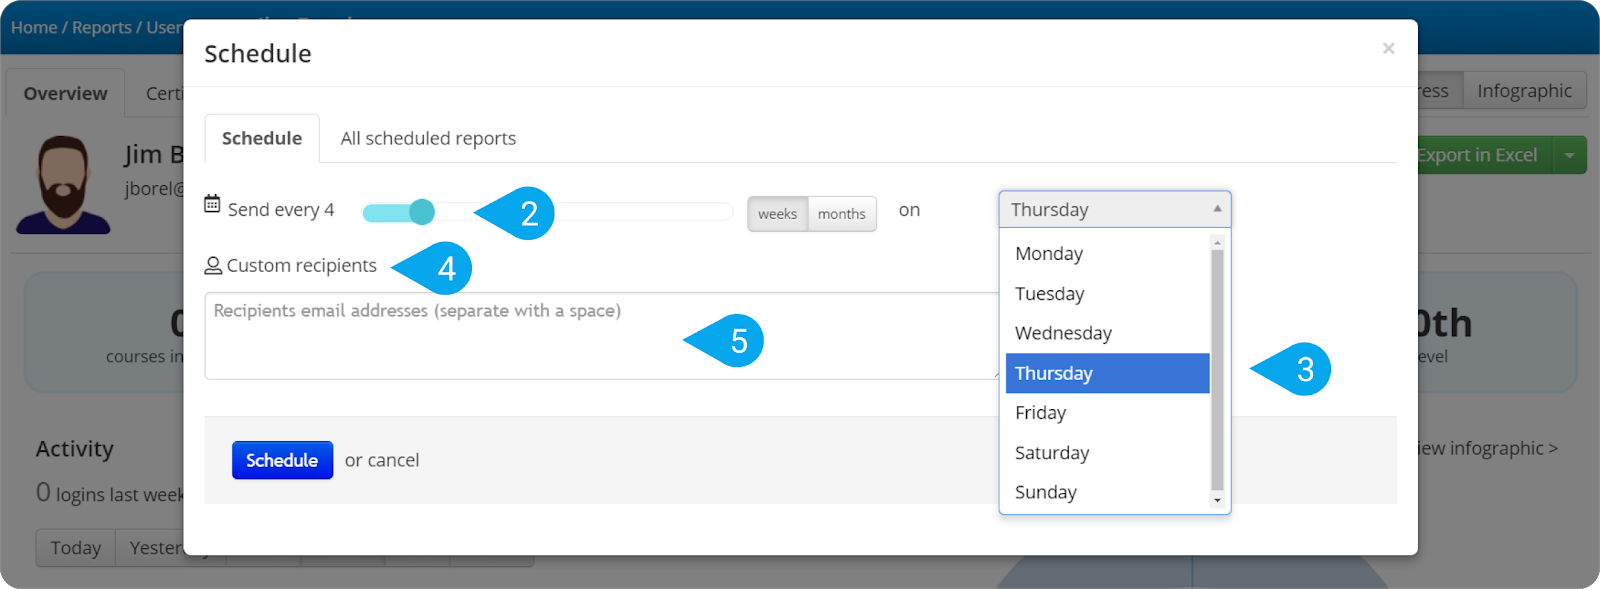
To schedule the report to be sent on a specific day every X weeks:
A. On the slider bar set the email cycle in weeks (2) and, from the drop-down list, choose which day of the week it should begin (3).
B. Click Custom recipients (4) and type the recipients’ email addresses (5). You can separate each email address by hitting space.

| Note: If the day you’ve scheduled your first report for has passed, the first report will be sent out next week. If the day you’ve scheduled your first report for is the same as today, the report will be sent out next week as well. |
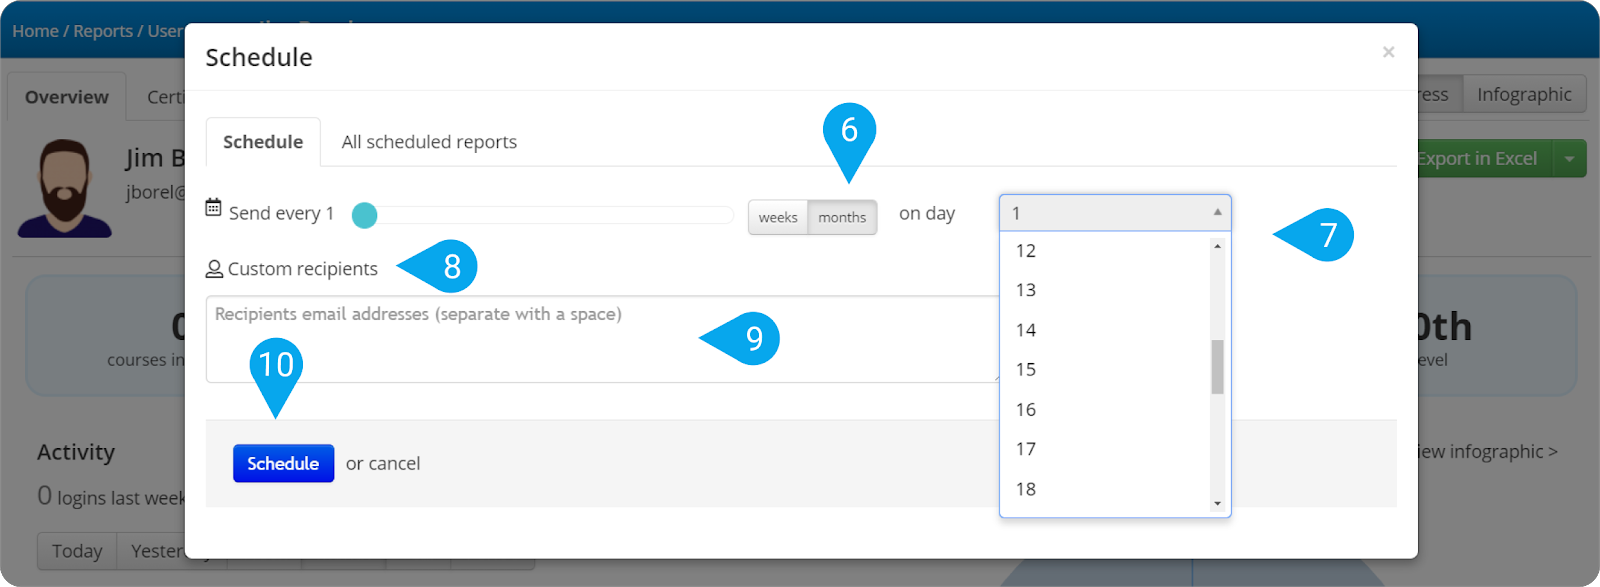
To schedule the report to be sent on a specific date every X months:
A. On the slider bar, set the email cycle in months (6) and, from the drop-down list, choose which day of the month it should begin (7)
B. Click Custom recipients (8) and type the recipients’ email addresses (9). You can separate each email address by hitting space.
Note: You can also add recipients that aren’t registered to your portal. |
Click Schedule (10) to save your settings.

| Notes: 1. If the day of the month you’ve scheduled your first report for has passed, the report will be sent out next month. If the day you’ve scheduled your first report for has not passed, your report will normally arrive within the month. |
From now on, when you click the drop-down arrow symbol (11) on the green Export in Excel button, you will see the date your next scheduled email is expected to arrive along with how often it will be delivered (12).
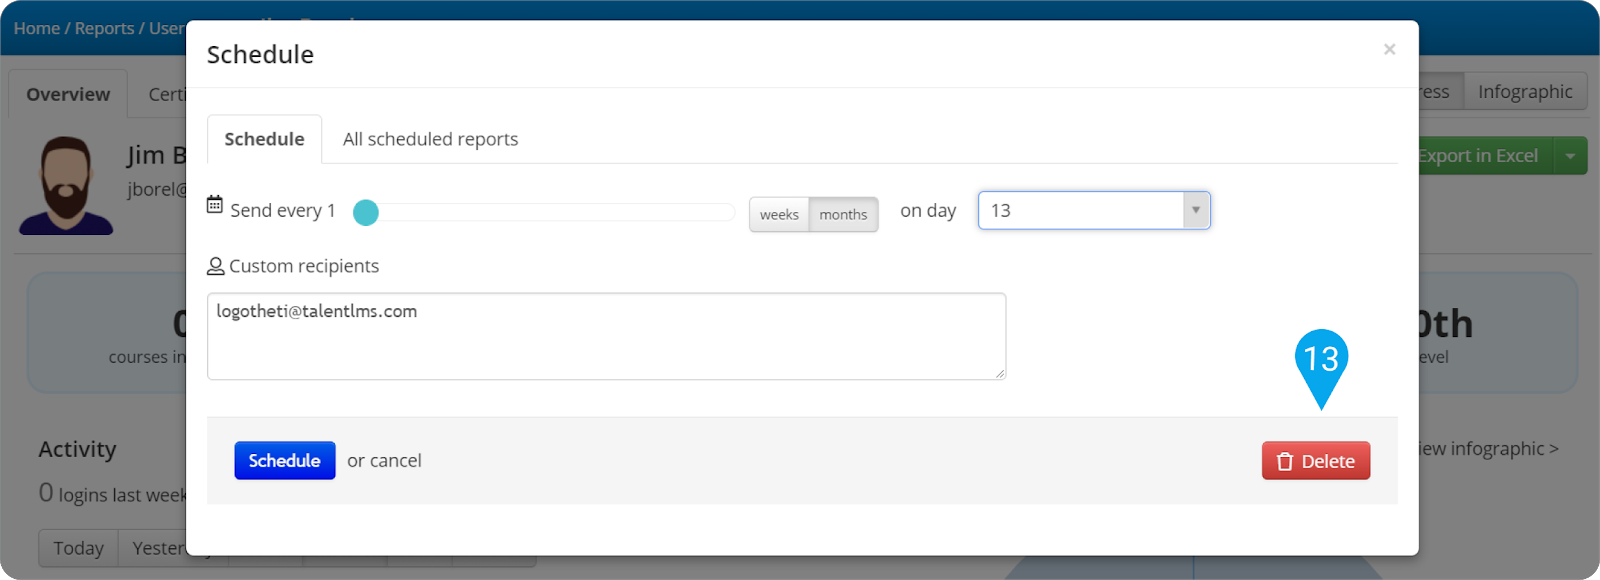
 Click it if you want to edit or Delete (13) your scheduled email.
| Note: For more on scheduled reports, see this article. |