pcl.LMS lets you add instructor-led training units to your courses (classroom-based and webinars) to enhance your users’ learning experience.
We’ve broken down the process of creating an ILT training event into four steps:
Step 1: Add an ILT unit to a course
Step 2: Create an ILT session
Step 3: Register users to an ILT session
Step 4: Manage registered users
Let’s start!
Step 1: Add an ILT unit to a course
1. Sign in to your pcl.LMS account as an Instructor and go to the page of the course you want to update.
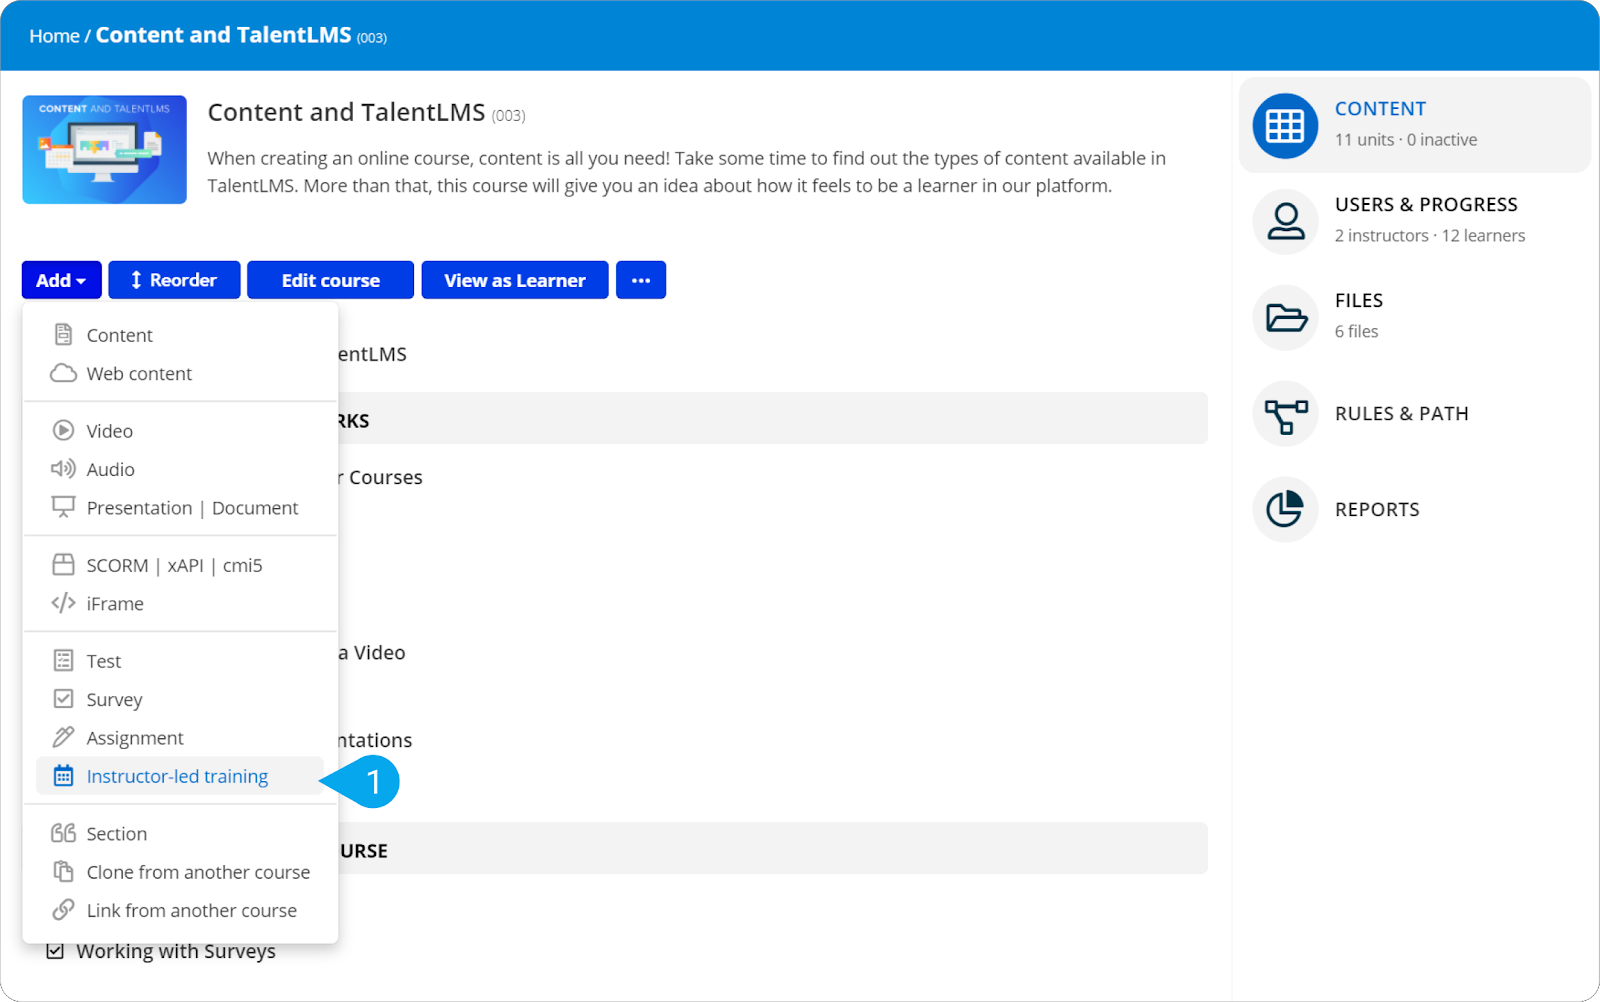
2. Click Add. From the drop-down list, choose Instructor-Led Training (1).
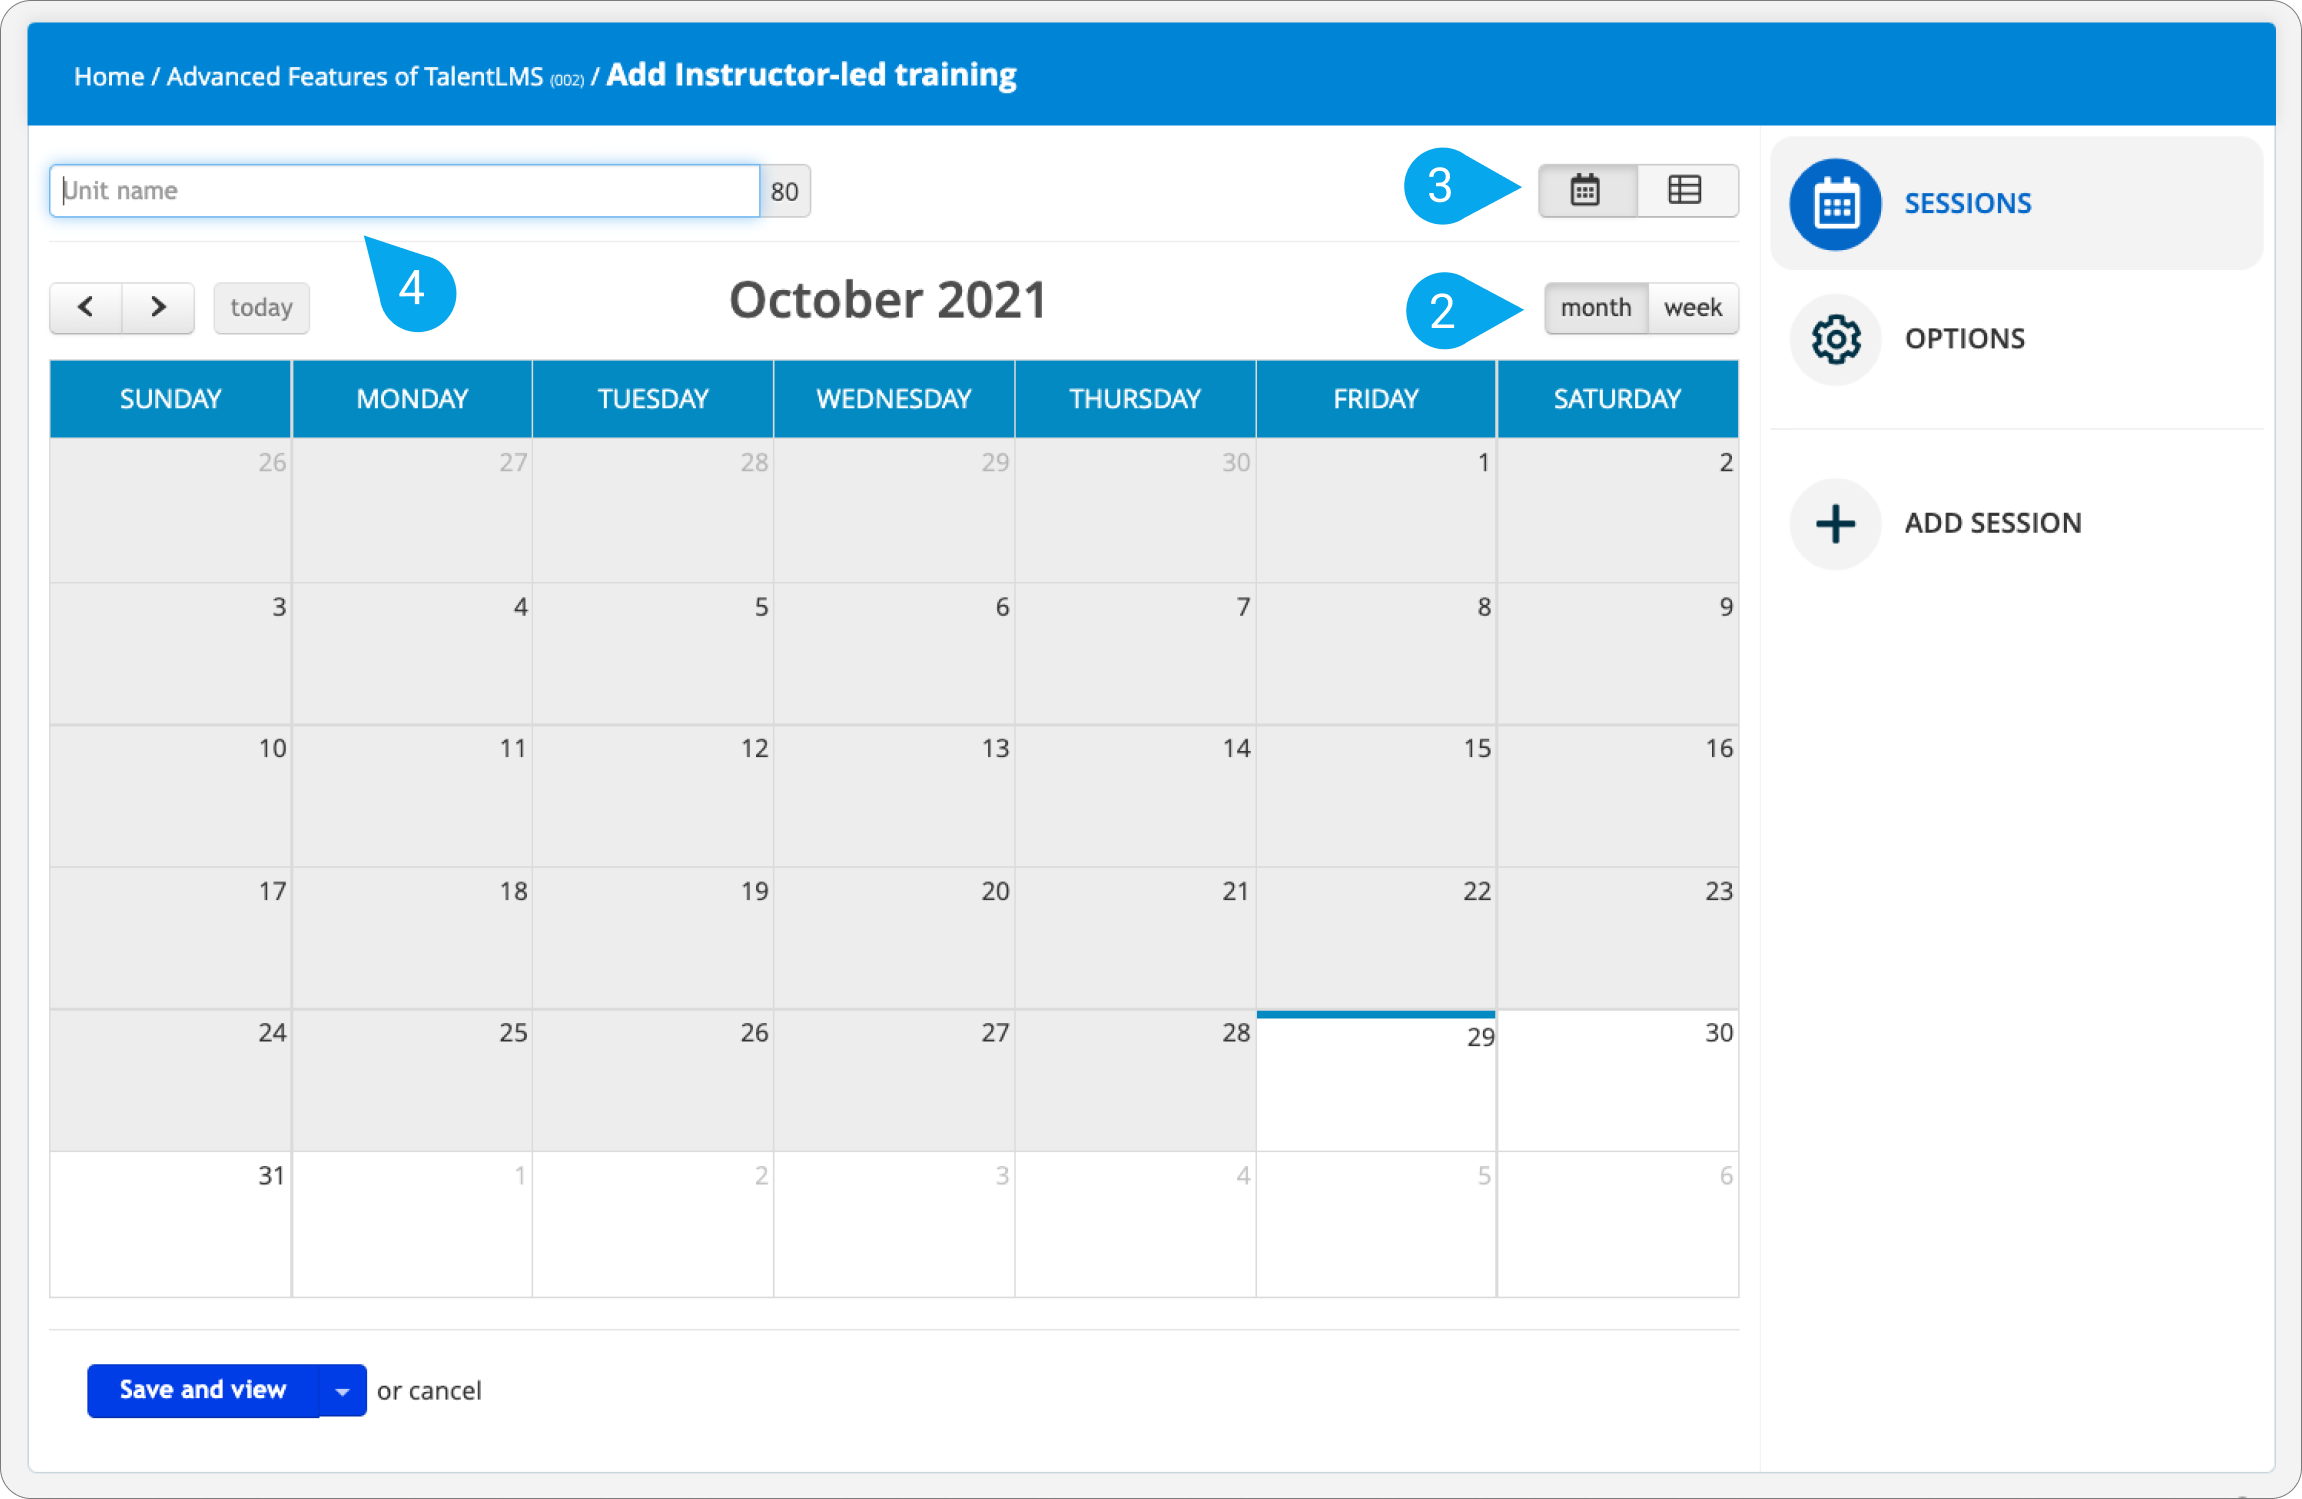
On the default Add Instructor-Led Training page, you see a monthly calendar view set to the current month. Before you proceed, take a moment to check out your options:
- Use the arrows to change months on the calendar.
- On the month/week (2) switch, click week, to see the current week instead. Again, use the arrows to navigate between weeks.
- On the calendar/list (3) switch, click the list symbol to change from the calendar to list view.
- Click the calendar symbol to return to the calendar view.
- On the month/week switch, click month to see the current month.
3. In the Unit name (4) field, type a name for your ILT unit (e.g., My first ILT).
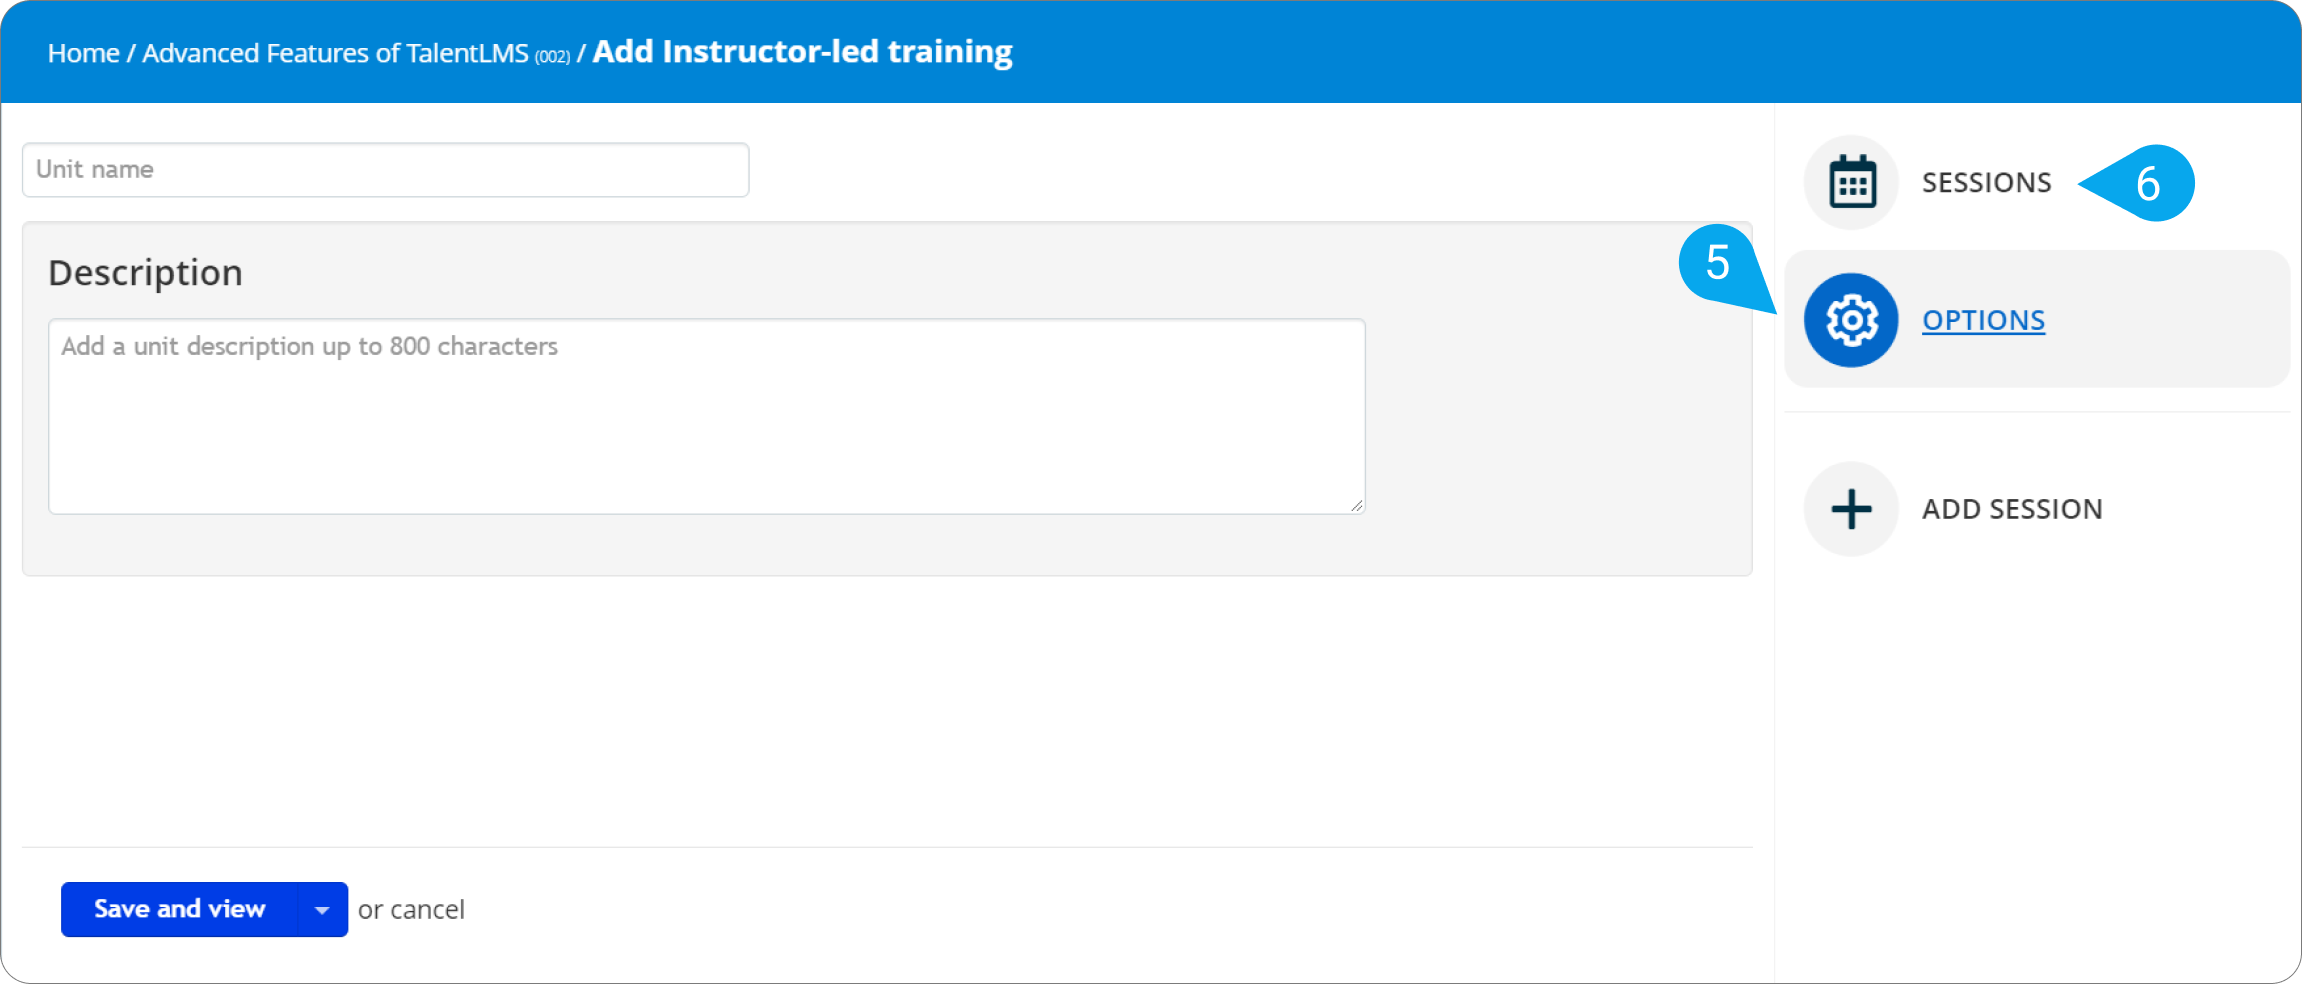
4. 4. In the Options (5) field, type a description for your ILT unit (e.g., Meeting for questions) and go to Sessions (6) to add your ILT session.
Step 2: Create an ILT session
1. If you have just added a unit description as above, click Add session.
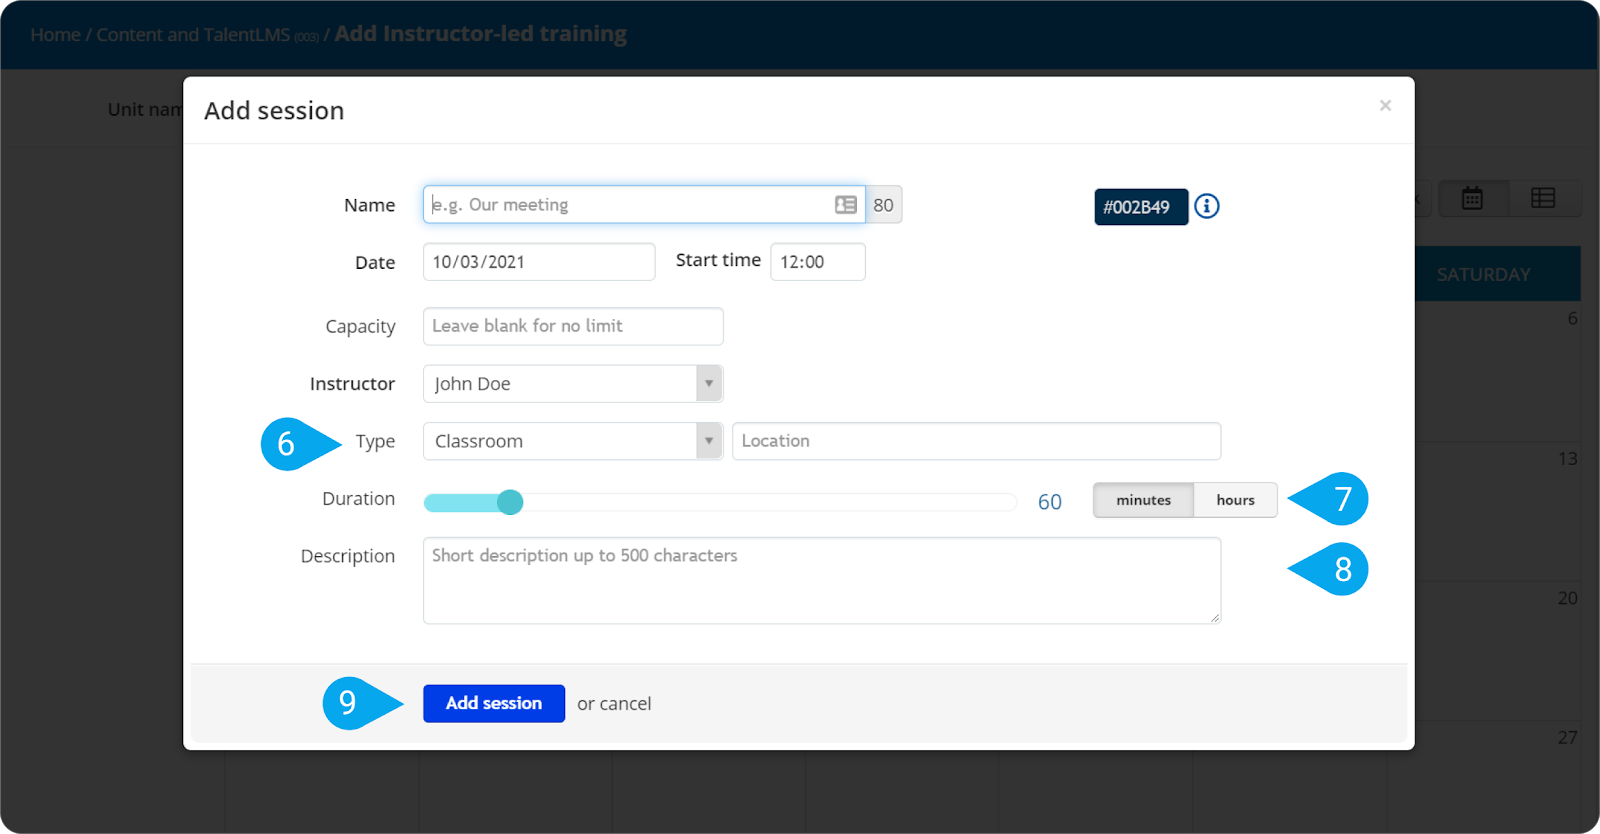
2. On the Add session dialog box, type a Name (1) for your session (e.g., My first ILT - Session 1).
3. Next to the Name (1) field, there’s a color field. From there, you can change the session’s color on the calendar.
4. The Date (2) field is already set with the date you’ve clicked on the calendar. If you need to change it, just type your new date.
| Note: You can also select past dates (up to one year back from the current date) to add important data from old training programs to your current database. This is available for both classroom-type sessions and webinars. When you choose a past date for a webinar you cannot click “Create a new webinar” since the Join link to attend is not needed. |
5. In the Start time (3) field, select the time you want your session to start.
6. In the Capacity (4) field, add the number of the available seats in your session. If your session has limitless seating, leave the field blank.
| Note: Our integrated conference tool allows you to host a session for up to 40 users (1 Instructor + 39 learners). |
7. From the Instructor (5) drop-down list, choose a person to conduct the ILT session.
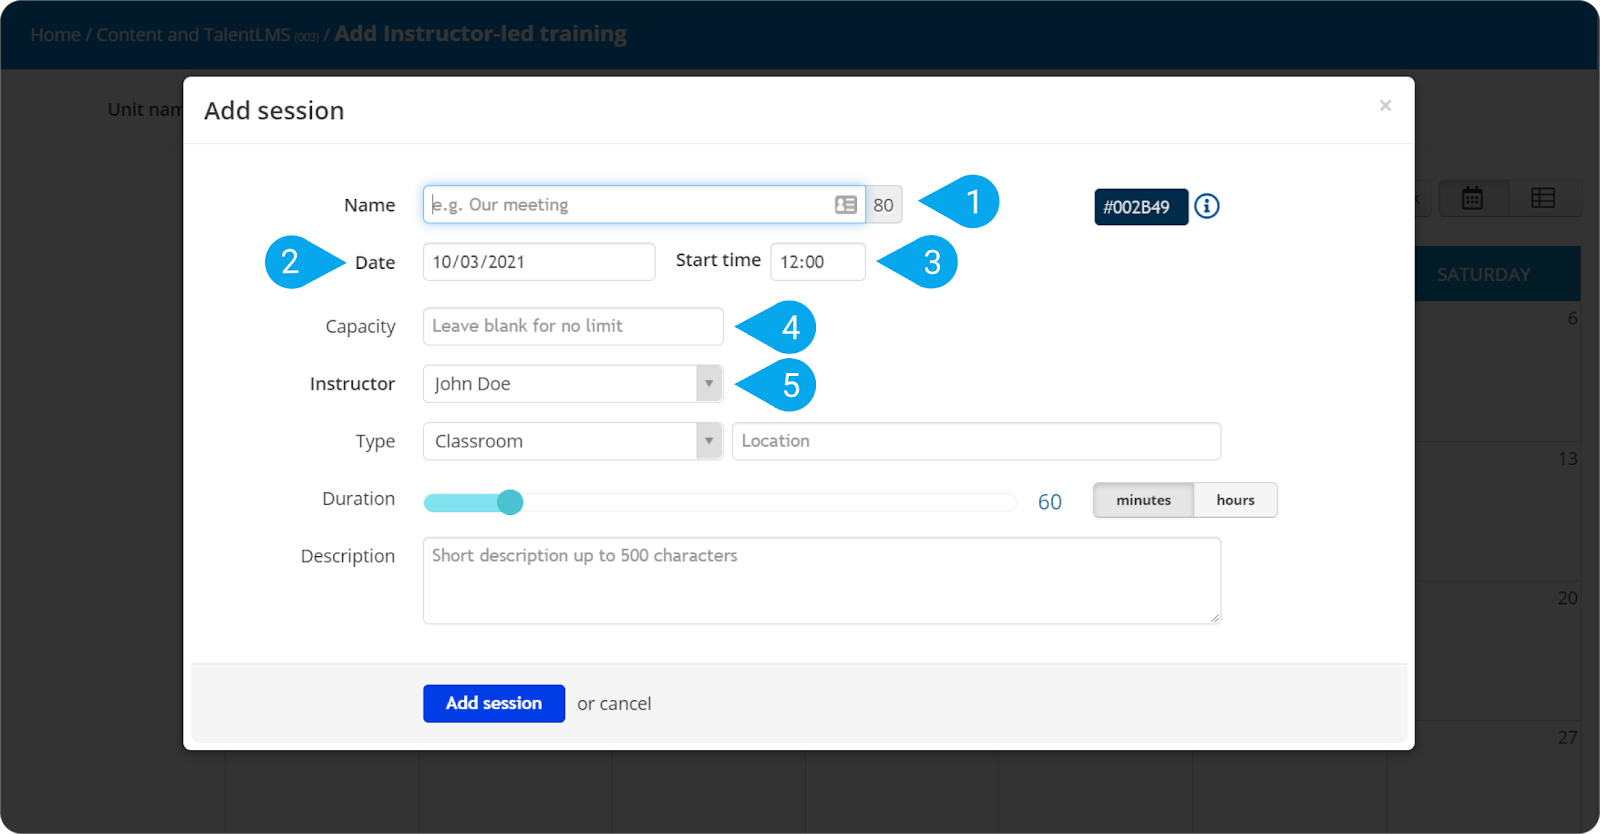
8. Choose your ILT Type (6):
- If you choose Classroom, type a Location in the respective field.
- If you choose Webinar, check Create a new webinar to use the pcl.LMS-BigBlueButton integration as a video-conference medium for your session. The same stands for the case that you have integrated any of the supported tools, GoToMeeting/Training/Webinar, Zoom and Microsoft Teams. To use another video-conference tool of your choice, leave that option unchecked.
| Note: When you check Create a new webinar, certain limits apply to the Start time, Capacity, and Duration values. Also, after saving the session, you cannot clone it, and you cannot edit the Type, Capacity or Duration values. |
9. Set the duration of your session by using the Duration (7) slider. You can either set it in minutes or hours (choose by clicking the minutes/hours switch).
10. In the Description (8) text area, describe your ILT session in brief.
11. Click Add session (9) to save your changes.
12. Now, click the session name on the calendar. A pop-over box appears with the session details and the options to Edit it, Clone it or manage the registered Users (1).
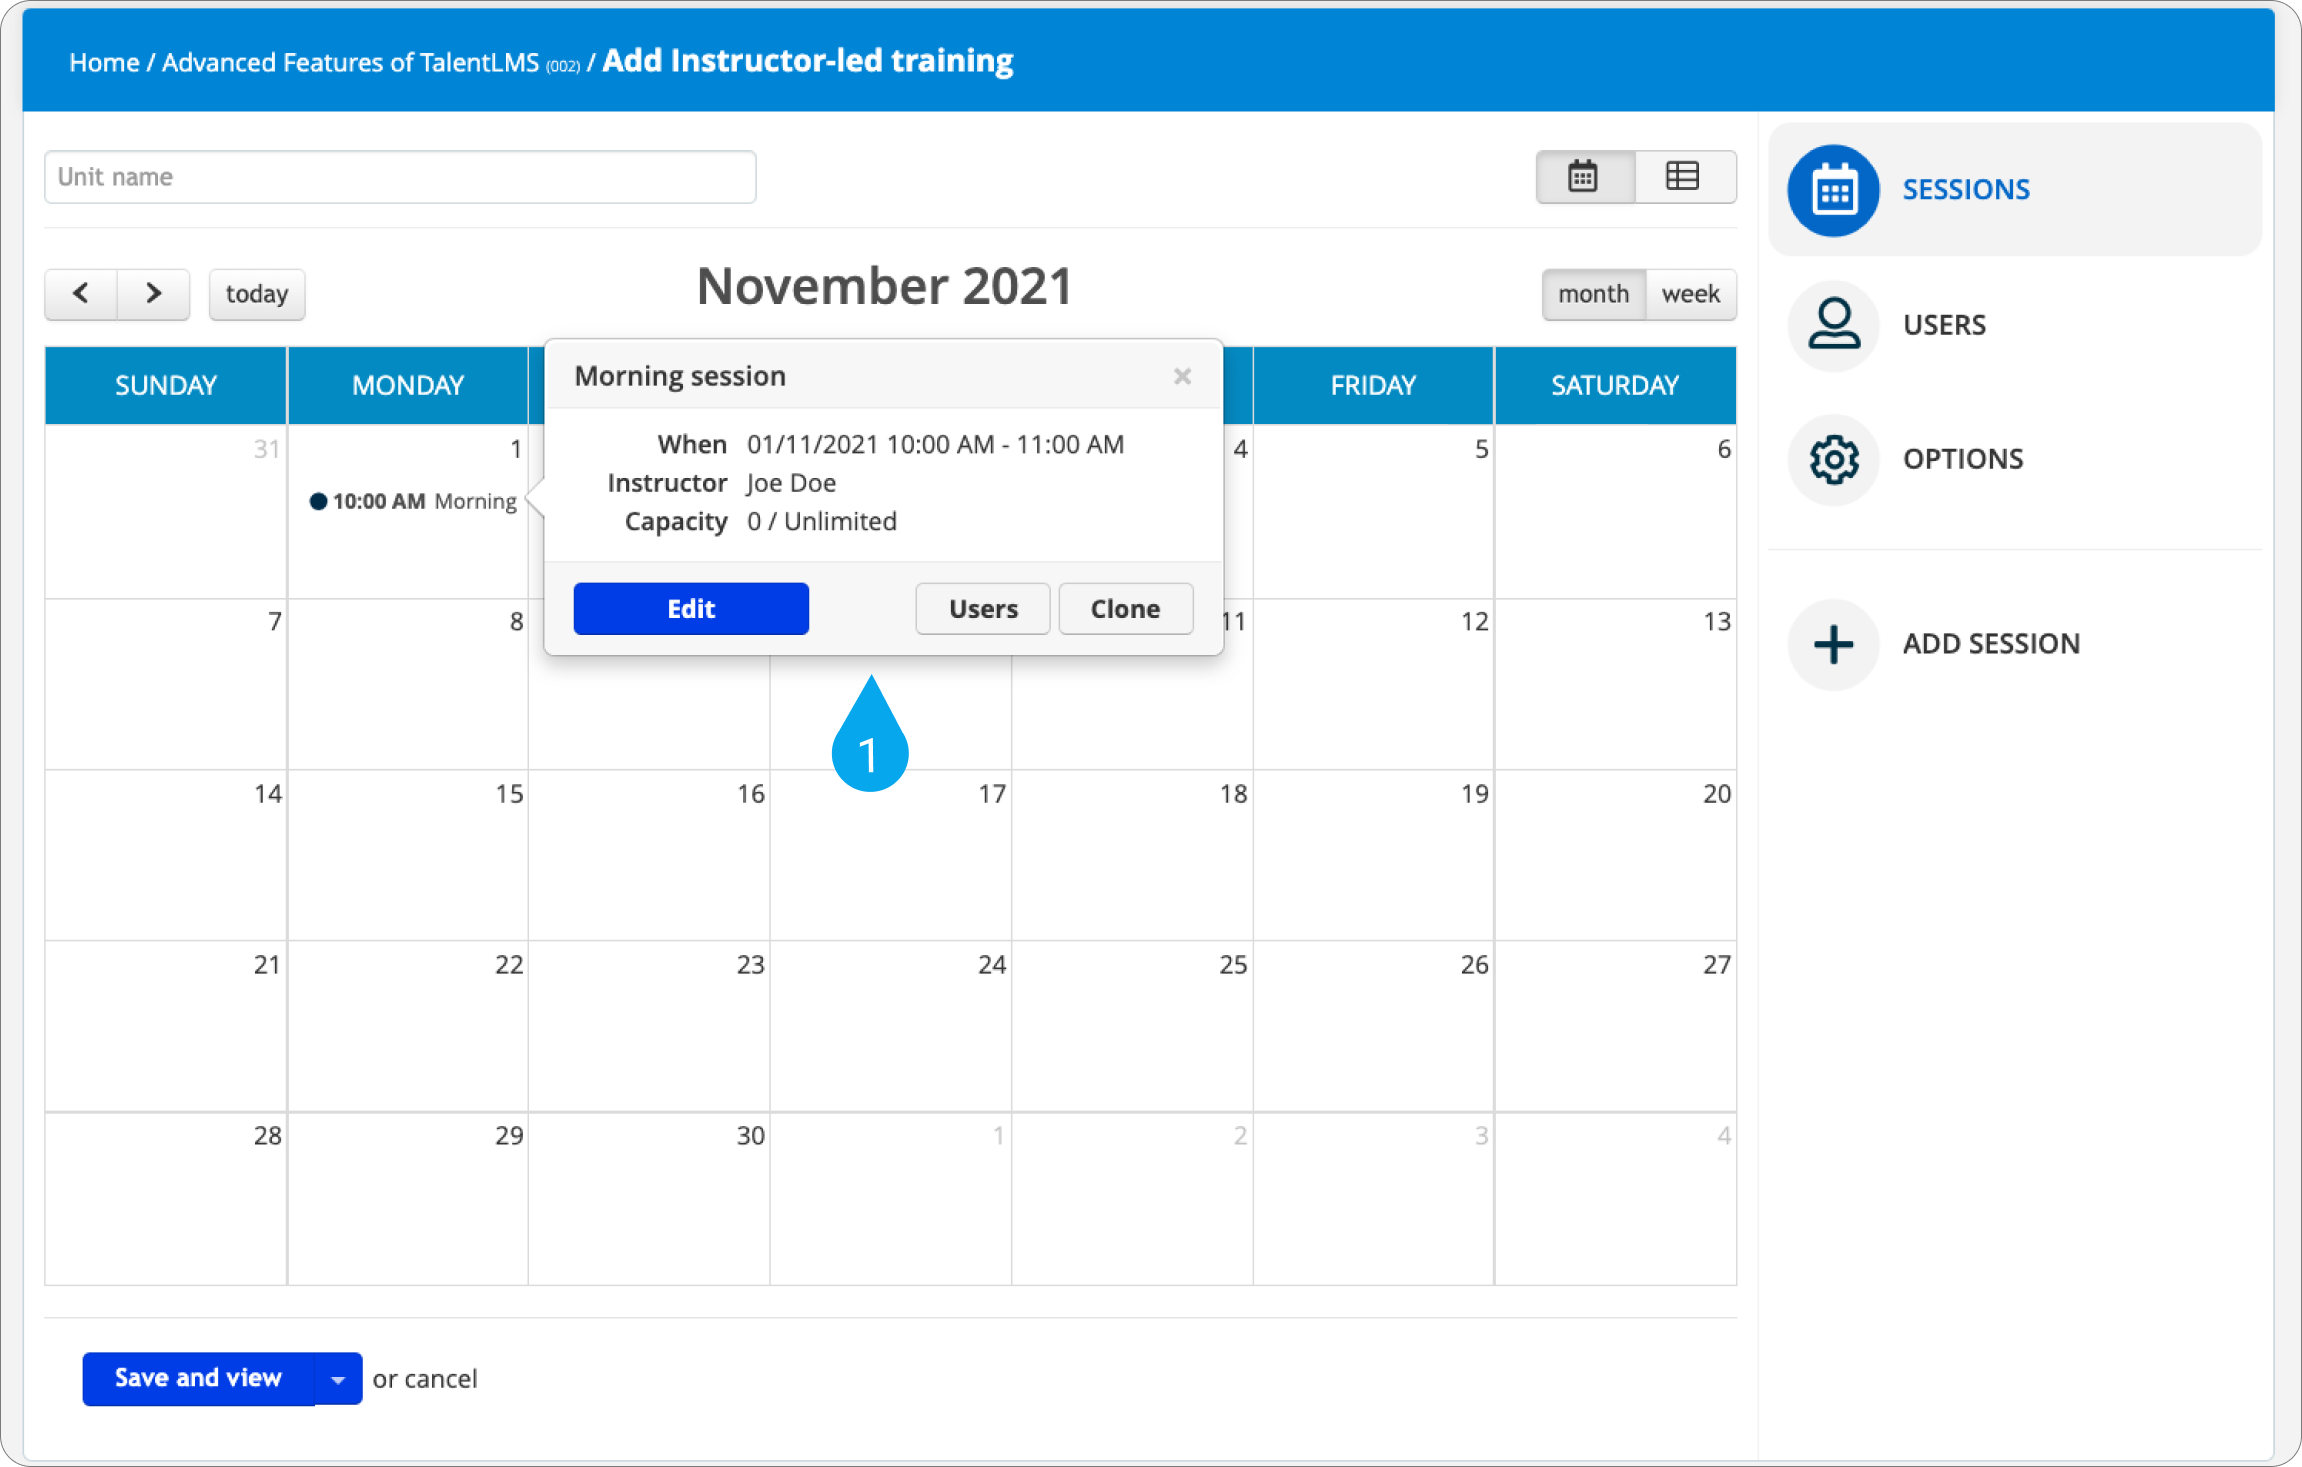
| Note: To delete a session, you have to change to list view (click the list symbol on the calendar/list switch) and click the delete symbol. |
13. Click Save and view.
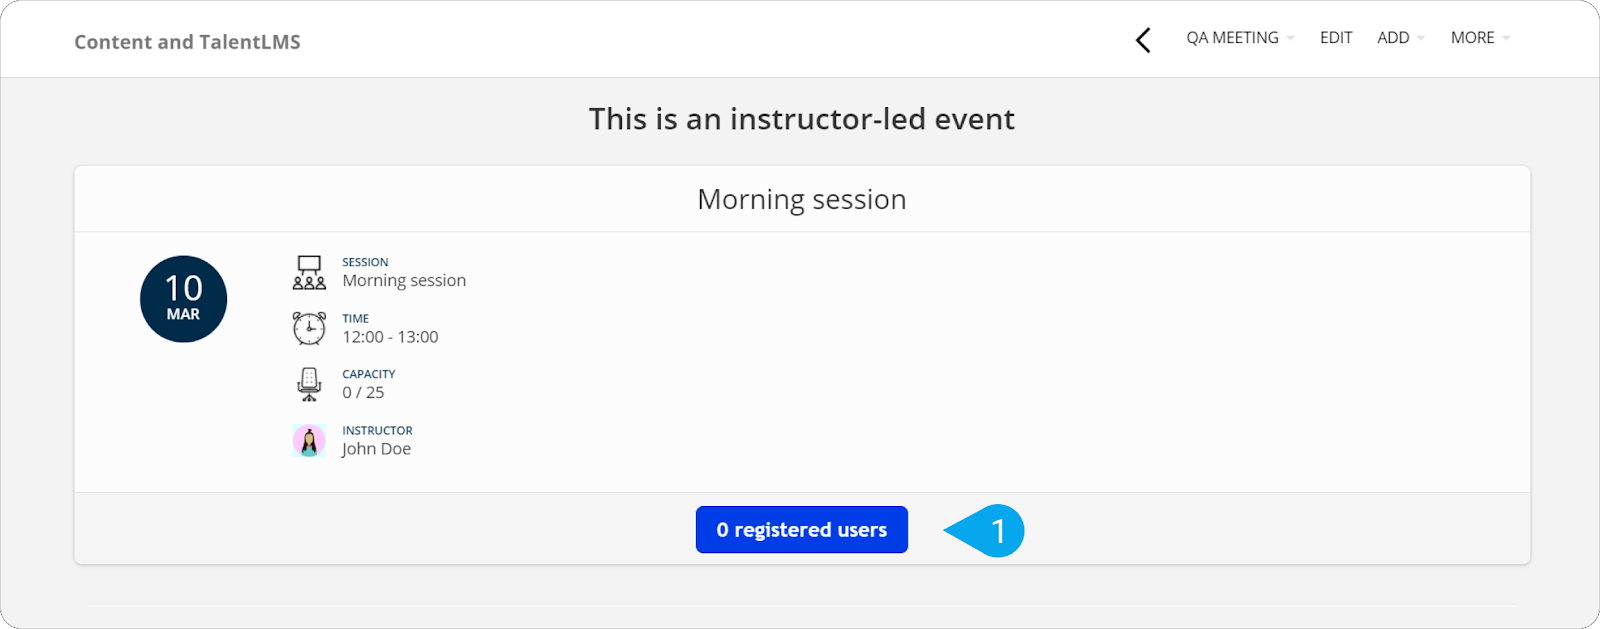
You’re taken to your new unit (My first ILT) on the course view page where you see the session details, and a button labeled 0 registered users (1).
| Note: On their calendar, learners can also click to view the session details on a pop-over box. For webinars, they are given the option to Join the virtual classroom when it’s time to attend. The Join button is active 15 minute before the webinar starts and throughout all the duration of the webinar. Learners can also export the session details to an external calendar application. |
| Note: On the course view page, learners can view all the available sessions for an ILT unit, and click Register to add a session to their calendar (they can also unregister if necessary). Expired sessions and those in full capacity are excluded. |
| Note: For your learners to be able to access the ILT, please ensure they have the permission "Conferences" checked on their user type. |
Step 3: Register users to an ILT session
Right now, your new session has no registered users.
1. Click the 0 registered users button.
You’ve taken to the All users (1) tab on the unit’s Users page where you can see all the users enrolled in the current course.
2. Use the drop-down list in the Session (2) column to manually register users to your session. You can also add mass users to the ILT session. Find here how to do it.
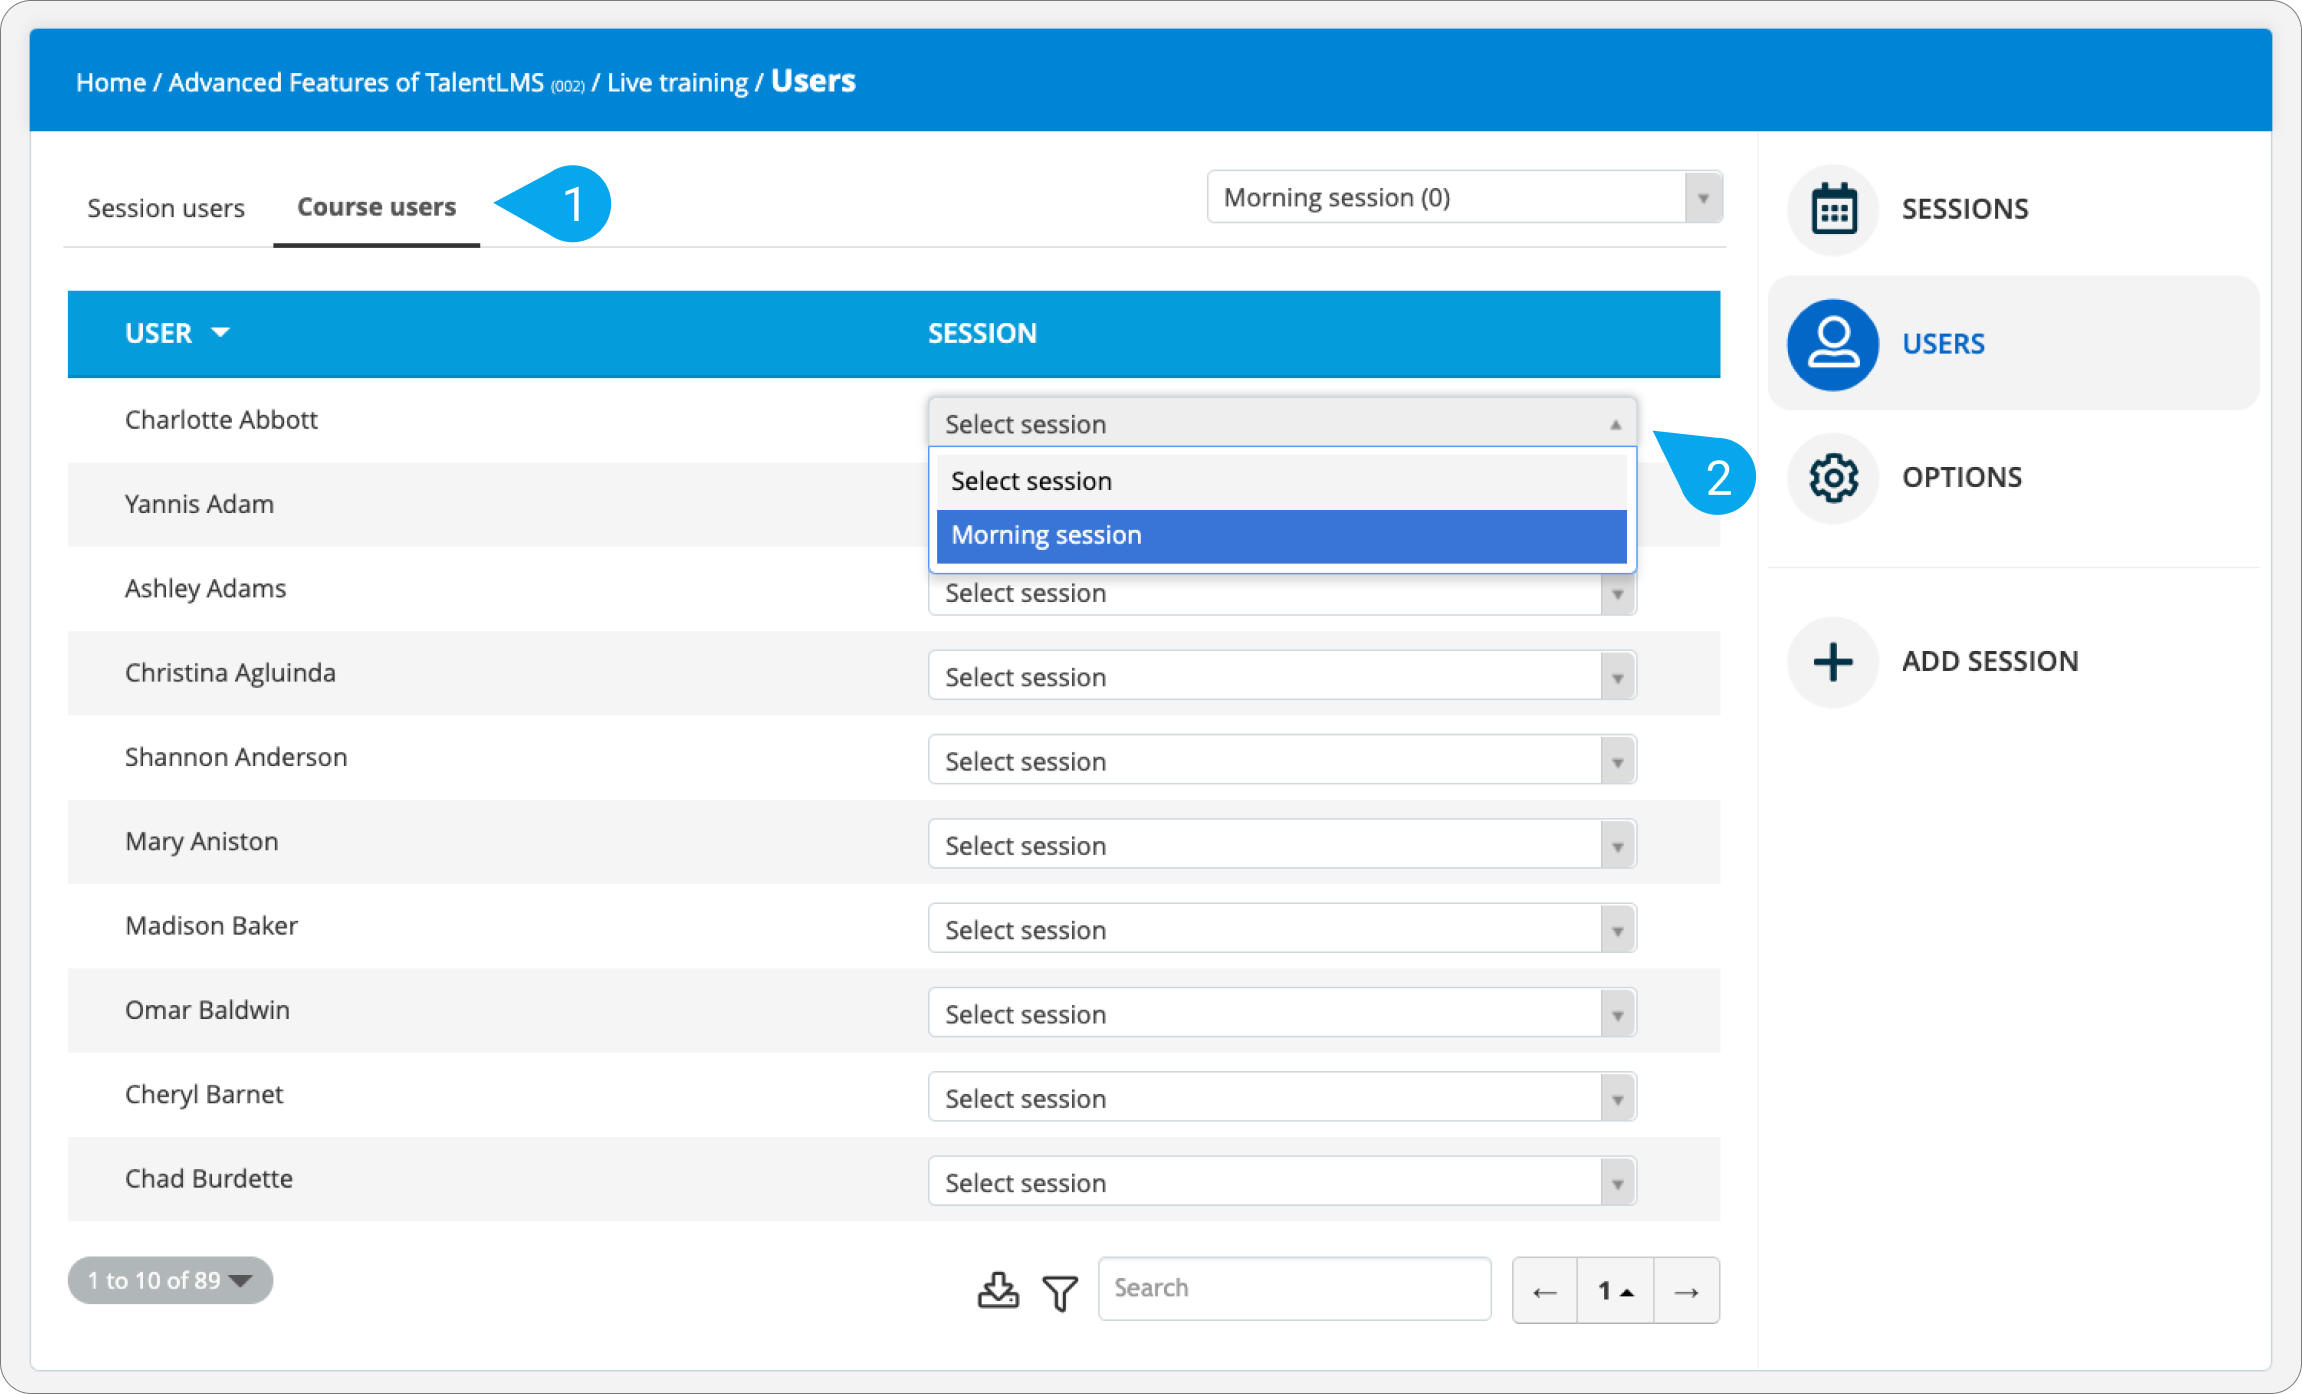
| Note: If you have returned to the ILT unit page, click Users on the Edit/Users switch and go to the All users tab. |
Step 4: Manage registered users
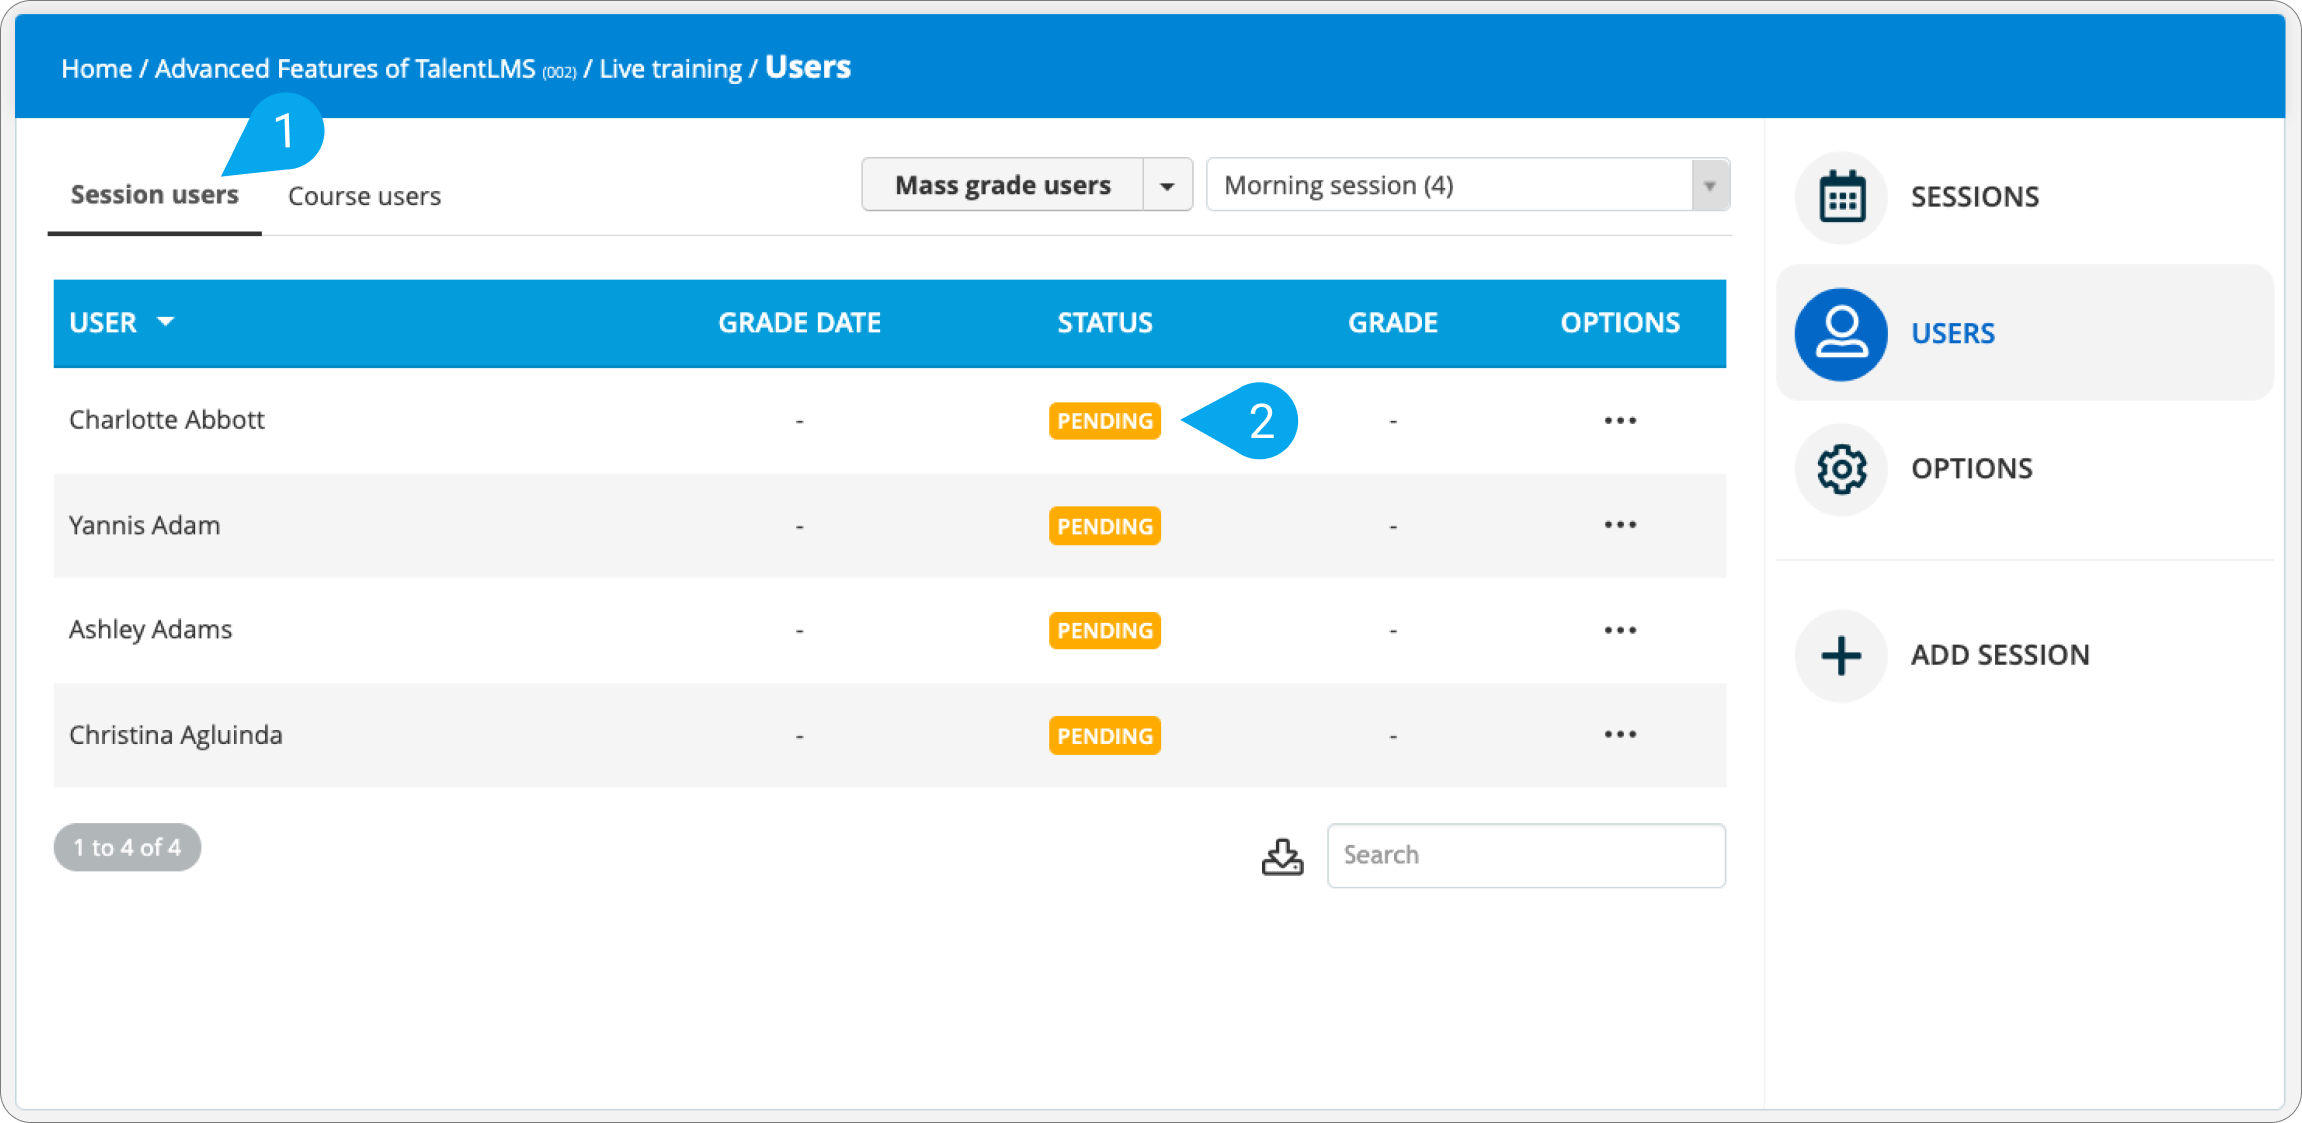
1. Go to the Session users (1) tab and choose your new session (i.e., My first ILT - Session 1)from the drop-down list. Here, you can see all the registered users, their status and their grade (optional). Right now, all the users’ status is labeled as “Pending”.
2. Choose a user, and click Pending (2) to open the Set status & grade dialog box.
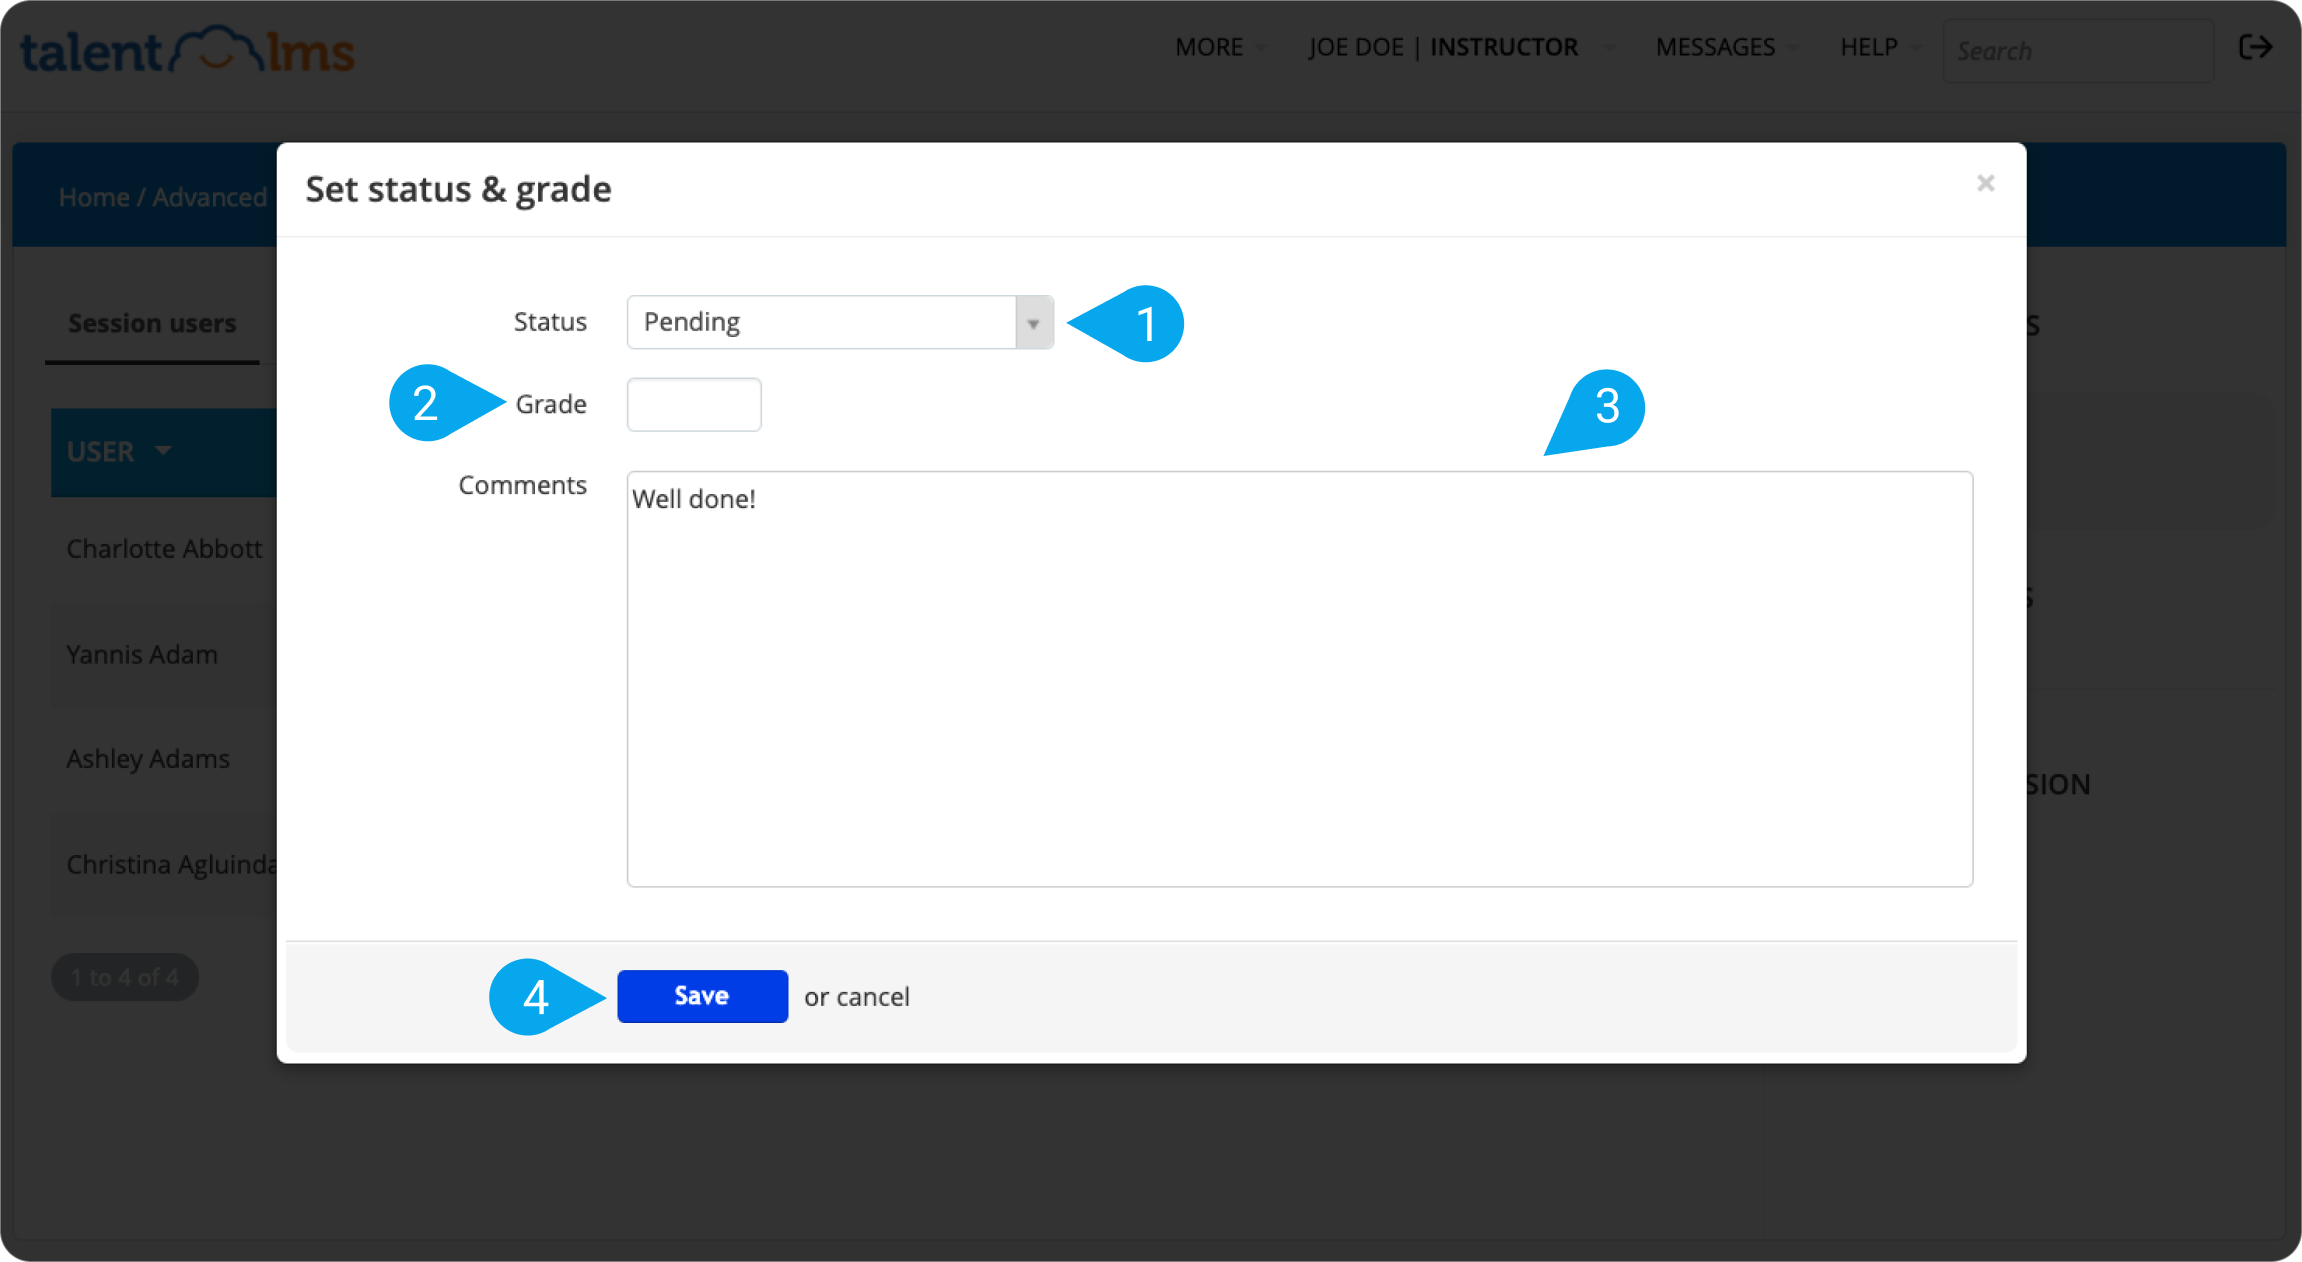
3. Change the user’s Status to Passed or Not passed (1). Optionally, you can give them a Grade (2) and add your feedback in the Comments (3) text area.
4. Click Save (4) to update your user’s status.
| Note: You can also change the status of multiple users at once. Click Mass grade users to launch the respective dialog box, and group them by status from the For users with the status drop-down list (for more on mass grading see this article). |
You can also send automated emails to your learners, Instructor, and account owner to notify them of specific events. This article shows you how to do that.