In this article, you’ll learn:
A. How to add your own tags
- To a file in a course
- To a file in a Group
- To a file in a Branch
- To a file shared with a User
B. How to use the auto-generated file-type tags
You can add tags to files in a Course, Group, Branch, or User. They all follow a similar pattern. The tag is applied across any page that includes this file. For example, if you've added a file in a course and a Group and added the tag from the course, the tag will also be visible to the Group.
- How to add a tag to a file in a Course:
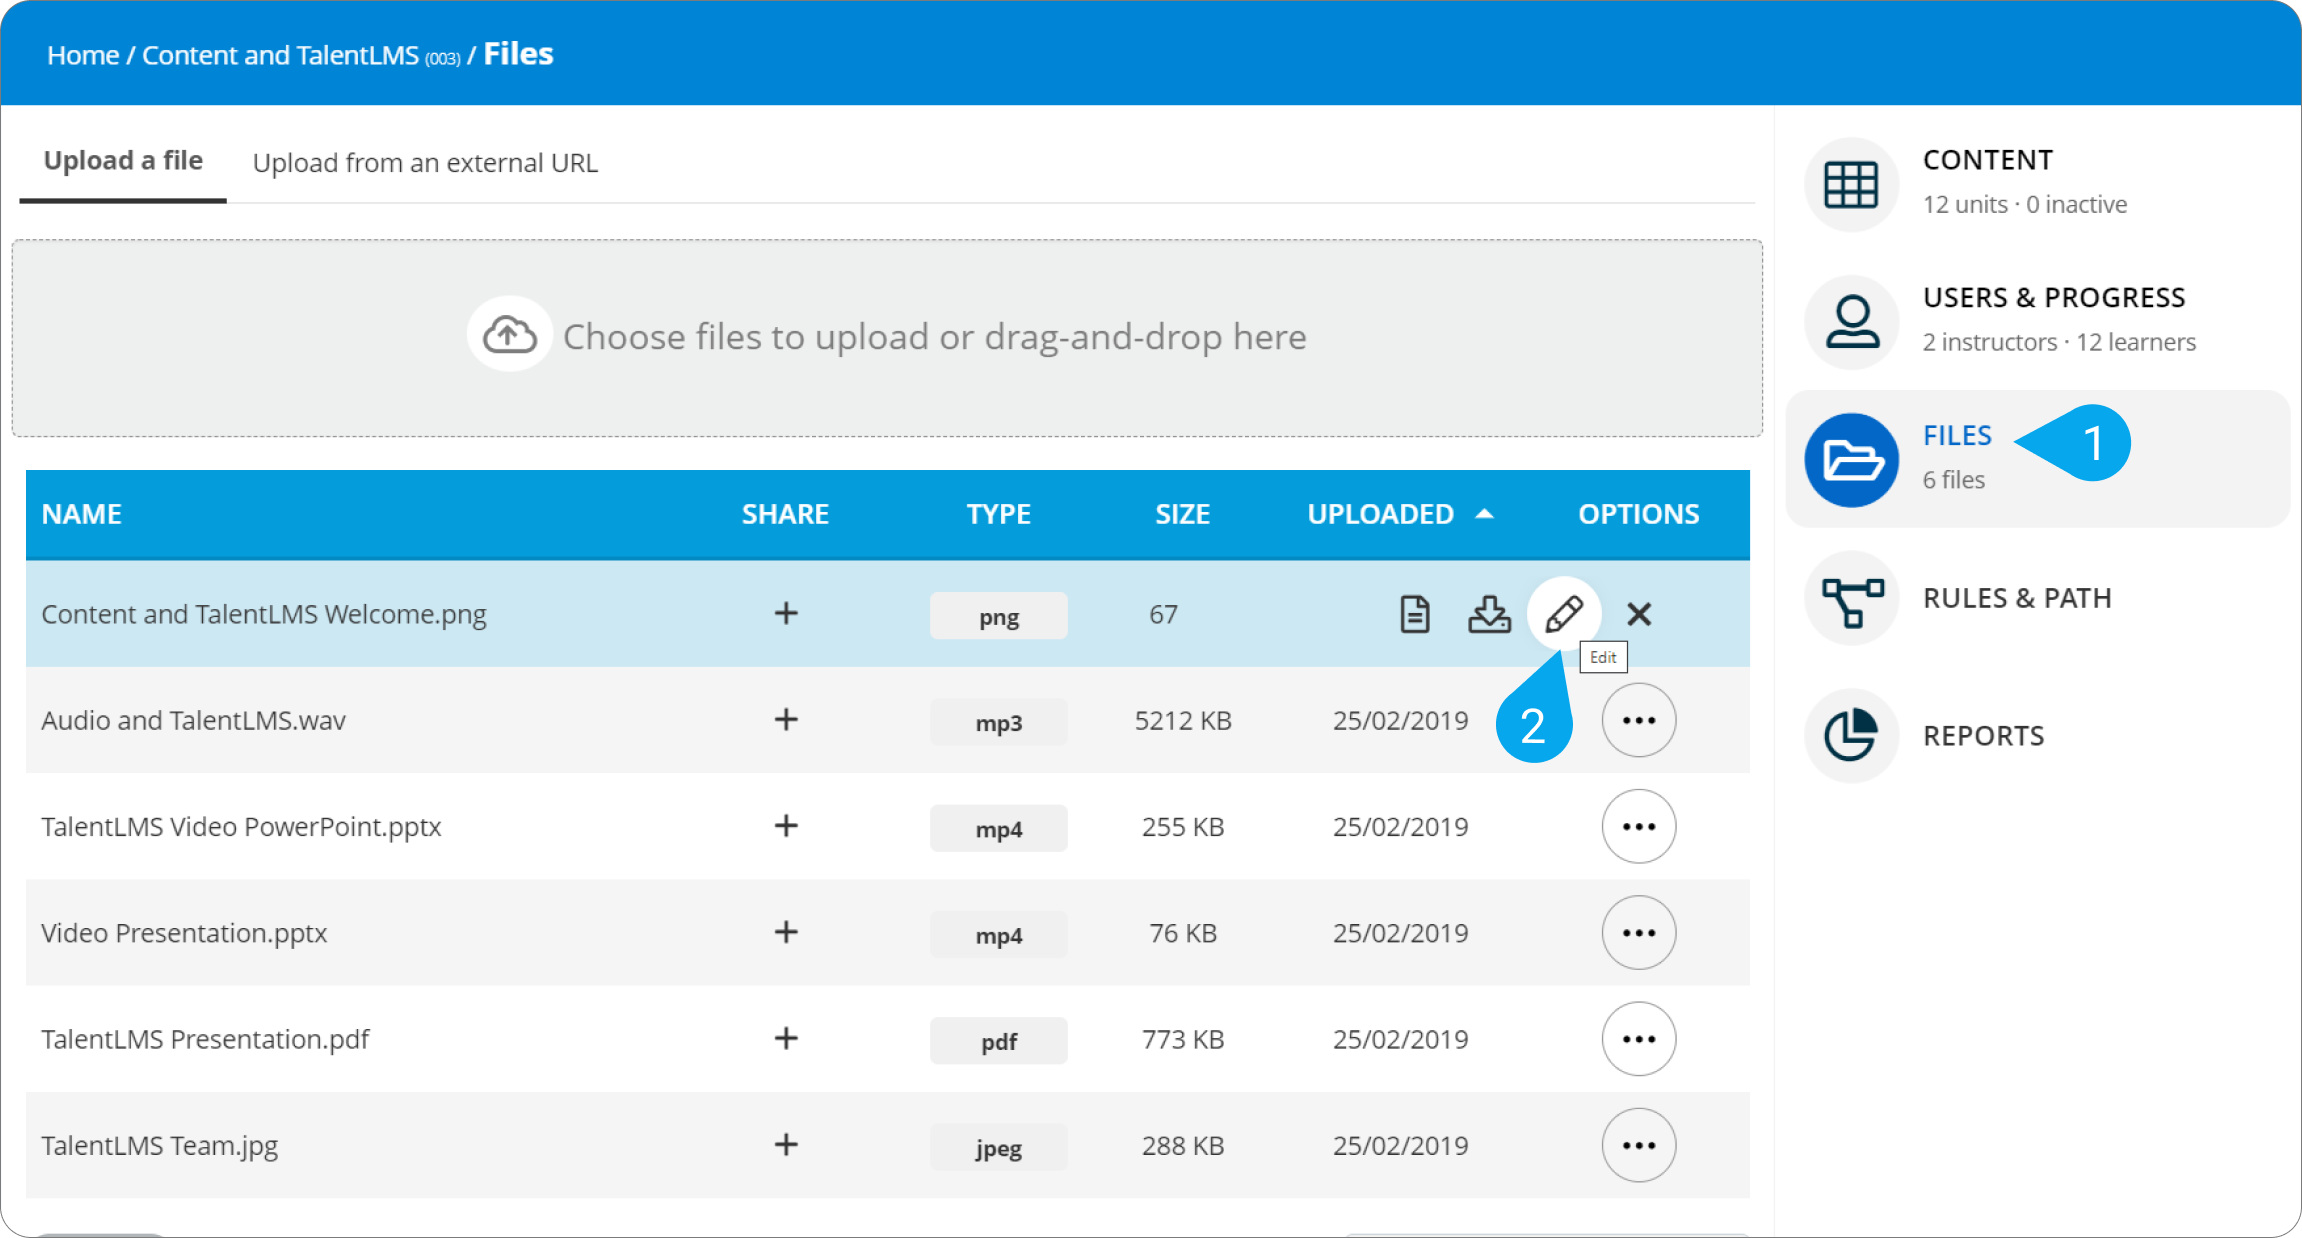
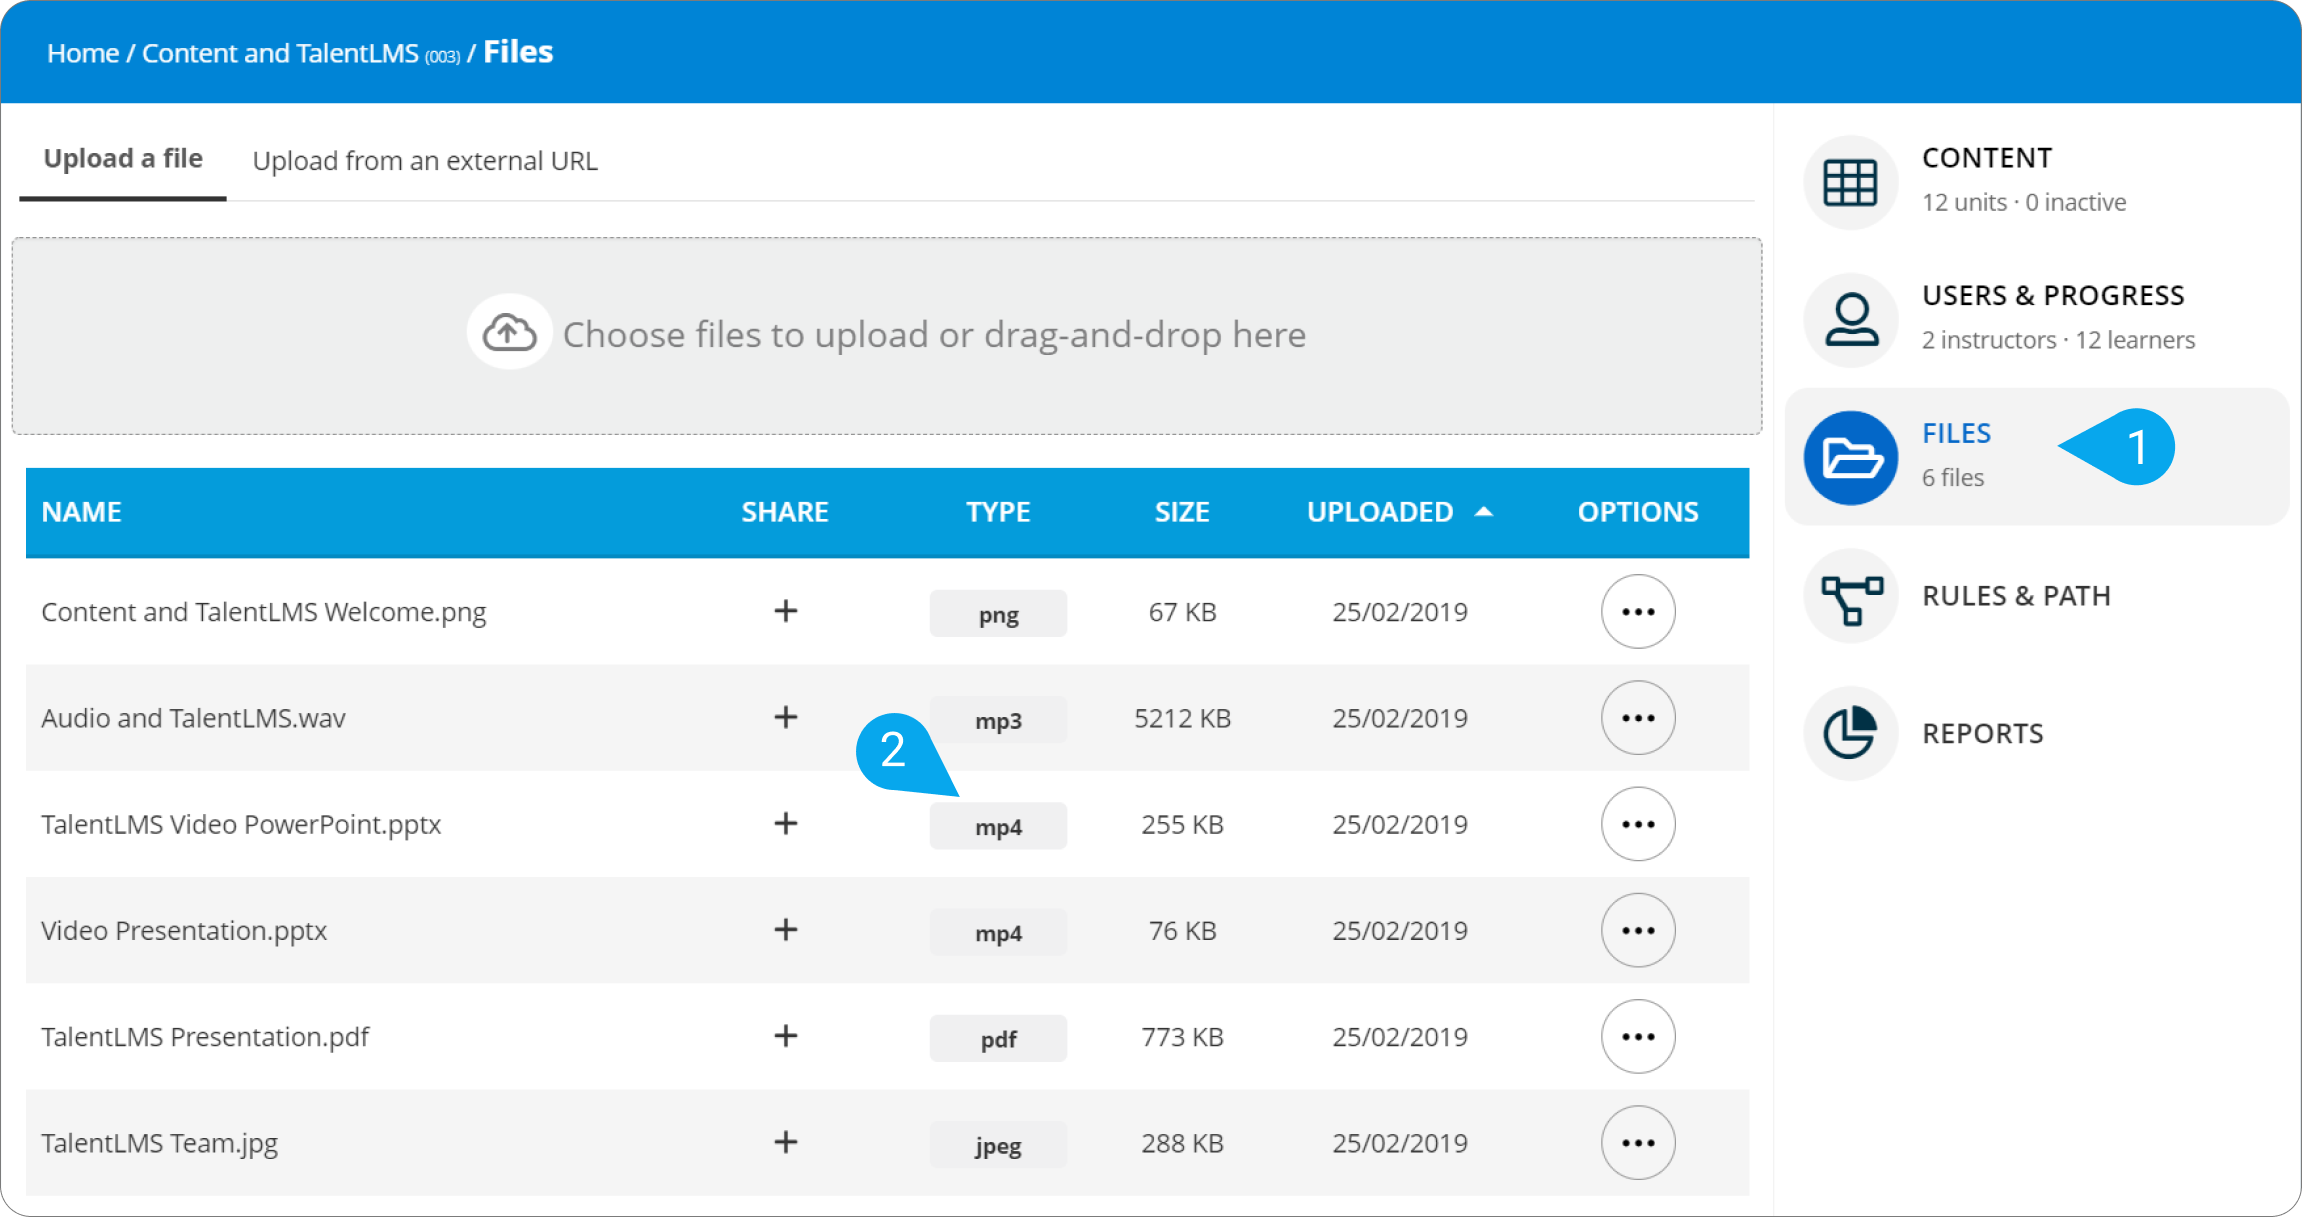
1. Sign in to your pcl.LMS account as an Instructor and go to a course page.
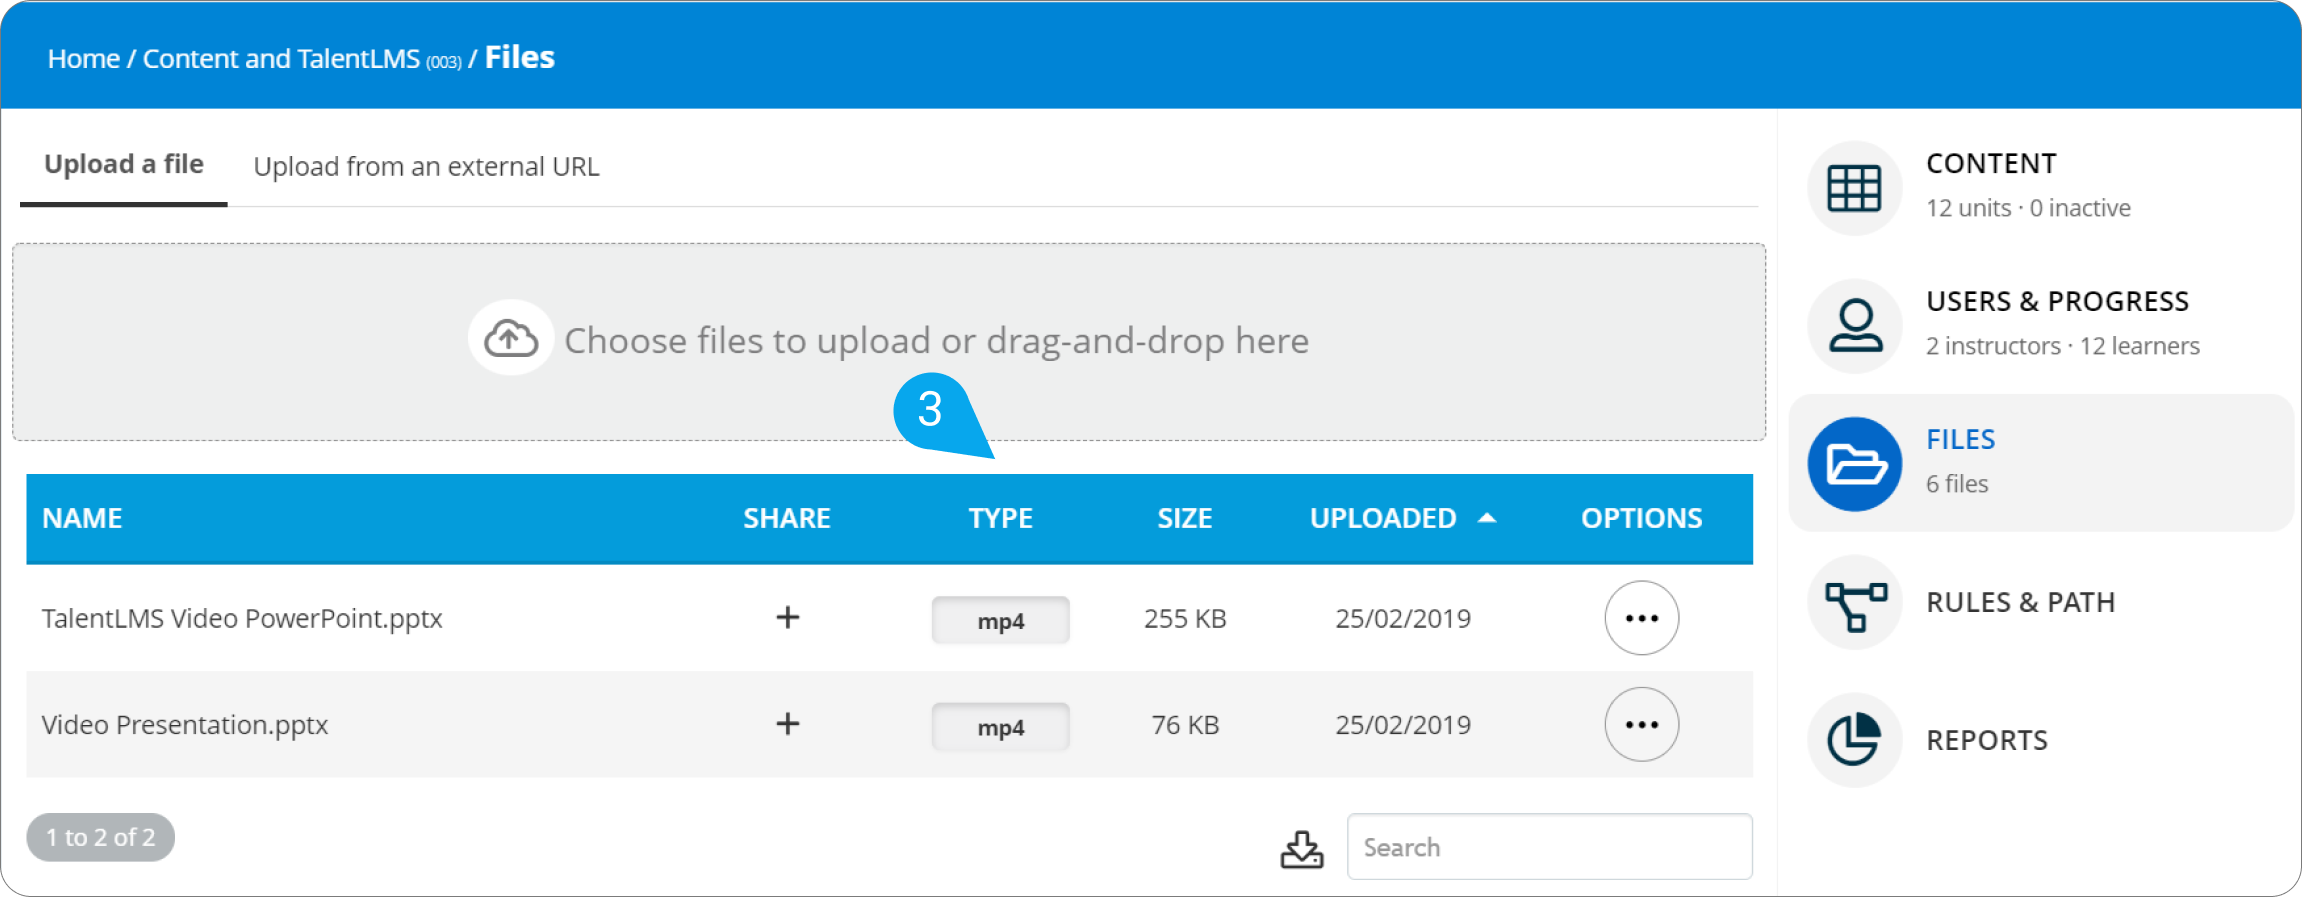
2. On the right-hand panel, click Files (1) to open the file library.
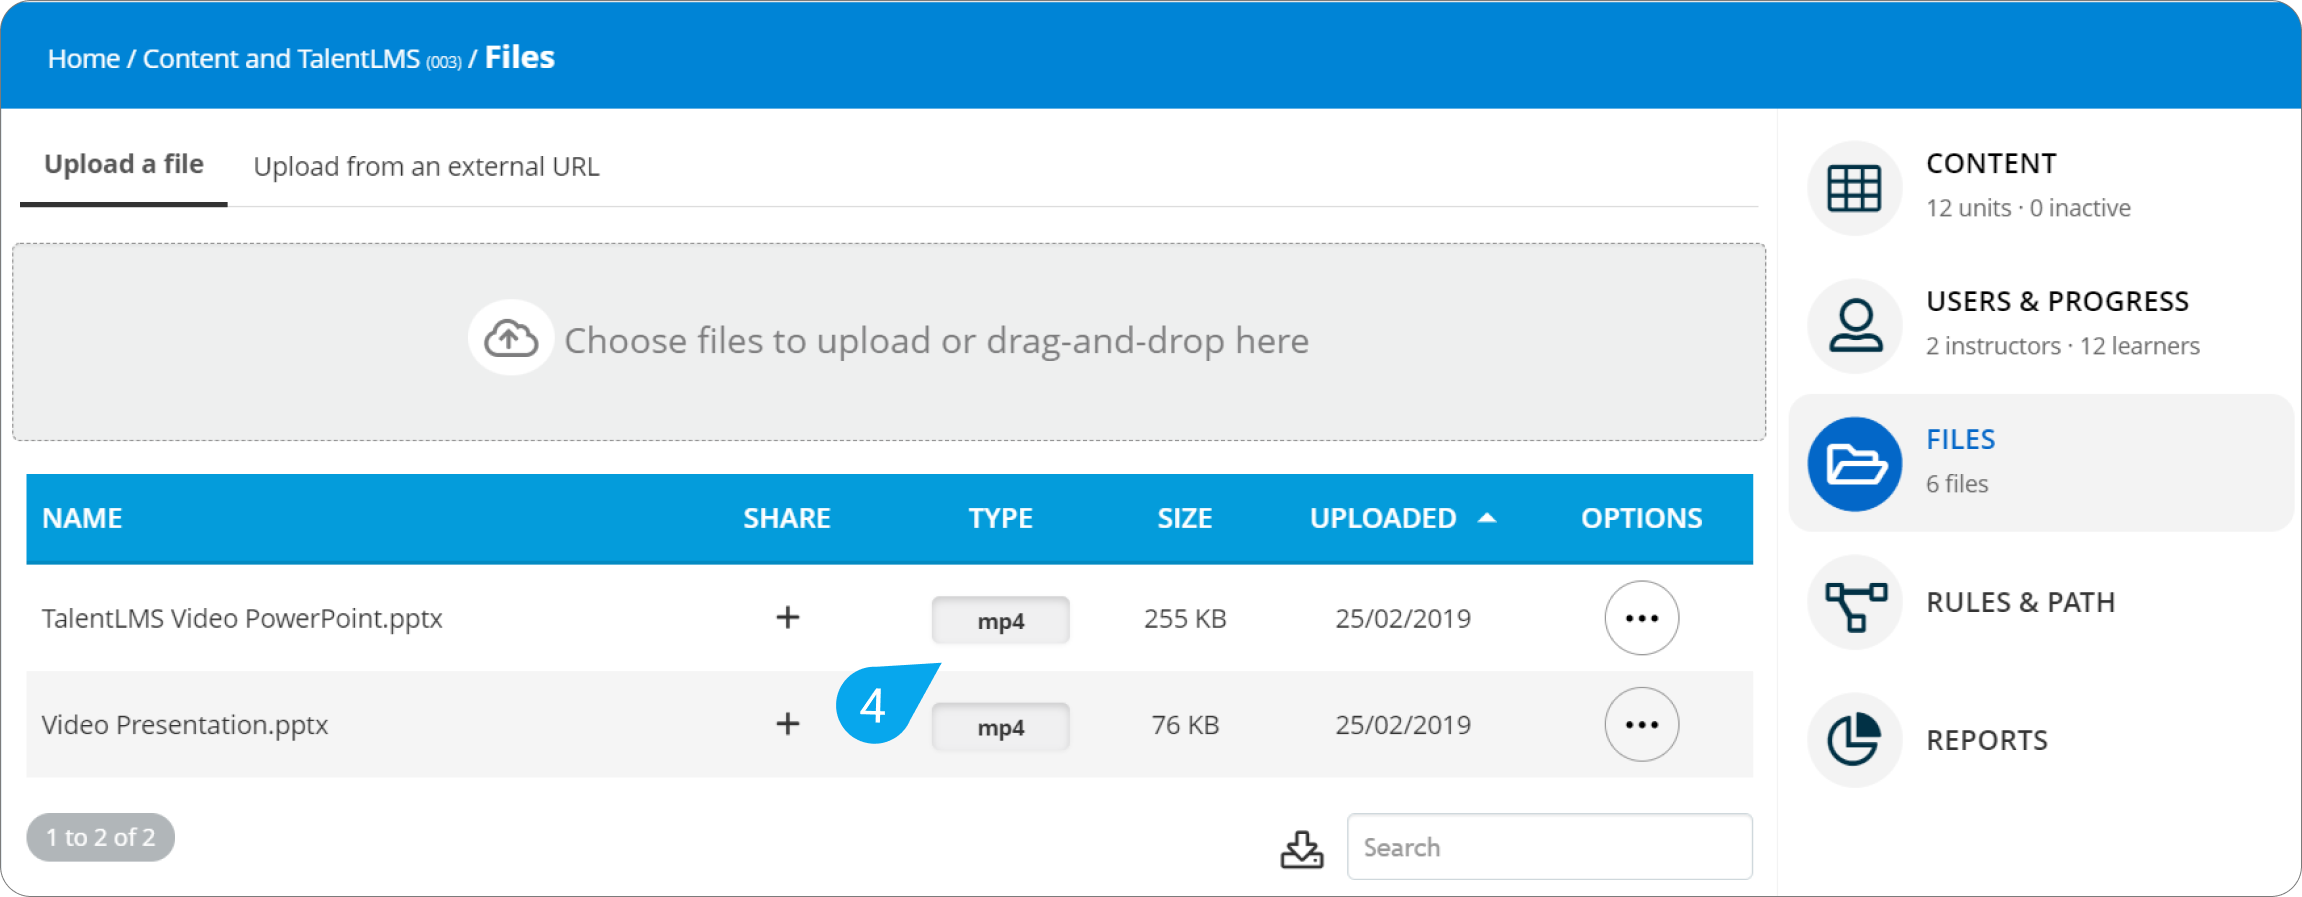
3. To add a tag to your file, click the edit symbol (2).
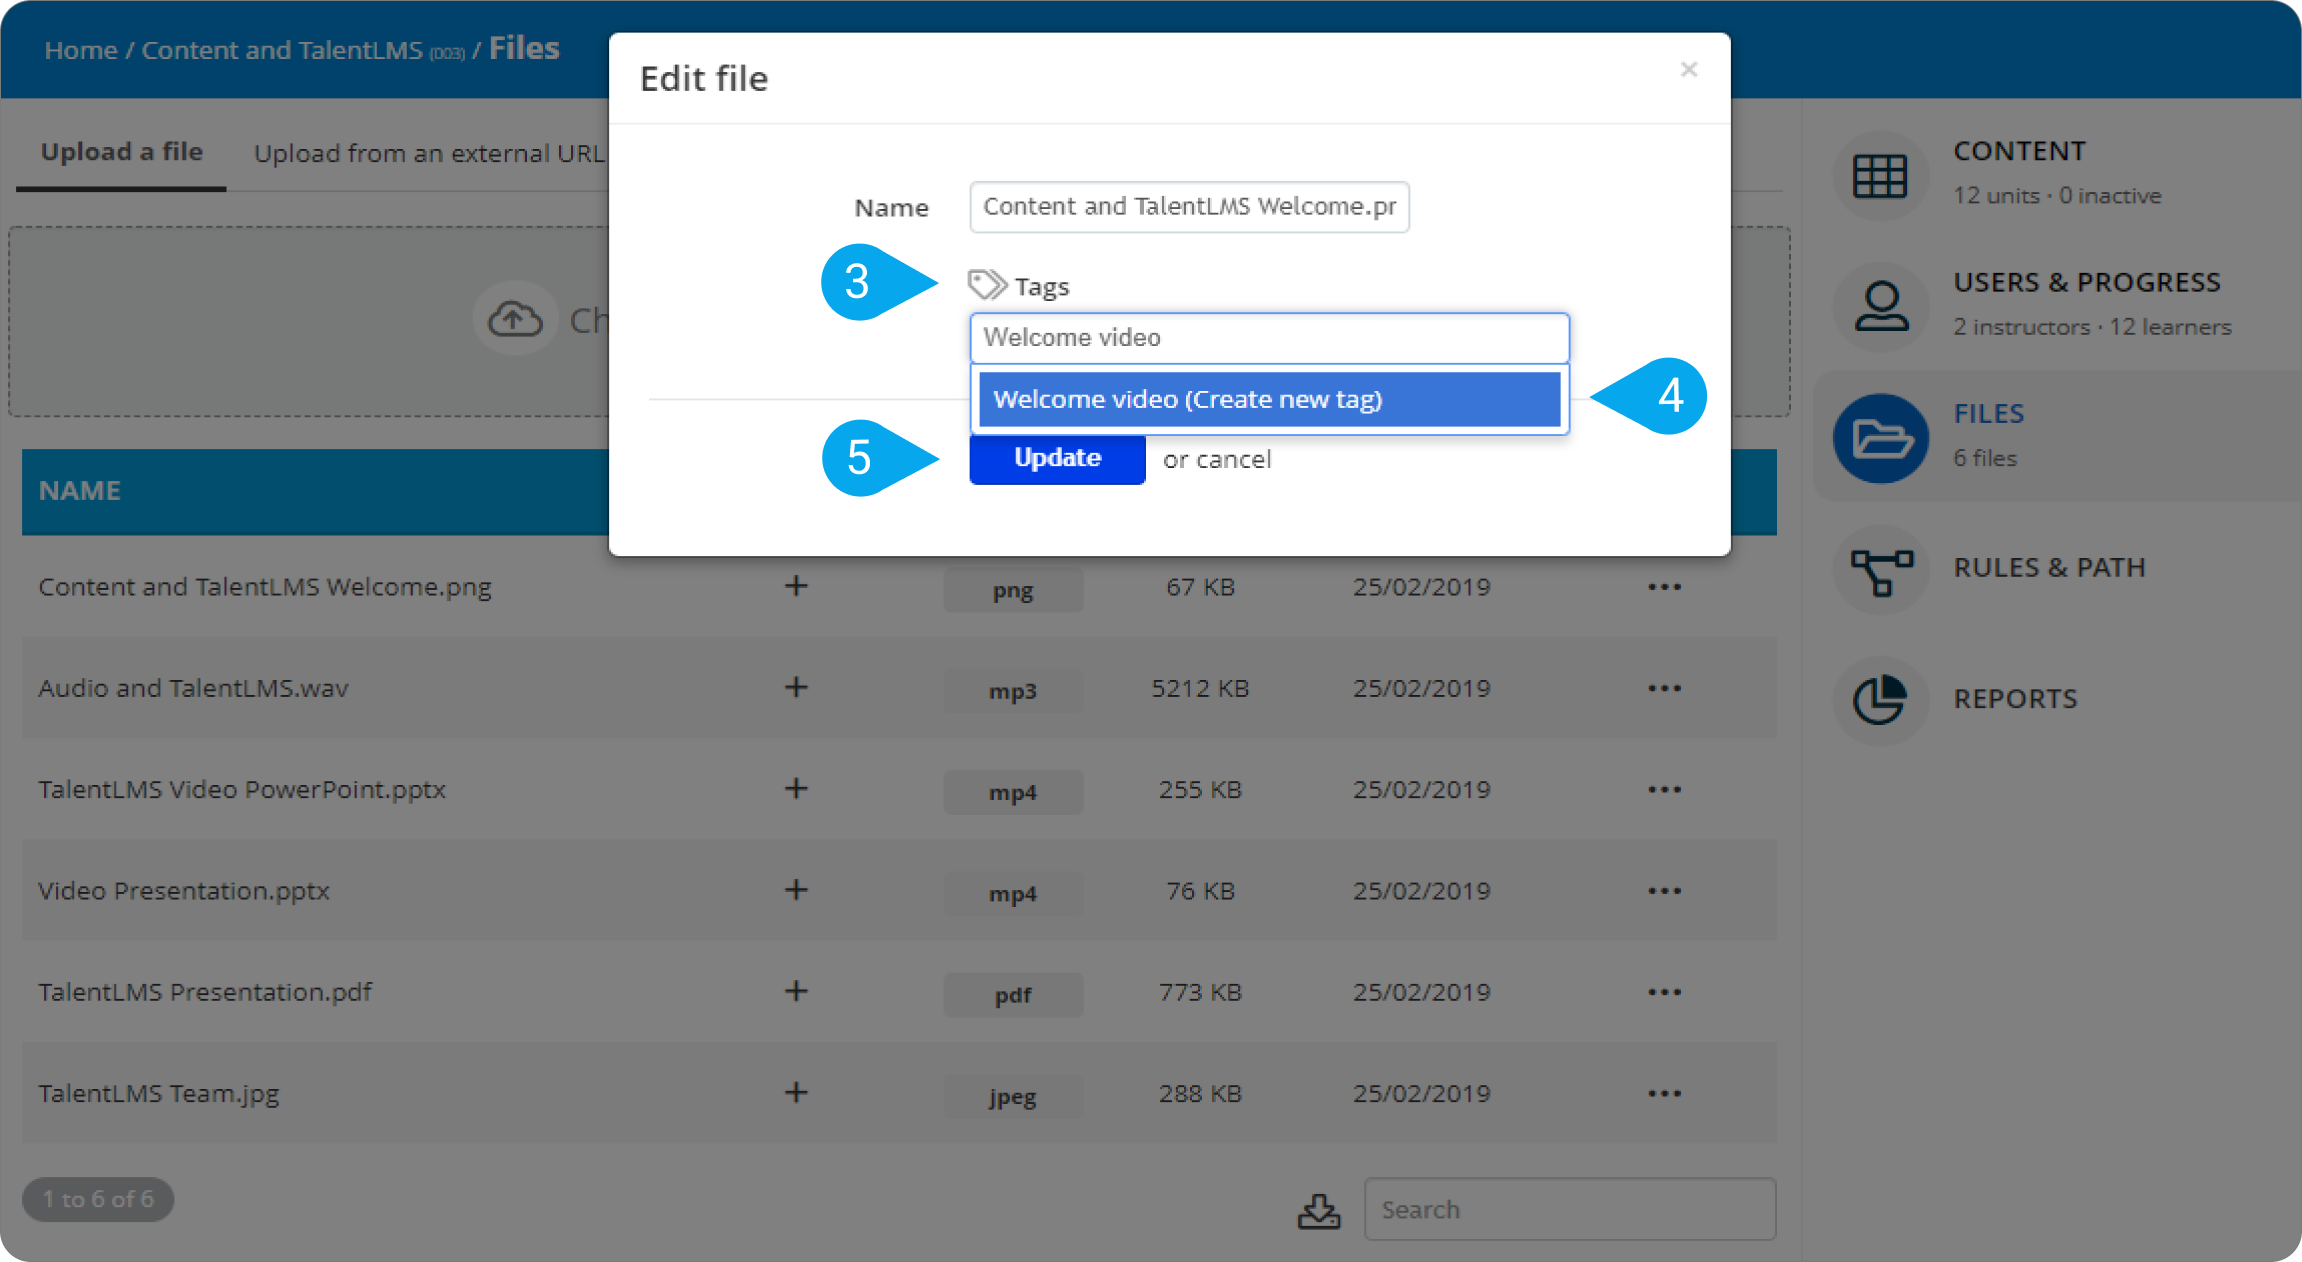
4. Click on Tags (3), type a tag name and click Create new tag (4).
5. Click Update (5) to save your tag.
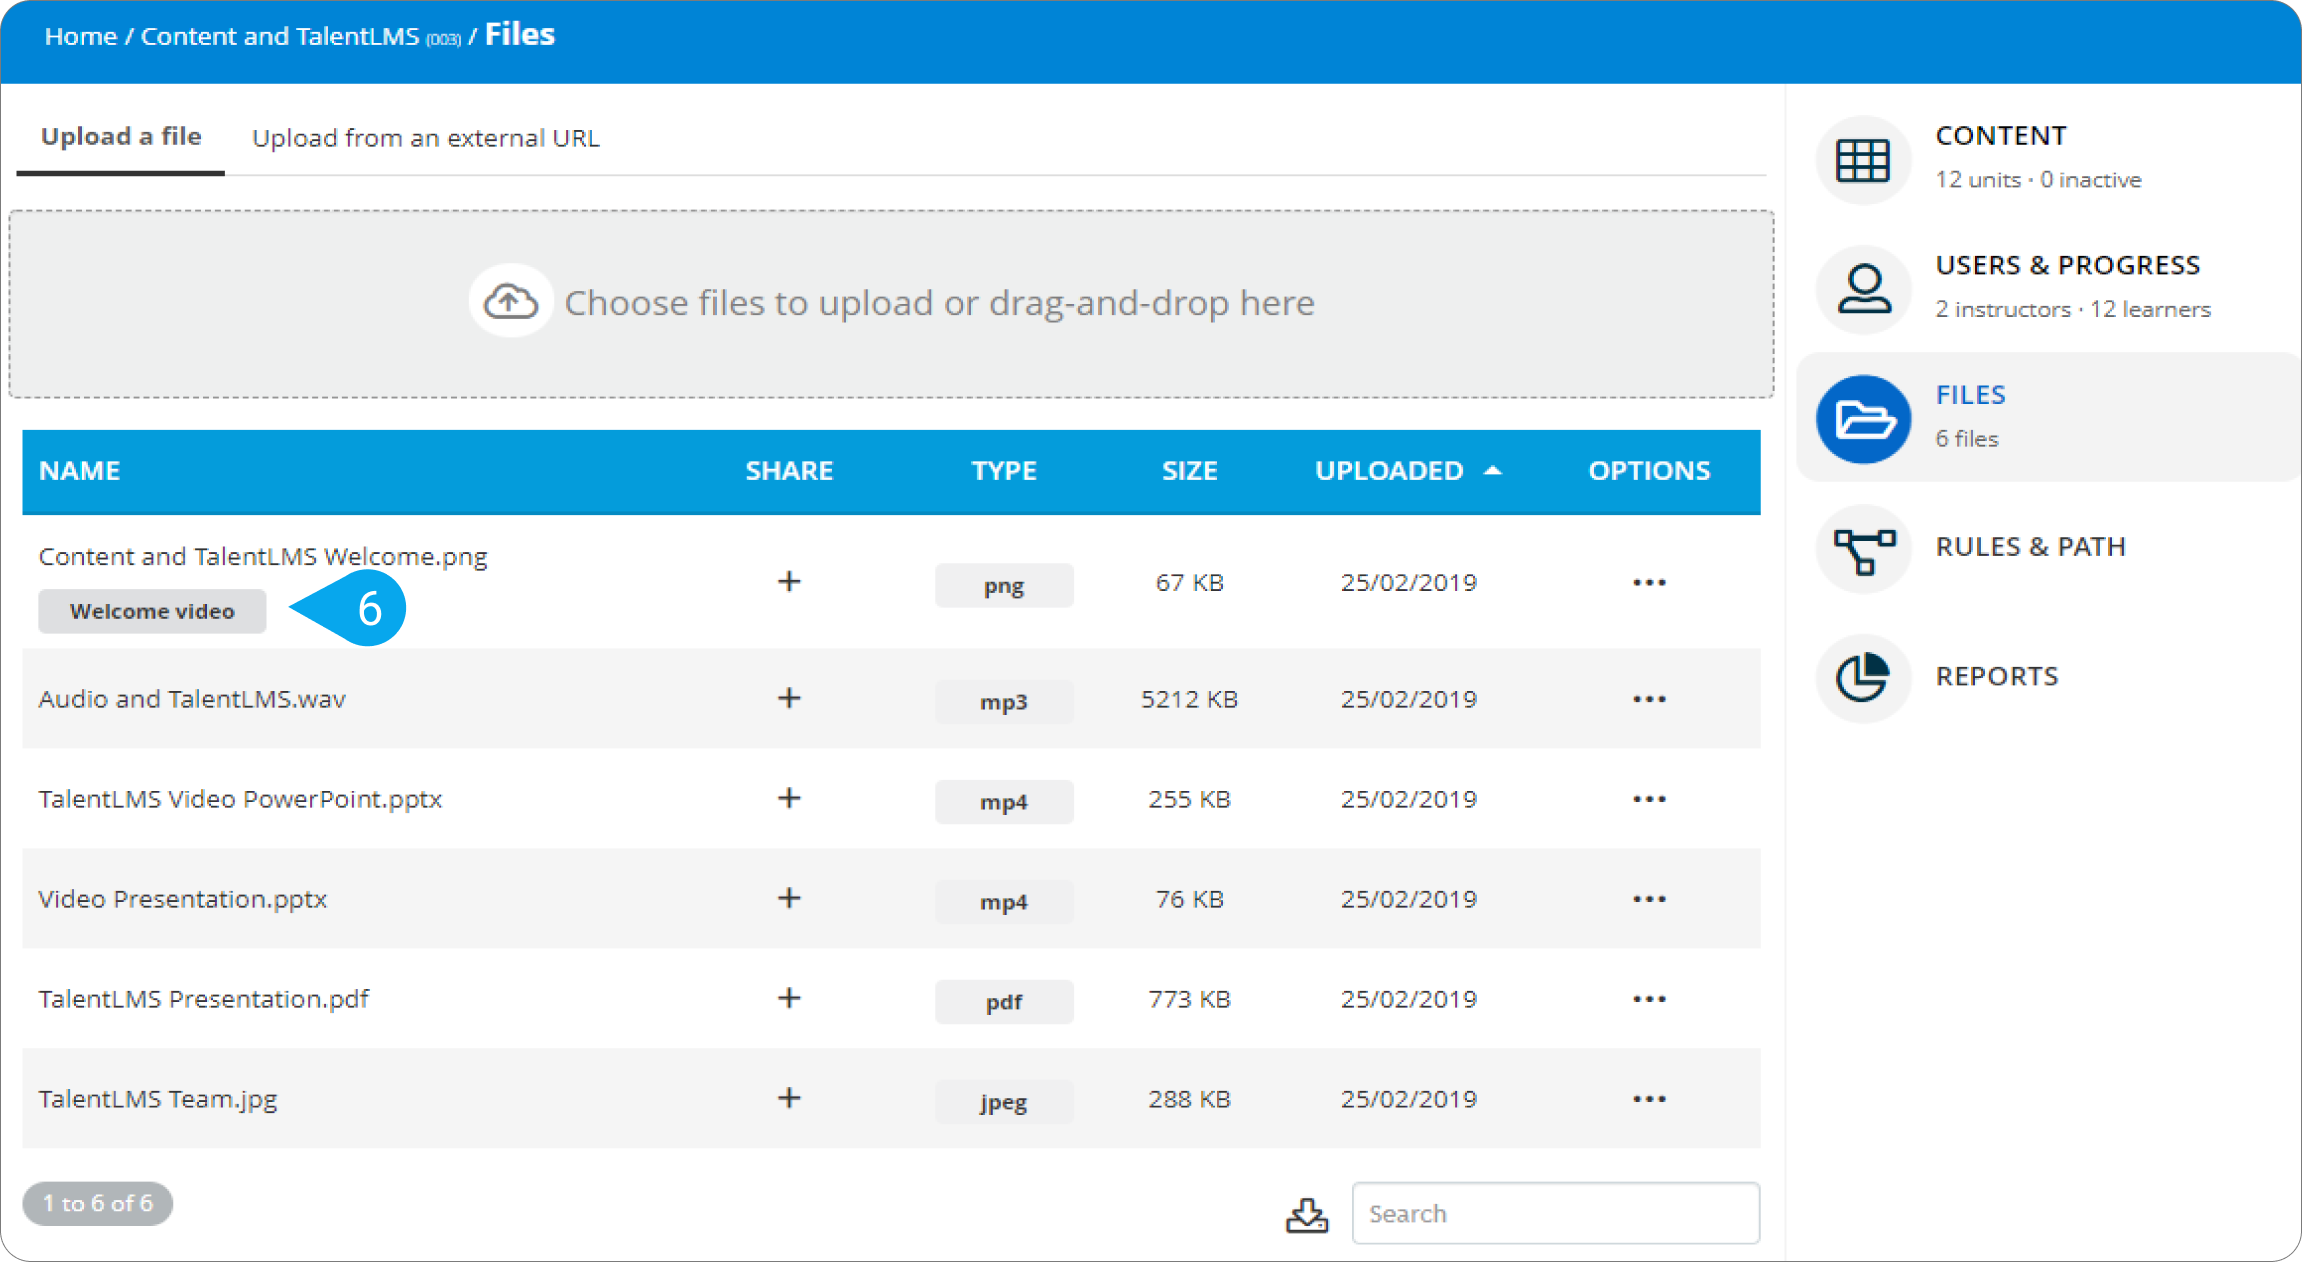
6. The tag will be visible next to the file name (6).
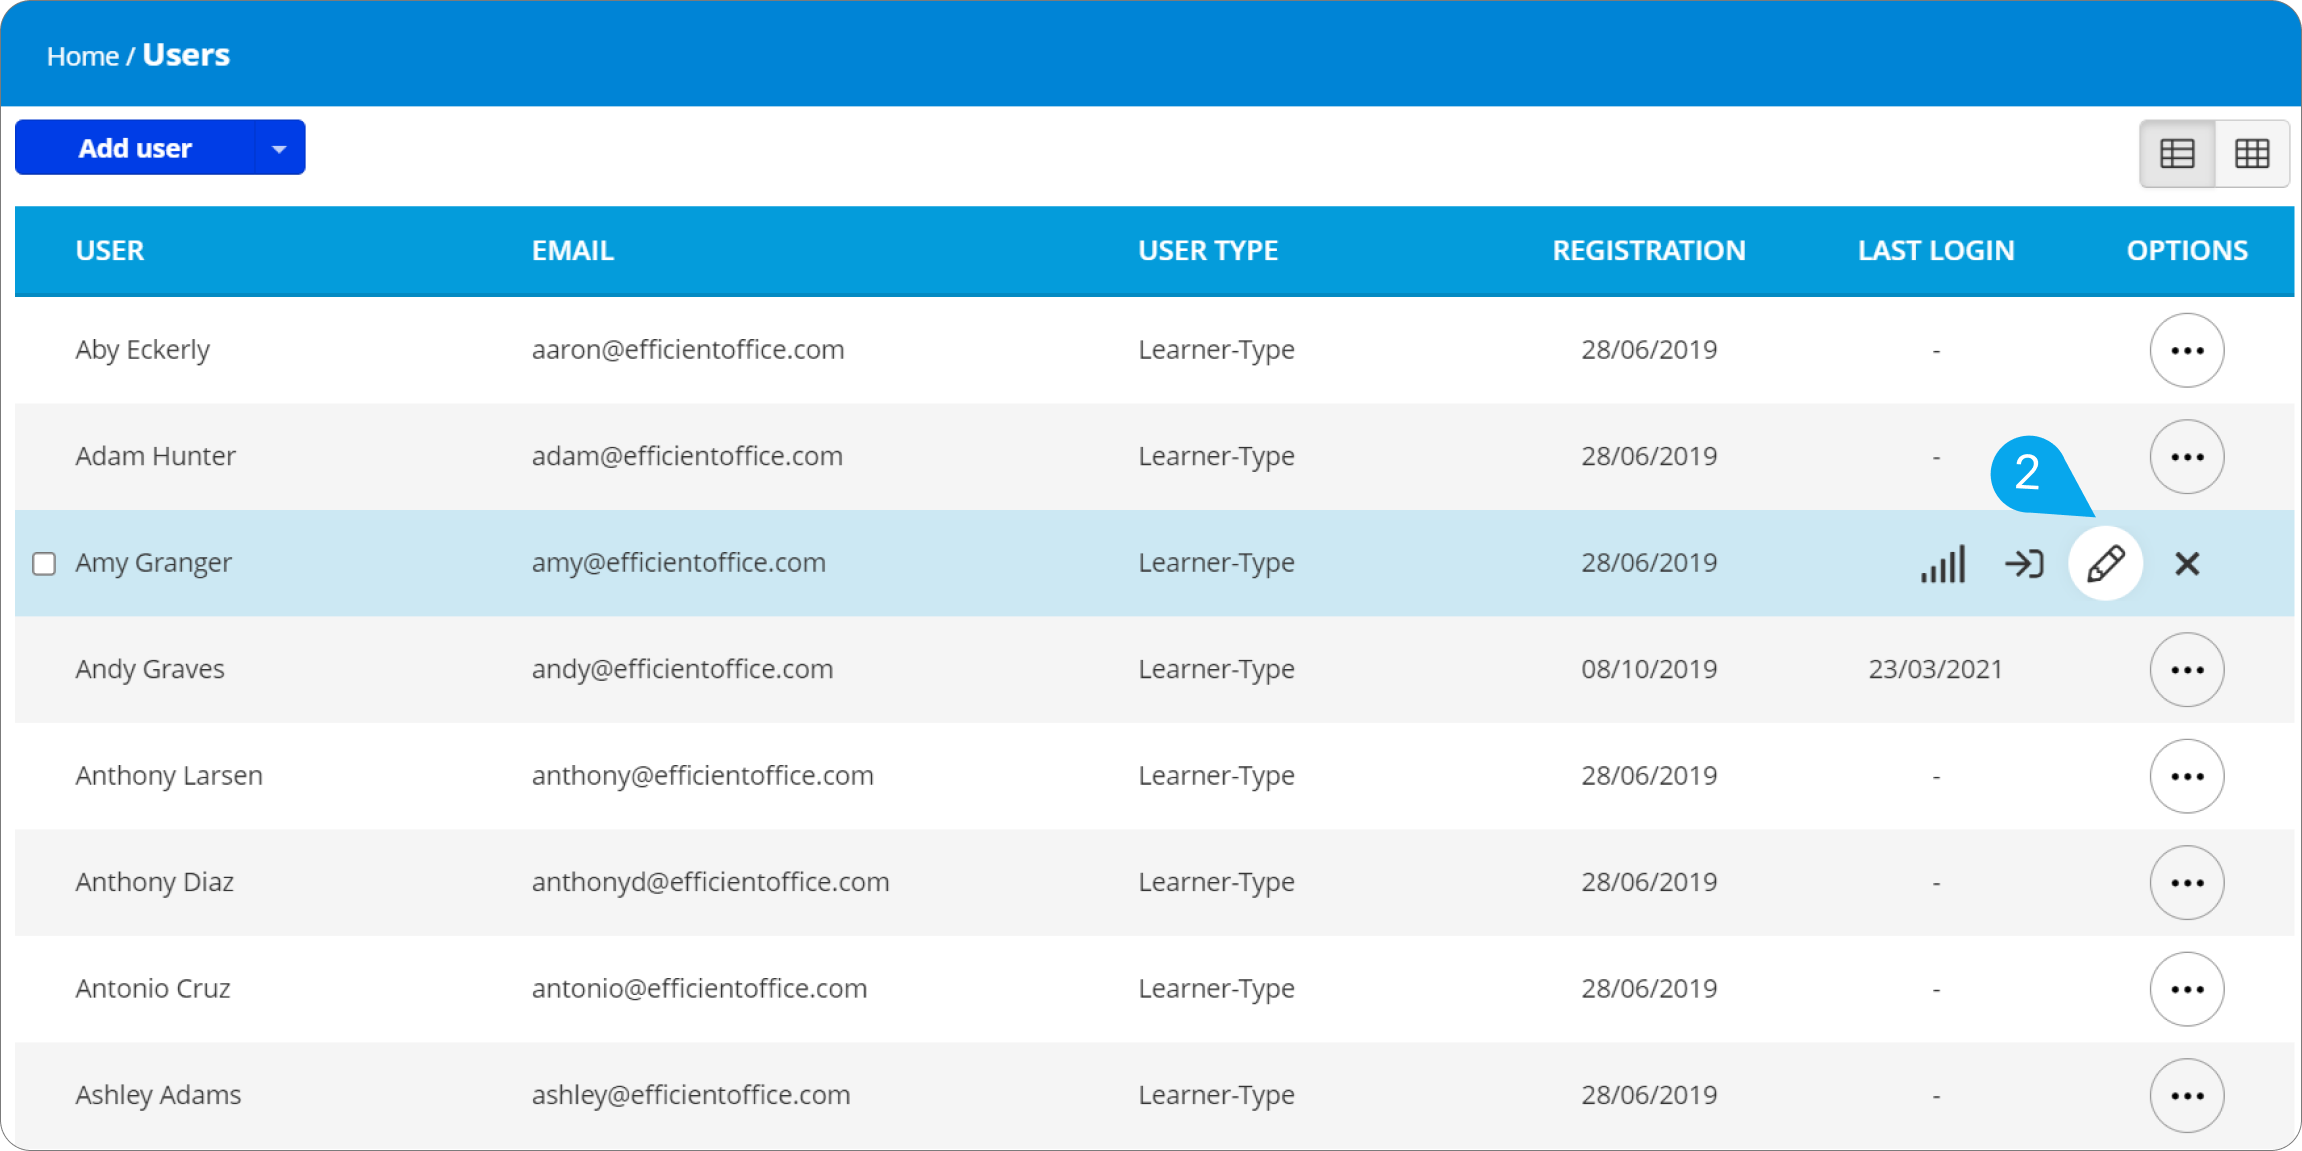
- How to add a tag to a file you shared with a Group:
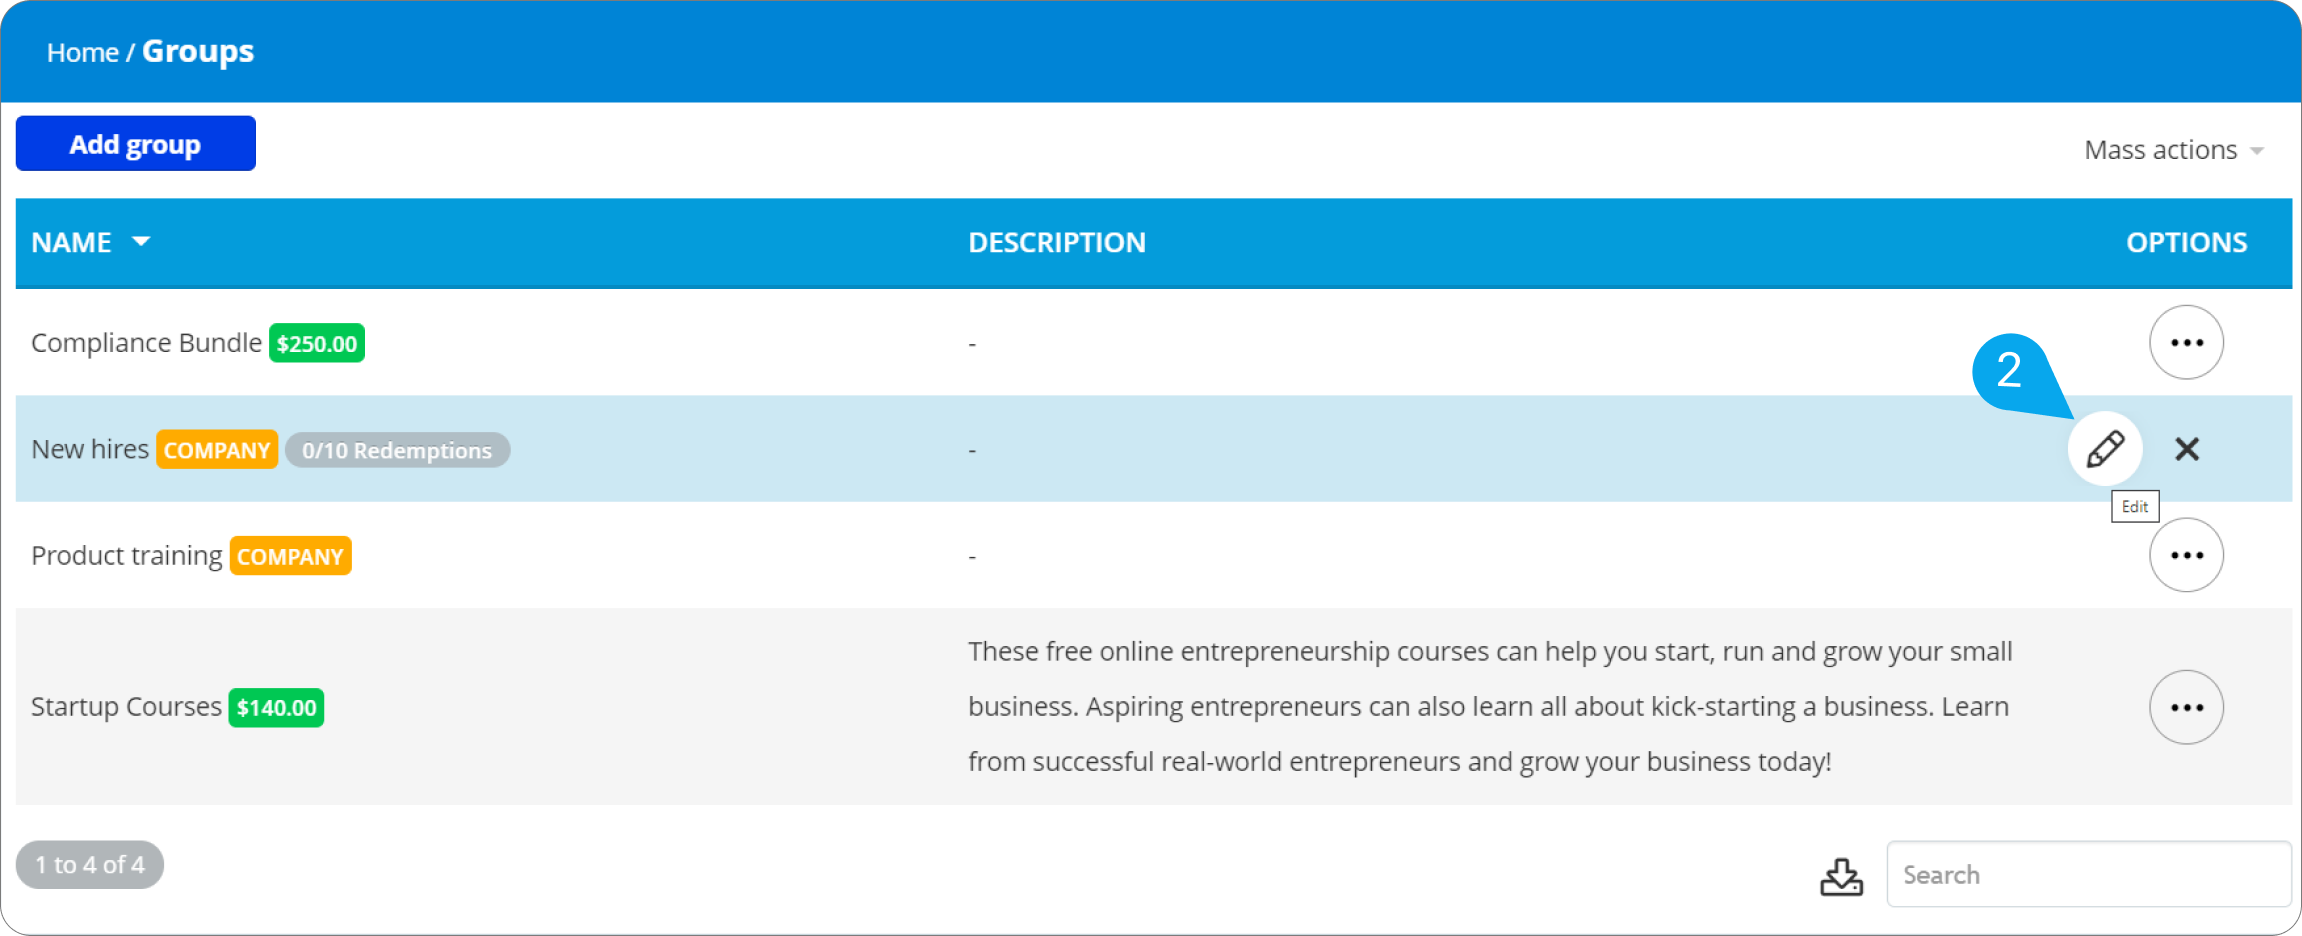
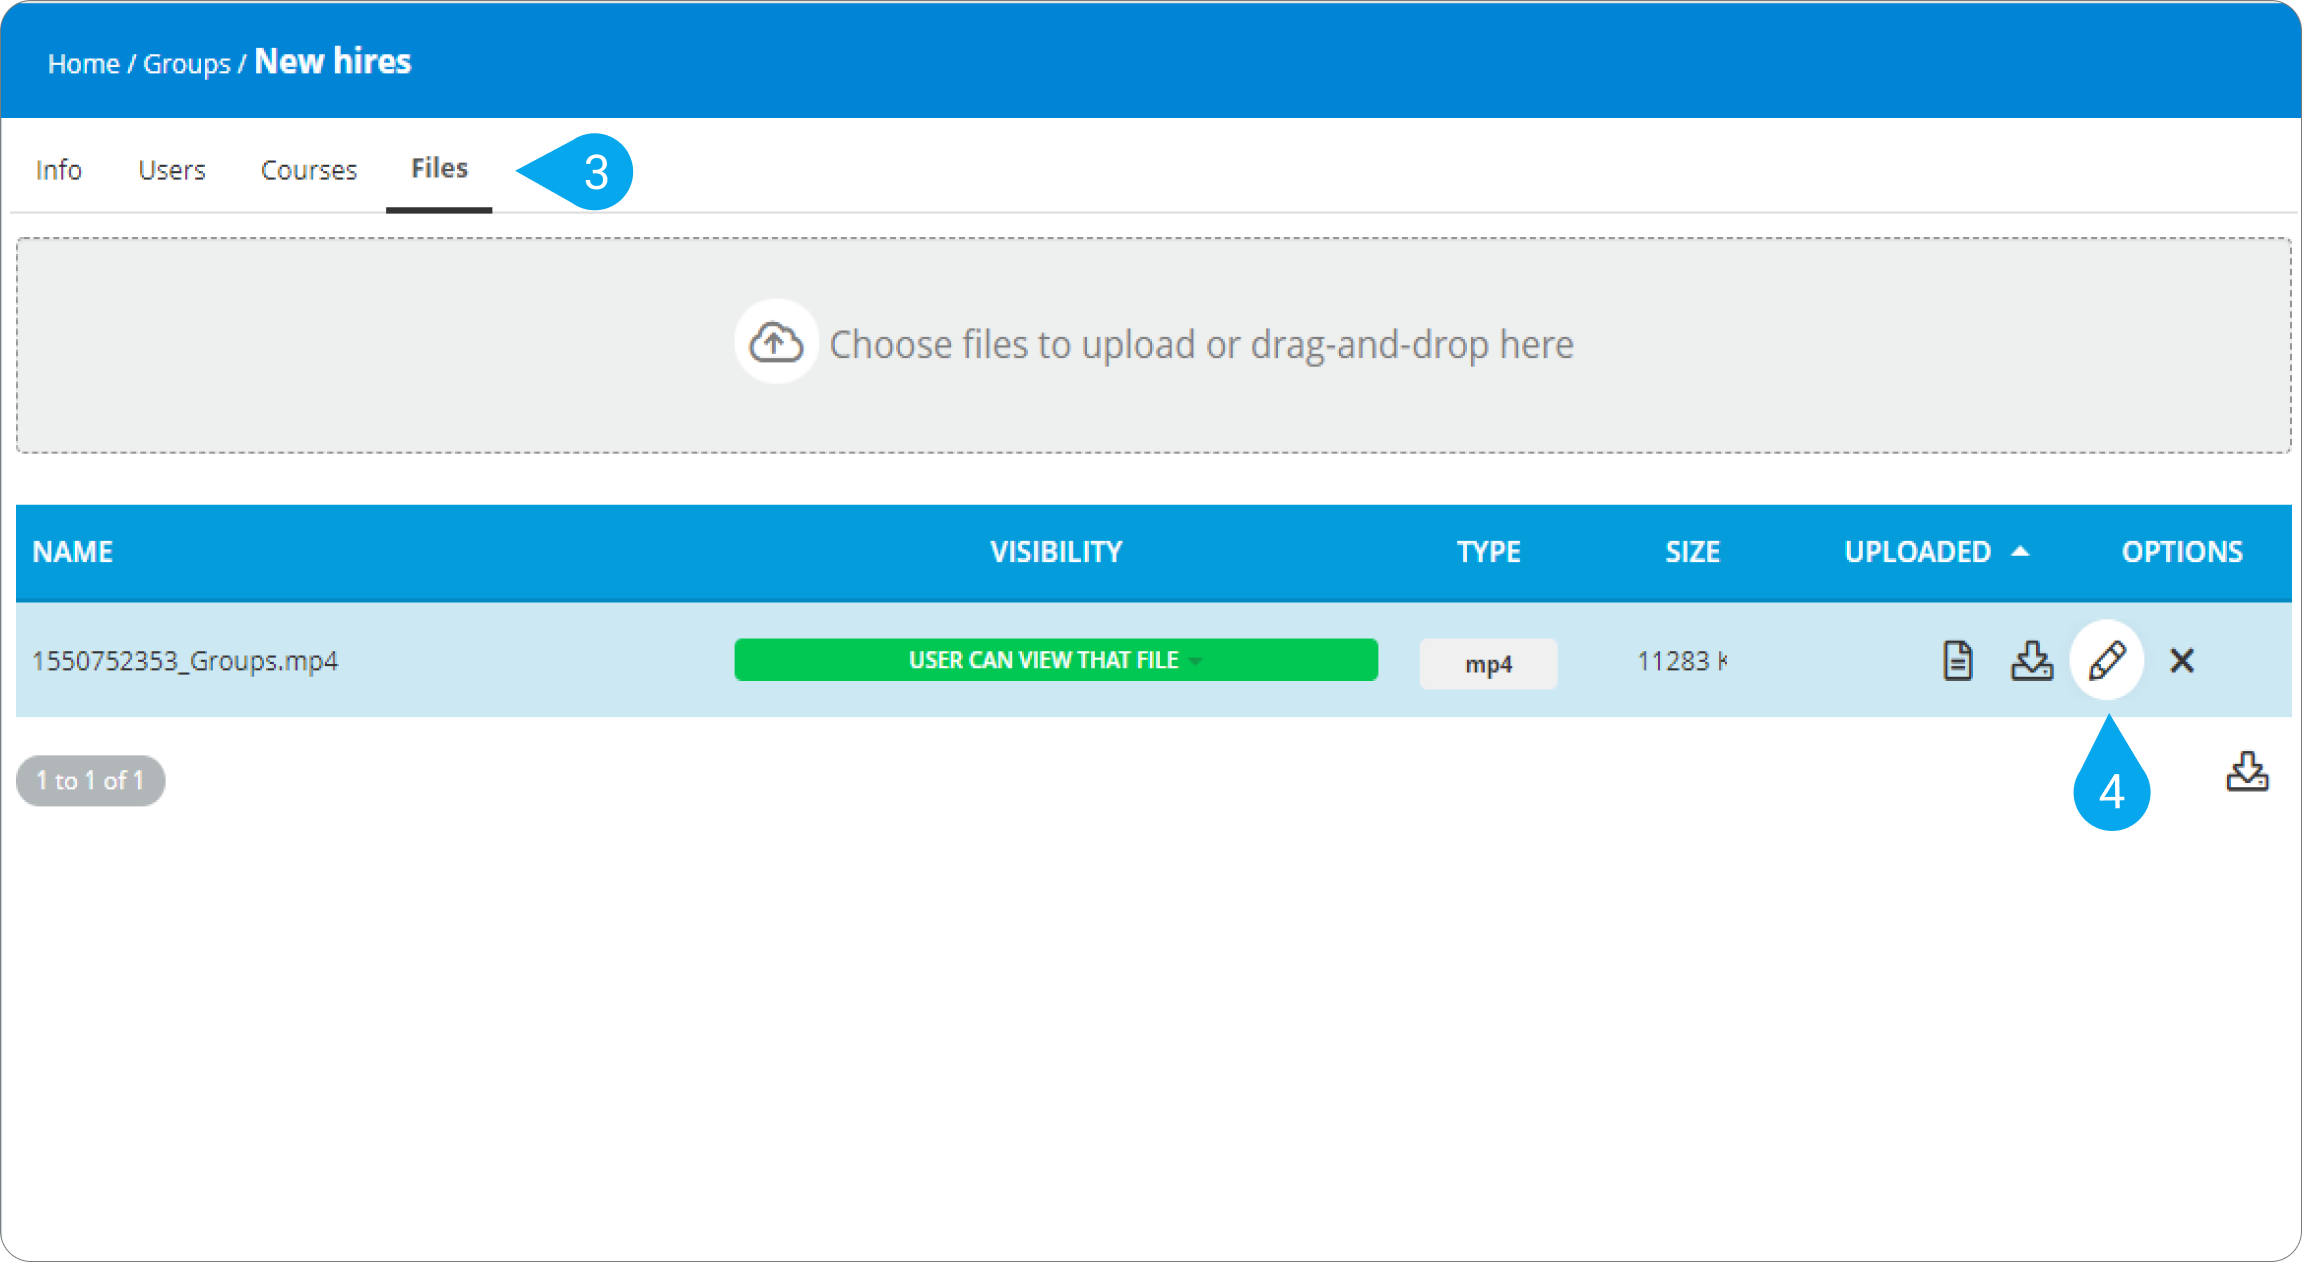
1. Sign in to your pcl.LMS account as Administrator and go to Home > Groups (1).
3. Click on the Files tab (3).
4. Find the file you want to edit, and click the edit symbol (4).
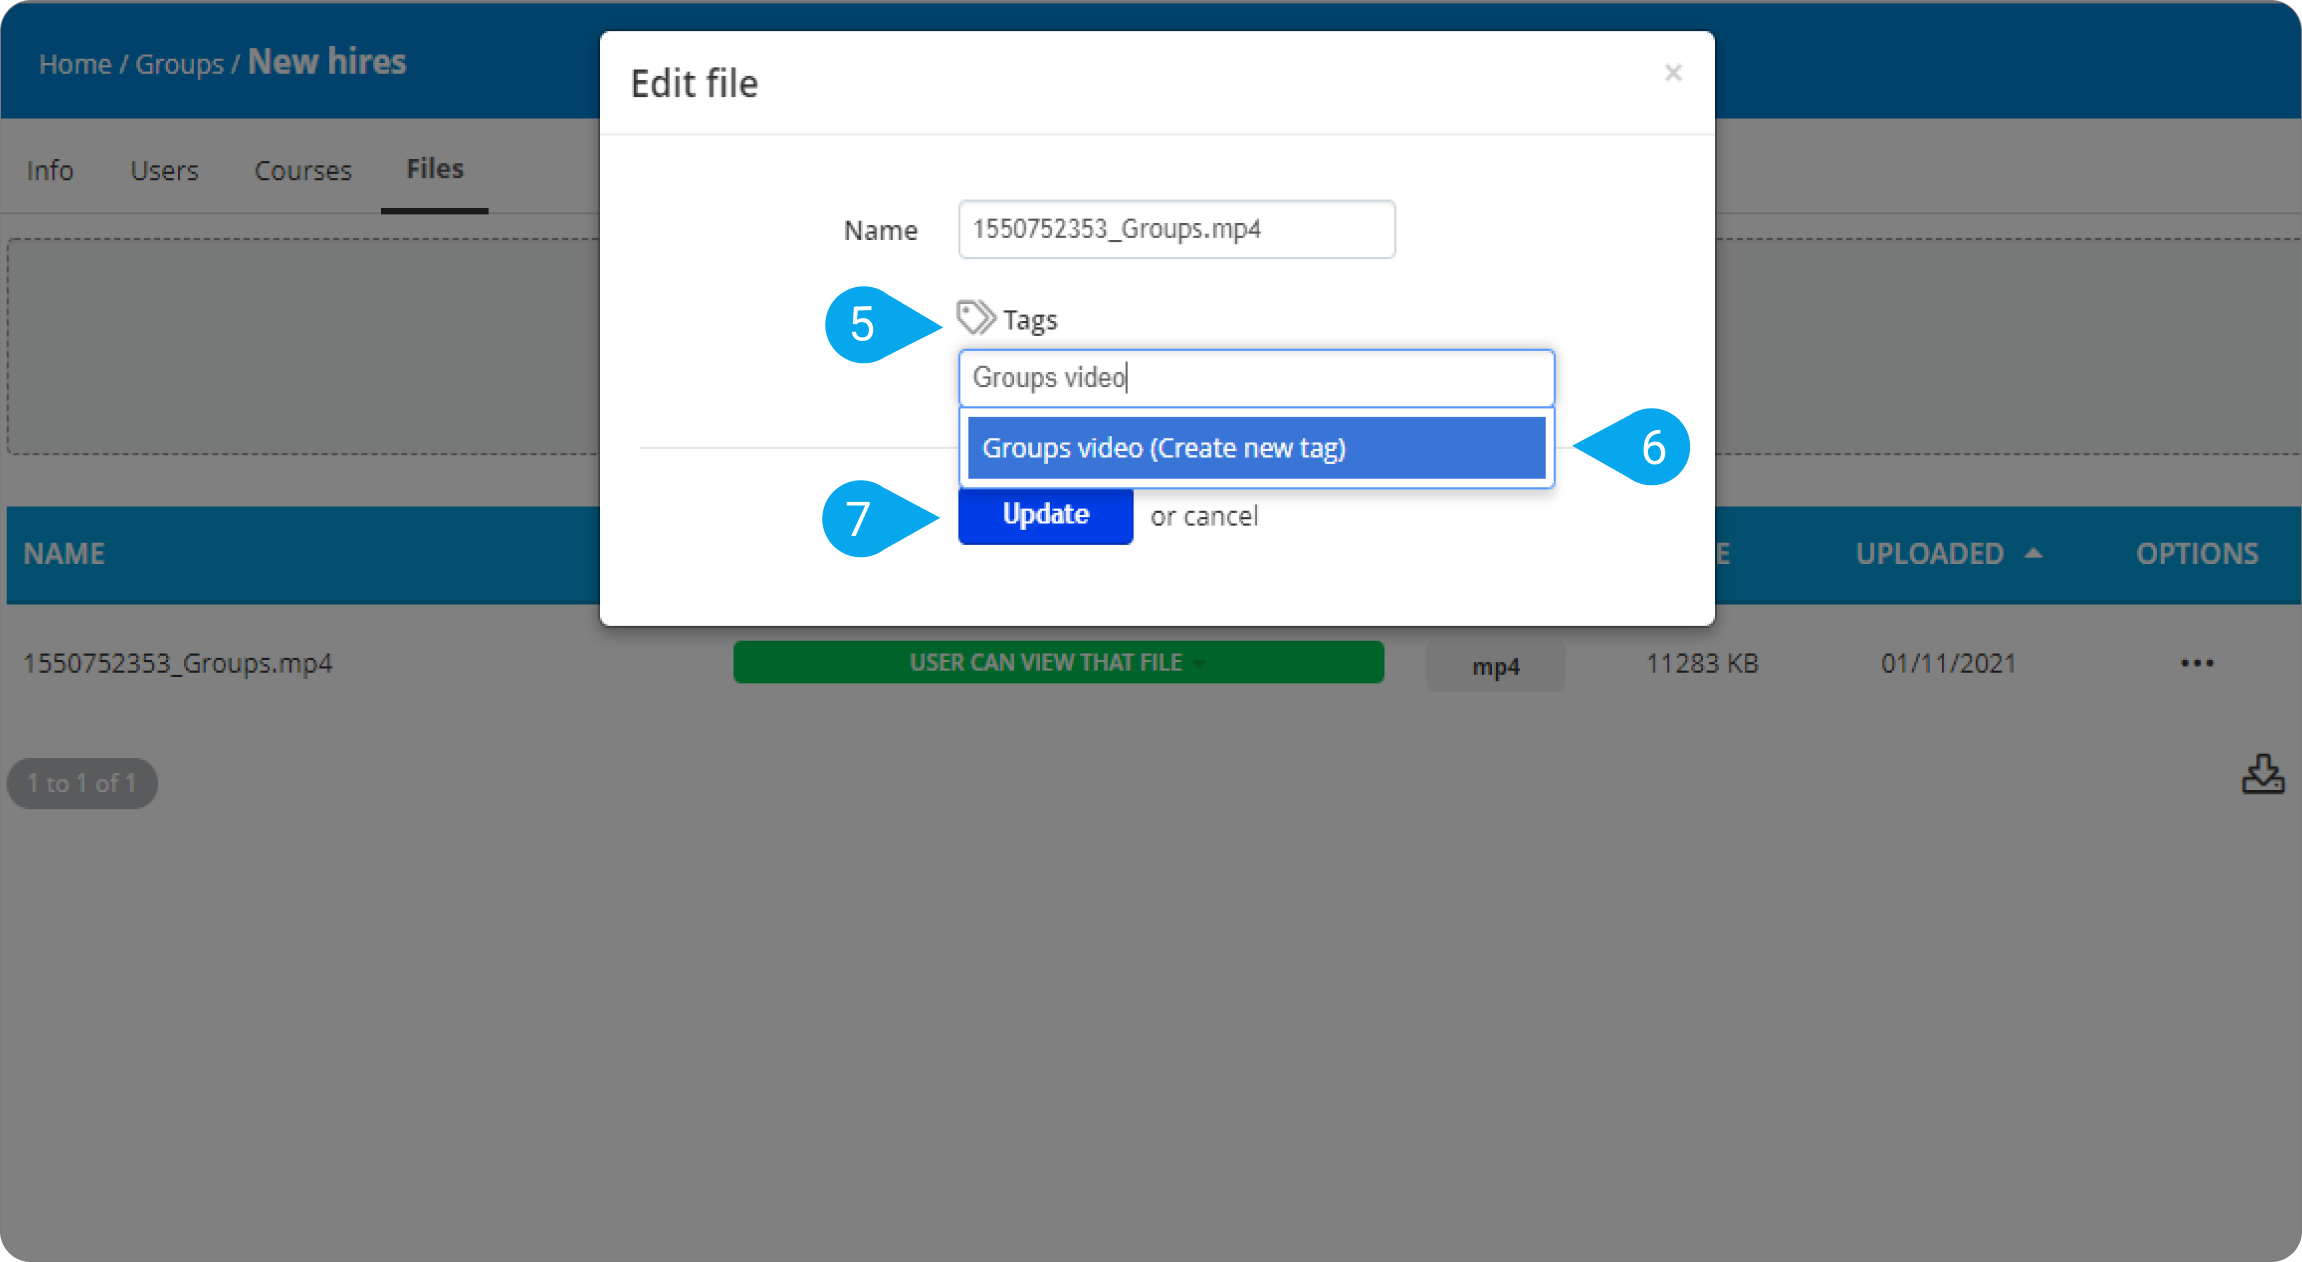
5. Click on Tags (5), type a tag name and click on Create new tag (6).
6. Click Update (7) to save your tag.
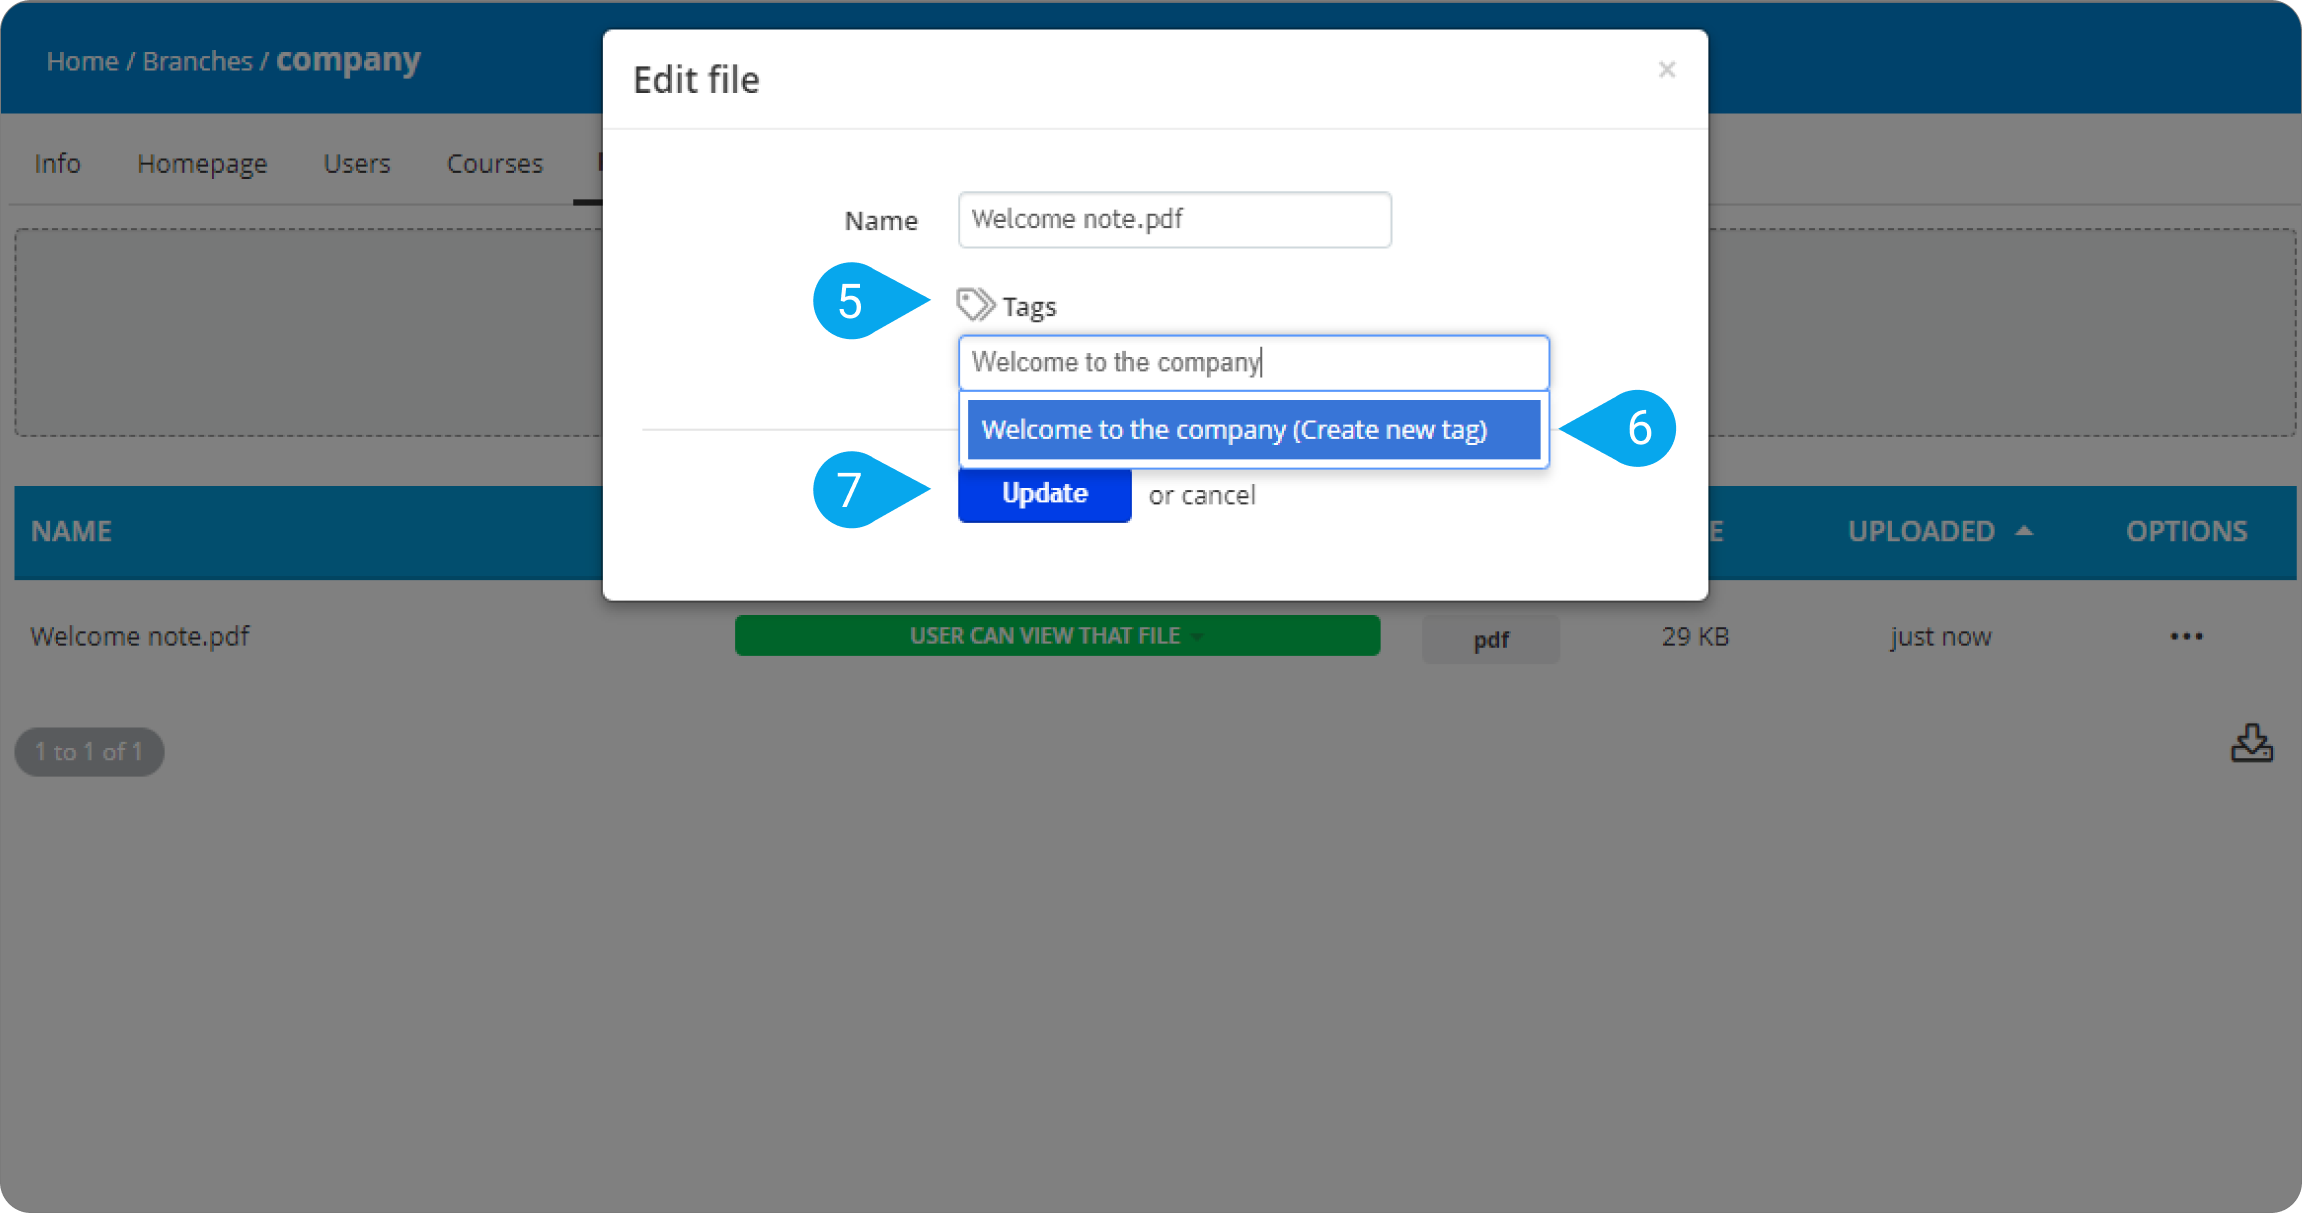
- To add a tag to a file you shared with a Branch:
1. Sign in to your pcl.LMS account as Administrator, go to Home > Branches (1).
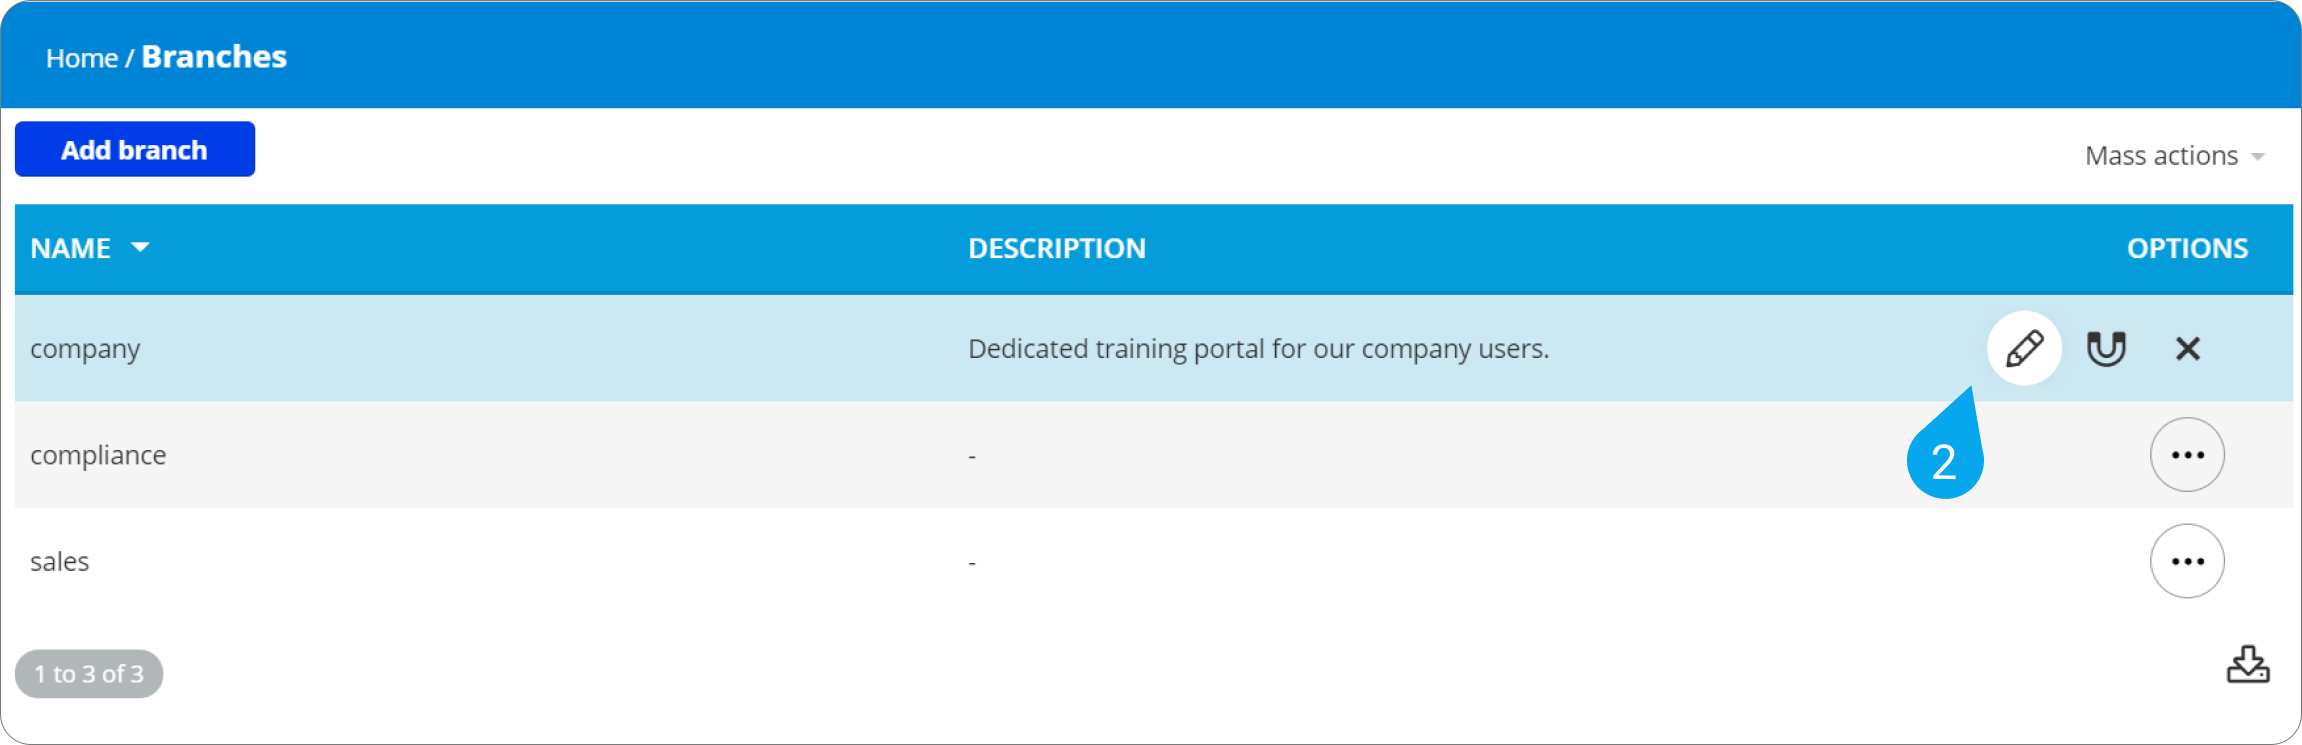
3. Click on the Files tab (3), find the file you want to edit, and click the edit symbol (4).
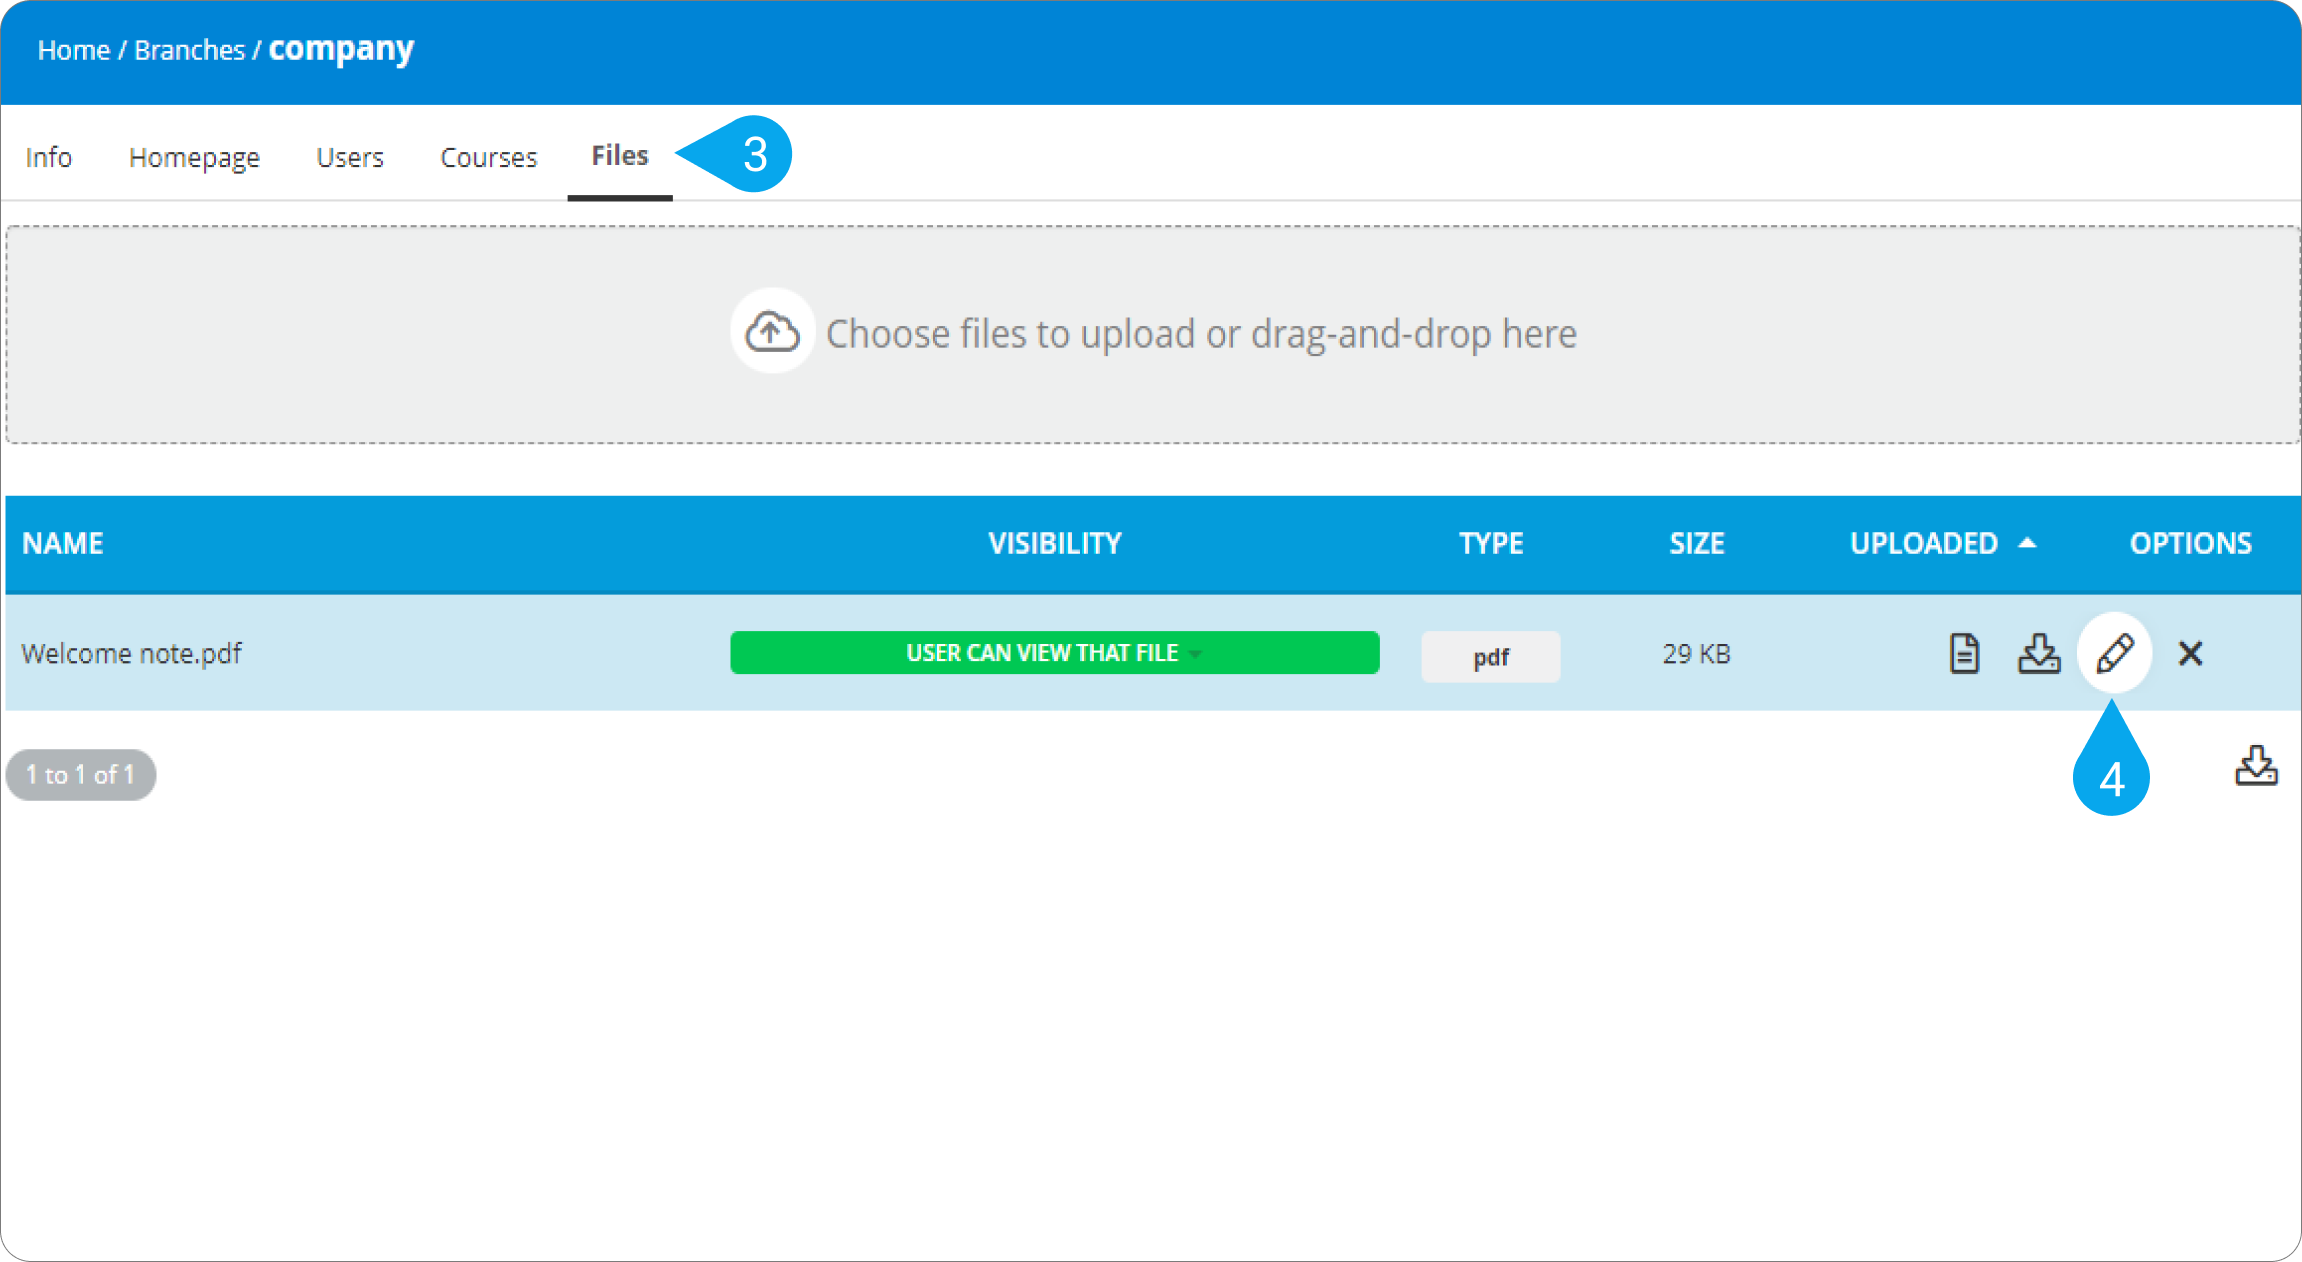
4. Click on Tags (5), type a tag name, and click on Create new tag (6). Click Update (7) to save your tag.
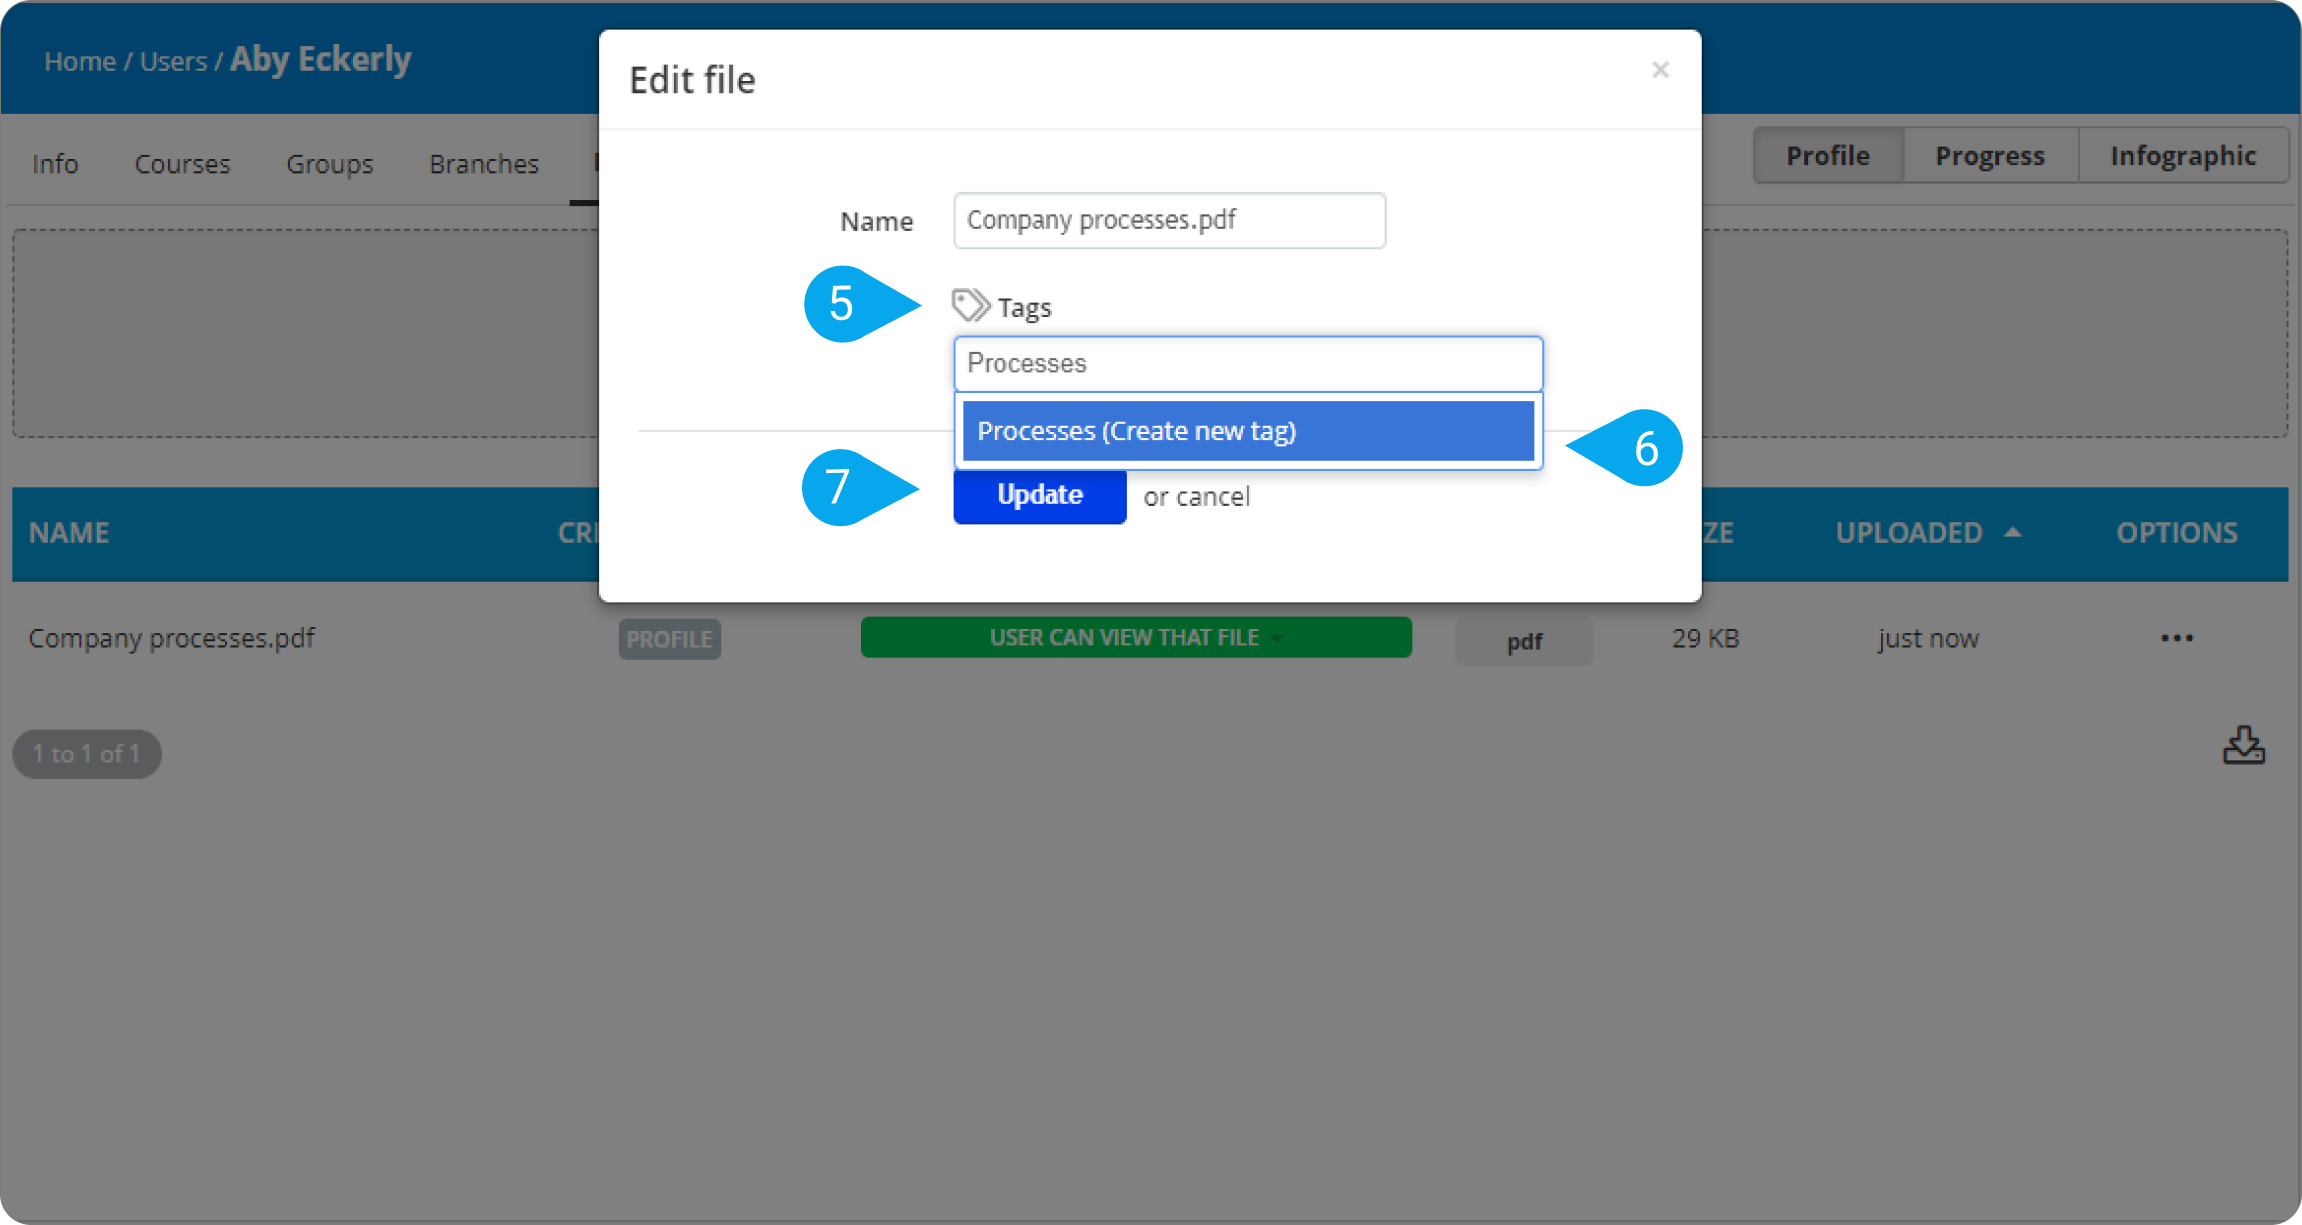
1. Sign in to your pcl.LMS account as Administrator, go to Home > Users (1).
3. Click on the Files tab (3), find the file you want to edit, and click the edit symbol (4).

4. Click on Tags (5), type a tag name, and click on Create new tag (6). Click Update (7) to save your tag.
| Note: Each file can have up to 10 tags. The maximum length for each tag is 50 characters. |
Β. How to use the auto-generated file-type tags
You can filter files according to their file type. Here’s how:
1. Sign in to your pcl.LMS account as an Instructor and go to a course content page.
2. On the right-hand panel, click Files (1) to open the file library.
3. Click on the file type (2) you want.
4. Now, all files with the same file type (3) are shown.
5. To remove the filter, click on the file type (4) once again.
6. Now, all file types (5) are visible again.

| Note: Learners can filter the shared course files using the File type tag only. Files shared with them via Groups, Branches or their own profile can also be filtered using the custom Tags. |